Configure Email as a Destination in OWOX Data Marts to allow business users to receive messages based on the results of each Data Mart run.
For example, you may want to notify a stakeholder every time a scheduled run produces updated data (such as new results from the Facebook Ads connector). You can also choose to receive an email only when the run result is empty.
☝️ Make sure that the
insights@e.owox.comaddress is not in your block list, and that emails do not end up in your spam folder.
Configuration Steps
Section titled “Configuration Steps”Follow the steps below to configure your Email destination.
Step 1. Create a Destination
Section titled “Step 1. Create a Destination”1.1. Open the Destinations page
Section titled “1.1. Open the Destinations page”In the OWOX Data Marts web application, open Destinations in the main menu and click + New Destination.
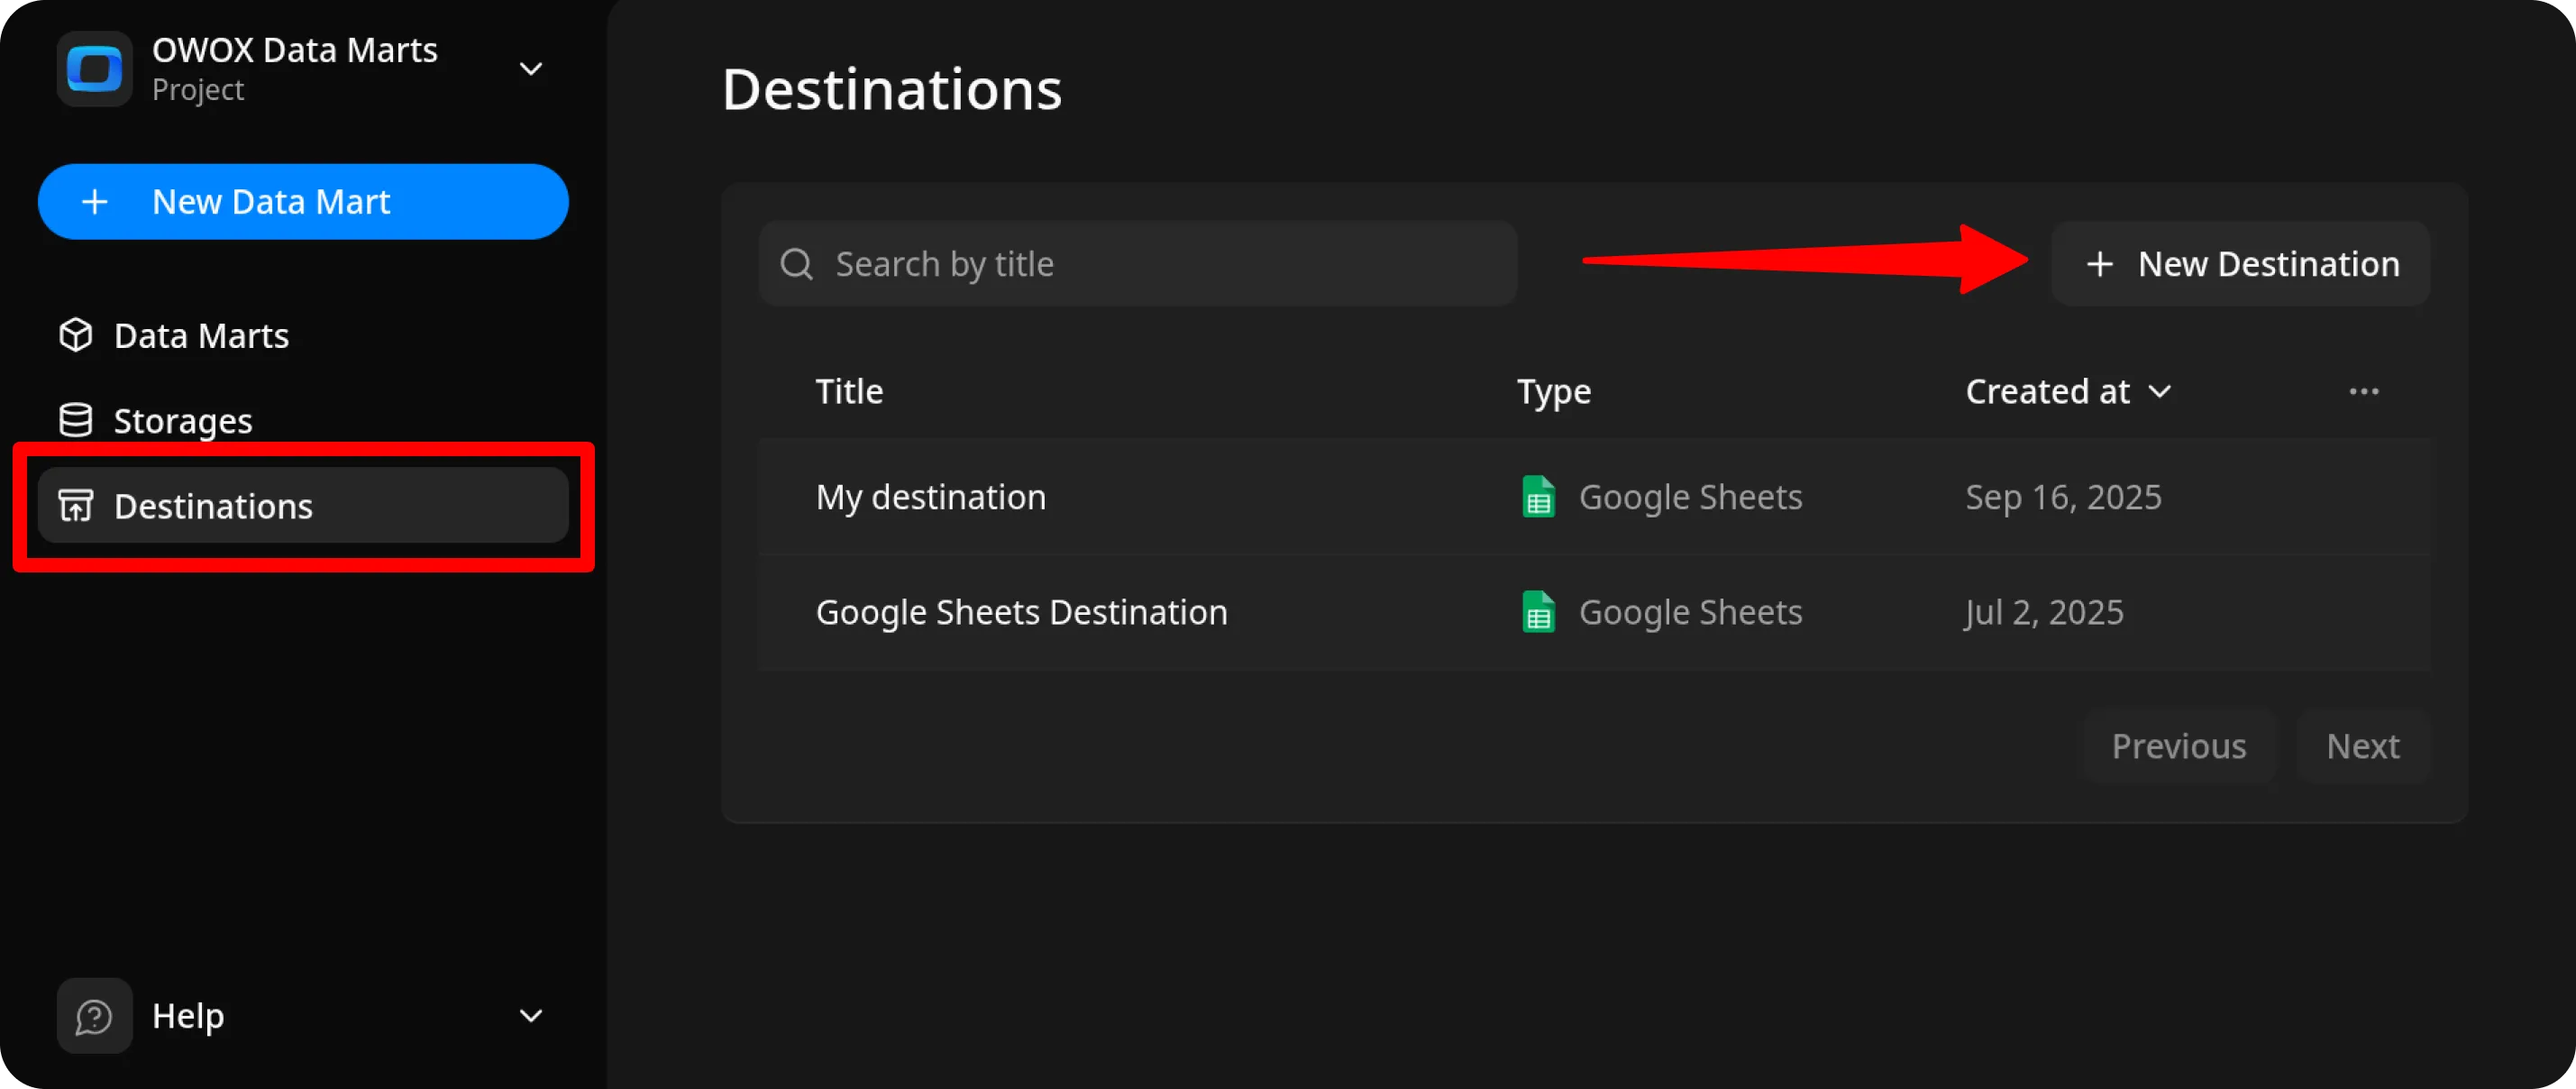
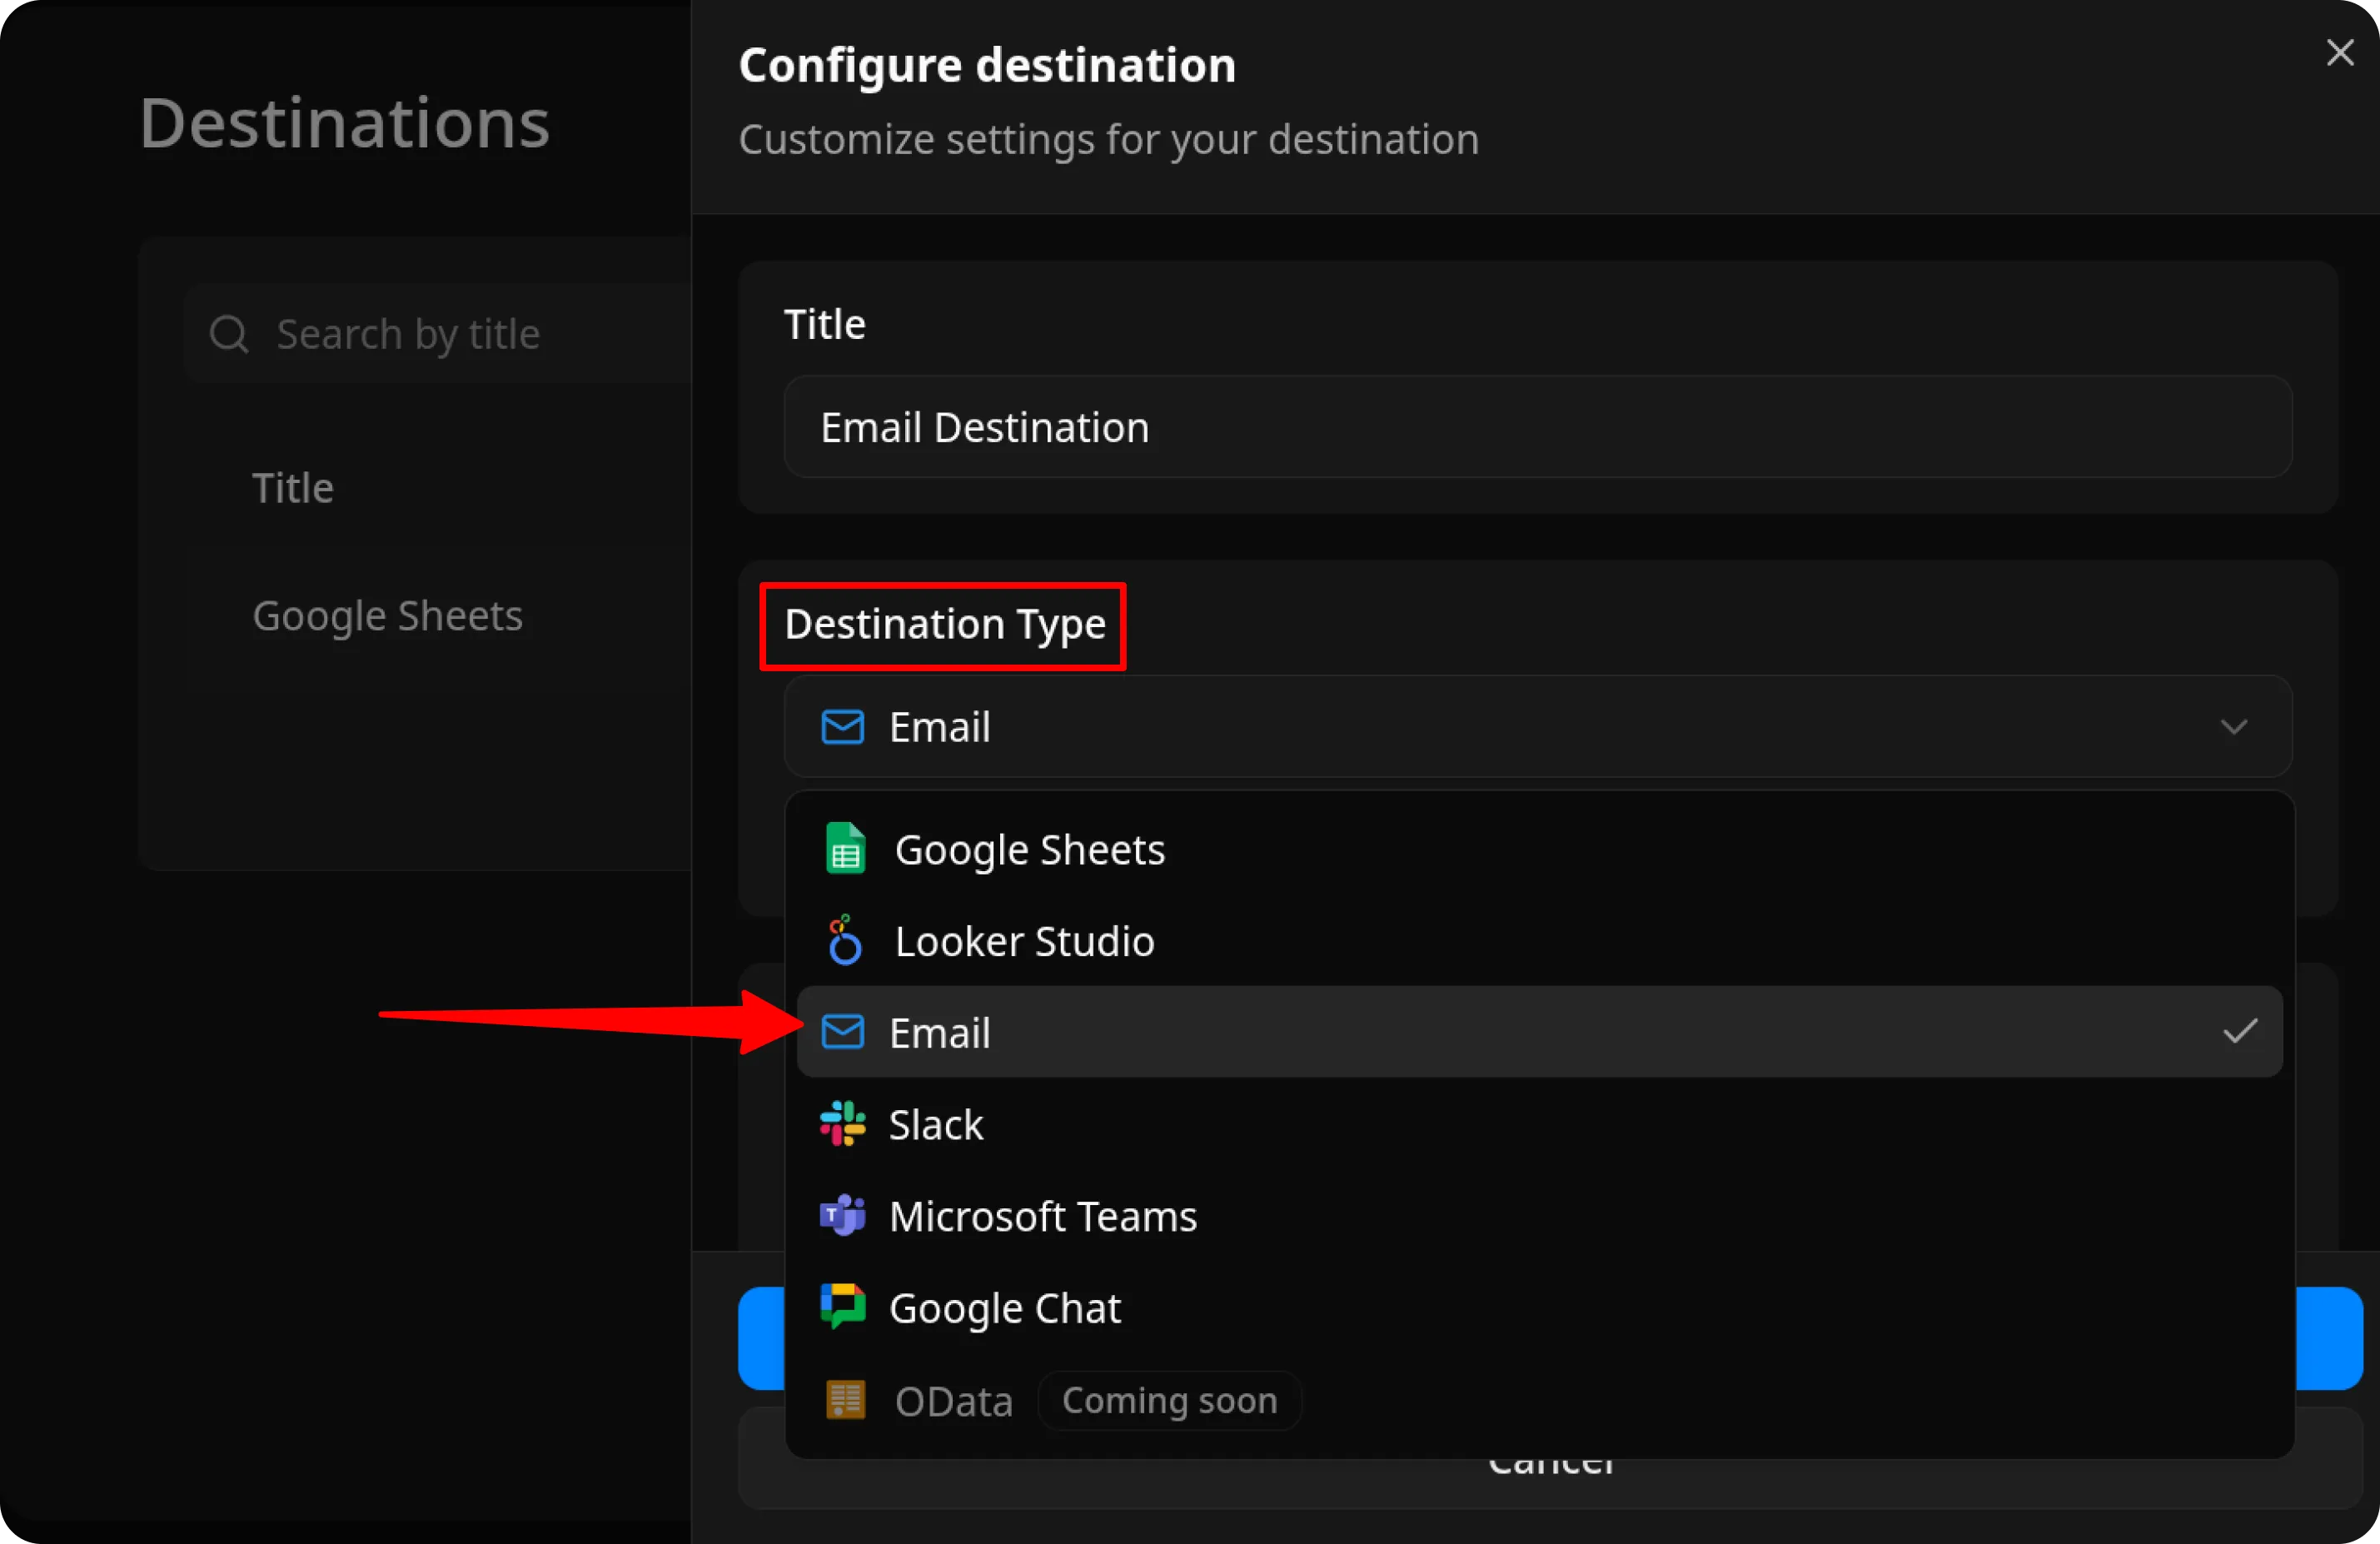
1.2. Select the Destination type
Section titled “1.2. Select the Destination type”Choose Email from the Destination Type dropdown.
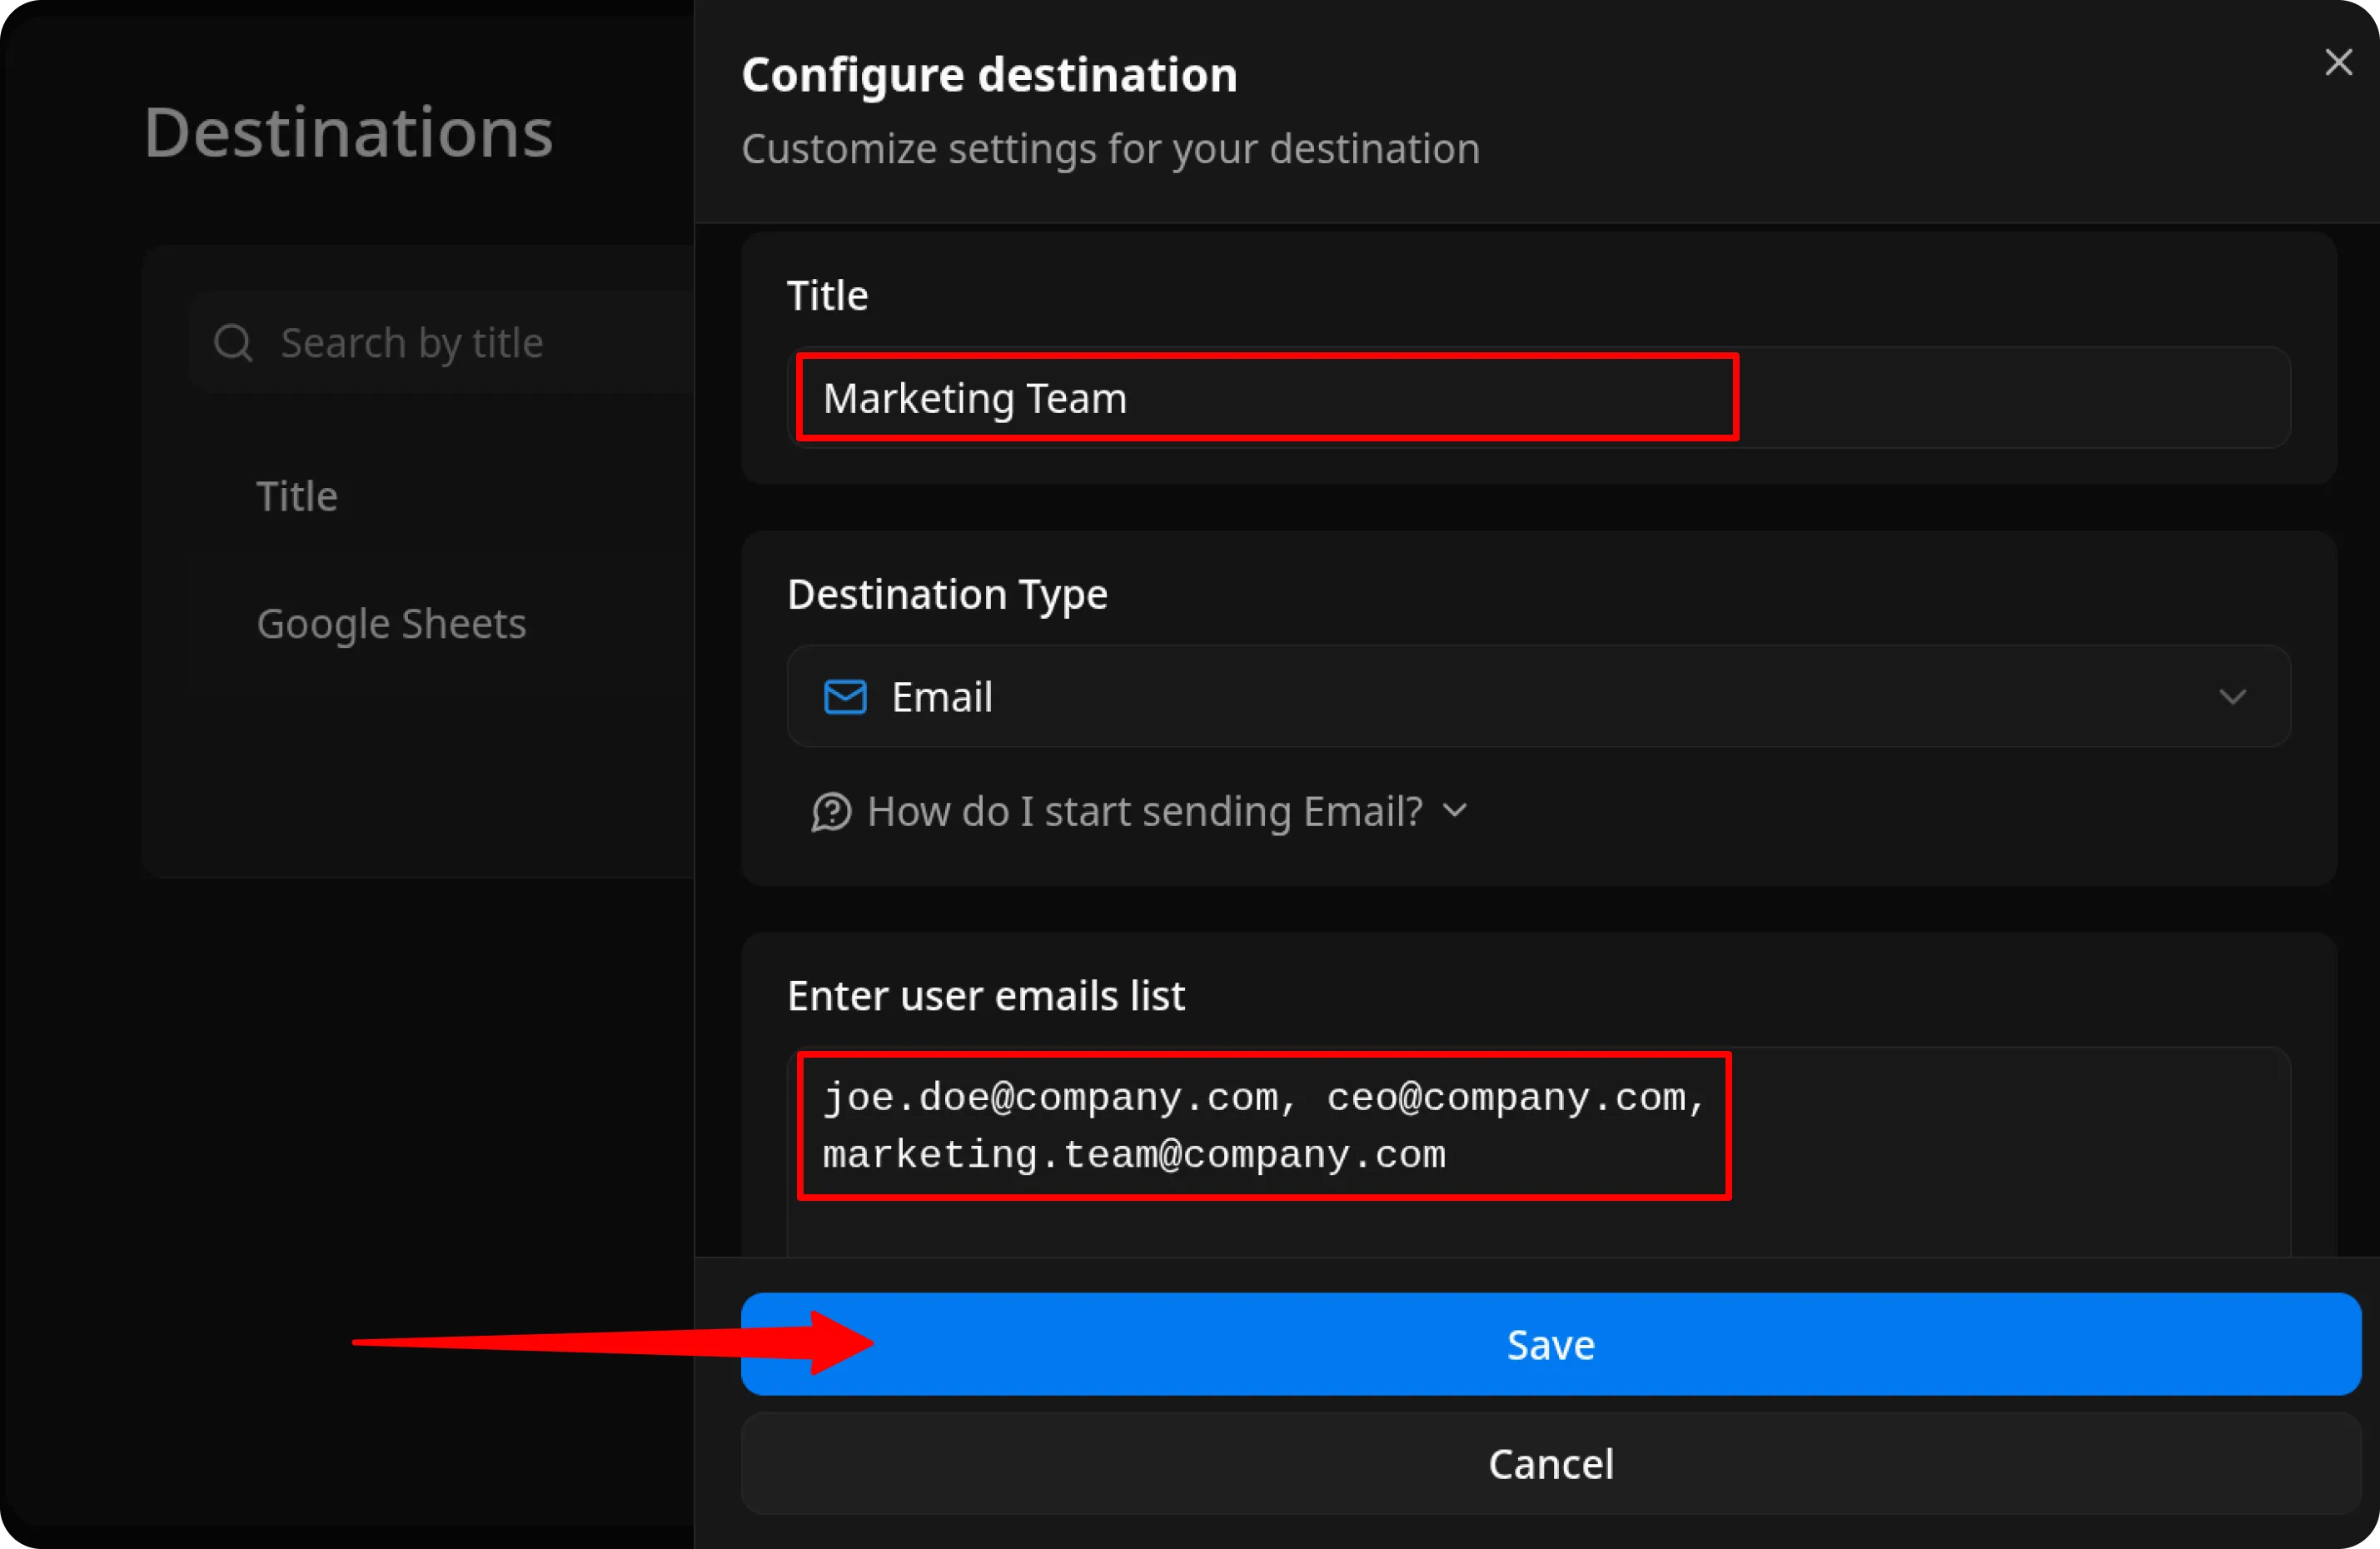
1.3. Configure Destination details
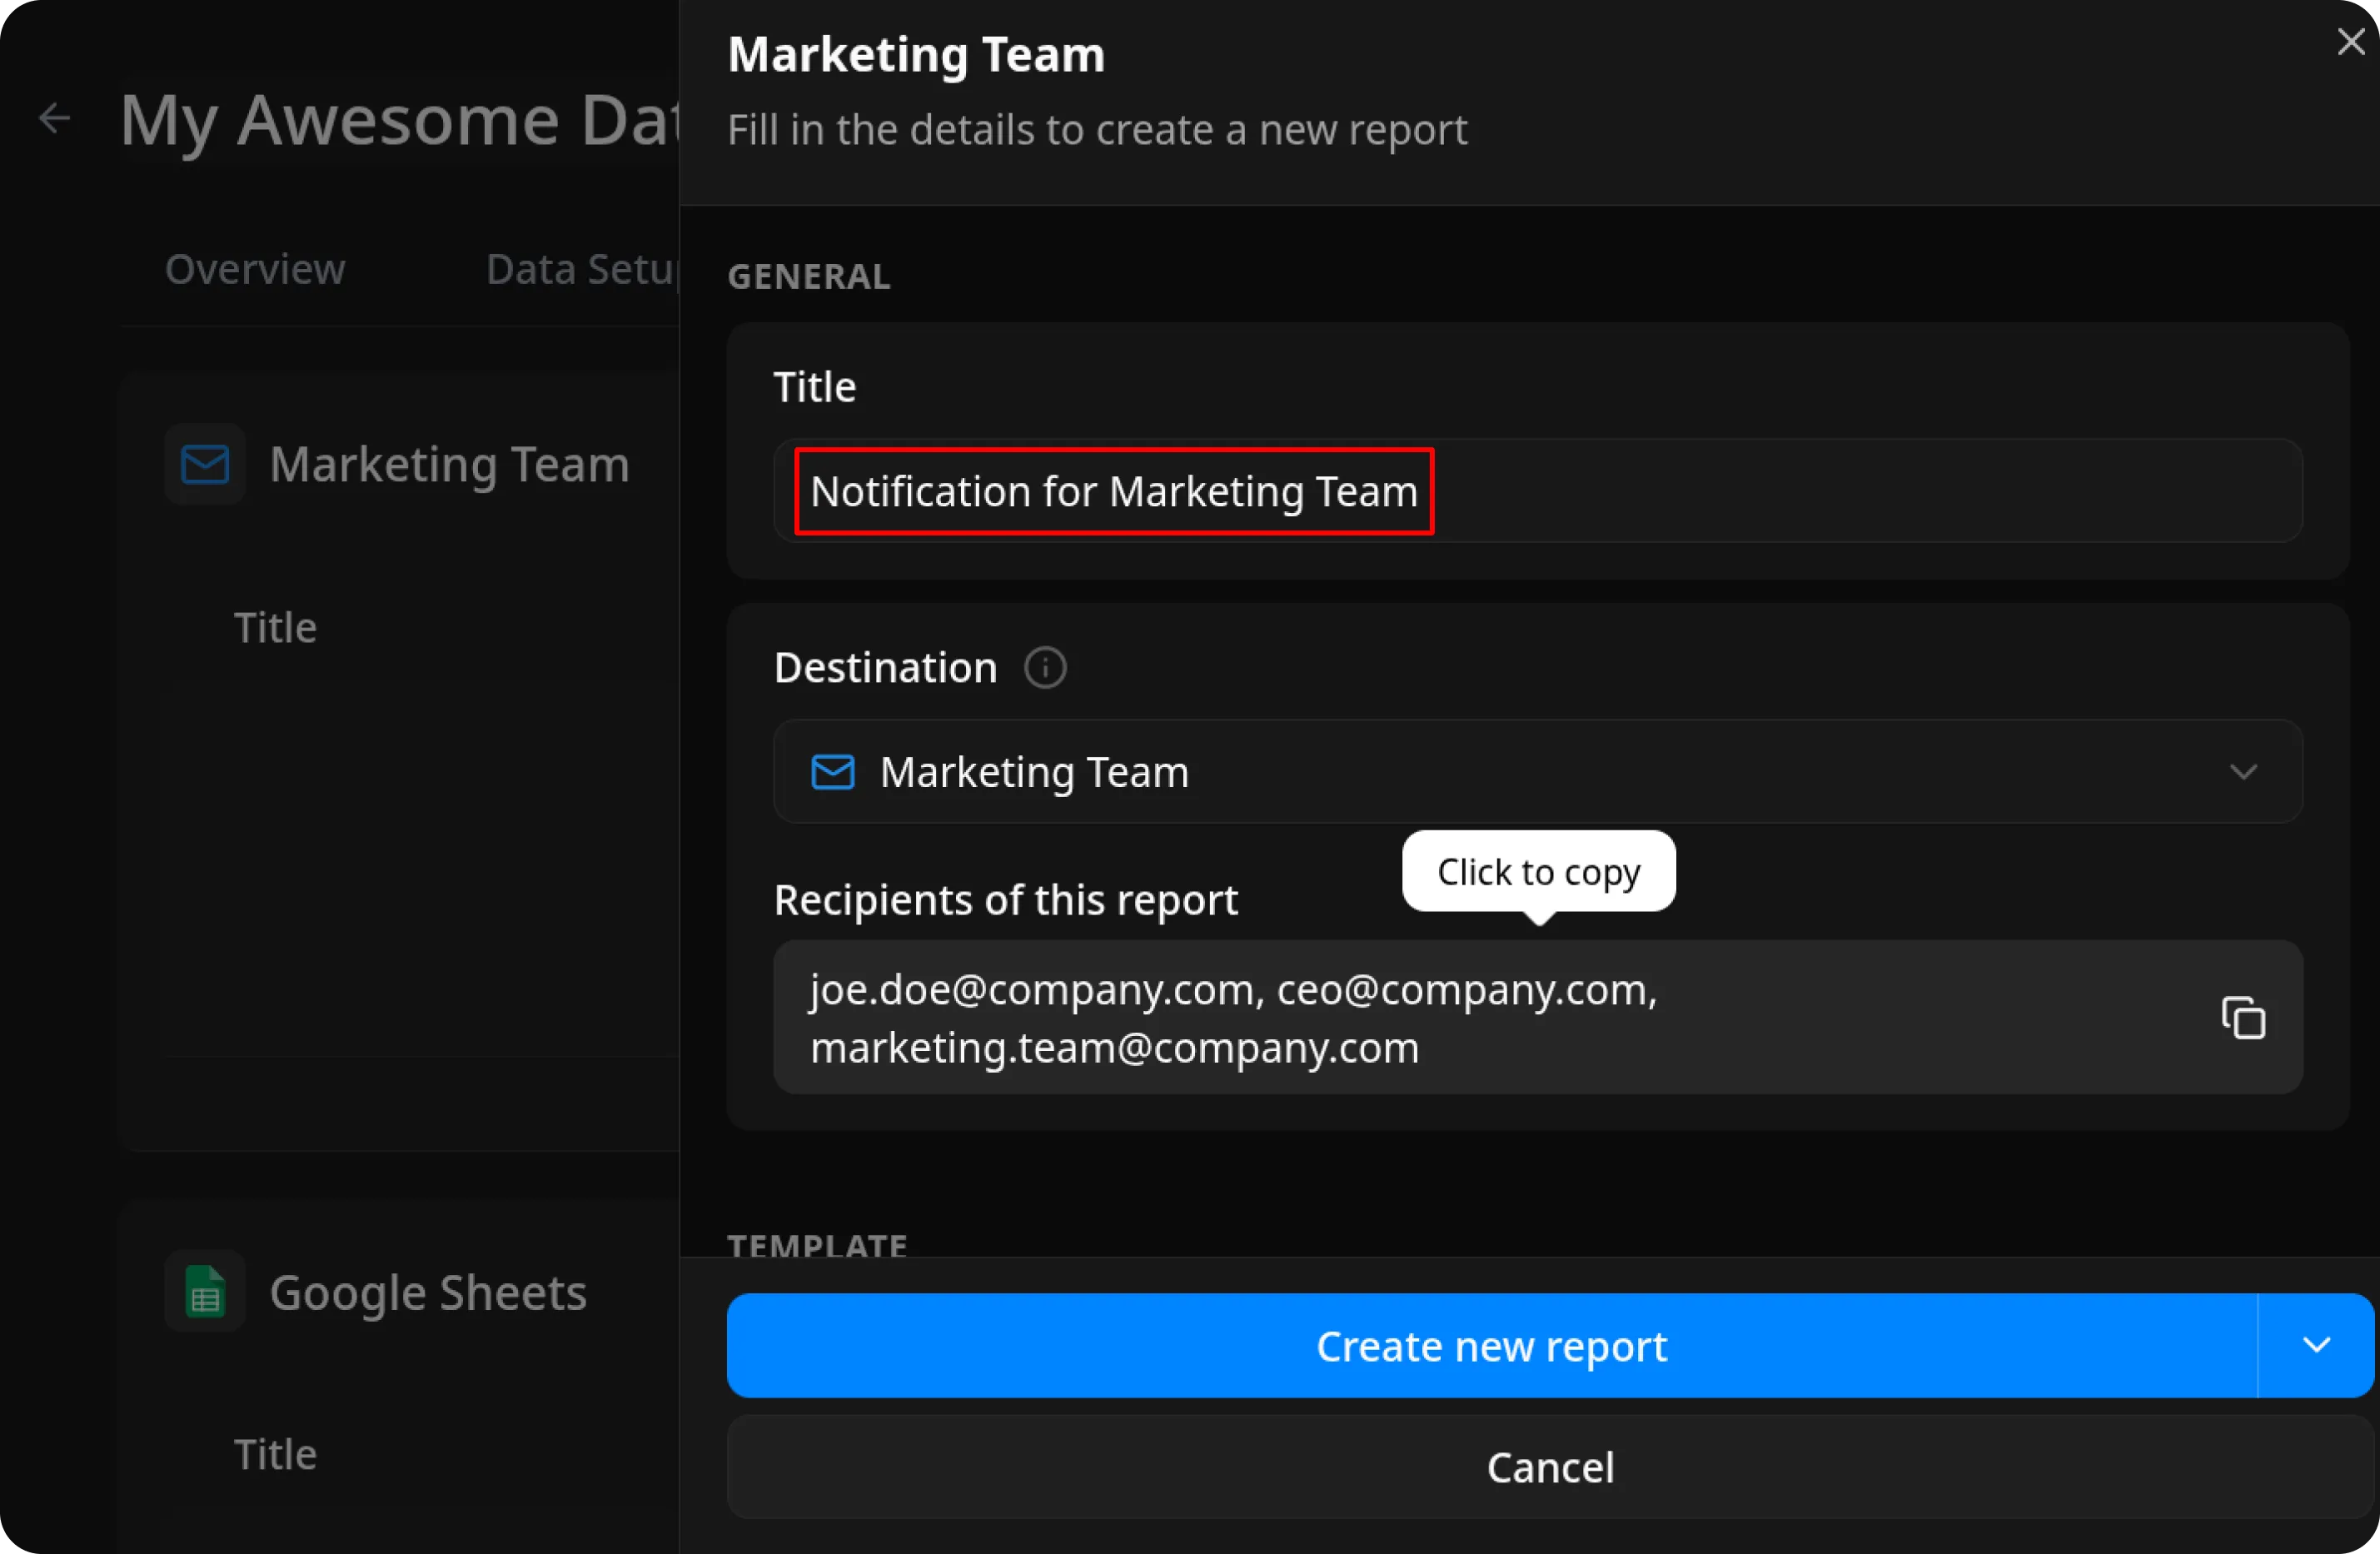
Section titled “1.3. Configure Destination details”- Title: Enter a unique name for the Destination (for example, “Marketing Team”).
- User emails list: Add recipient email addresses separated by commas, semicolons, or new lines
(for example:joe.doe@company.com,ceo@company.com,marketing.team@company.com).
1.4. Save the Destination
Section titled “1.4. Save the Destination”Review the details and click Save to create the Destination.
Step 2. Create a Report for this Destination
Section titled “Step 2. Create a Report for this Destination”For each Destination, you can create as many reports as needed and configure different schedules for them.
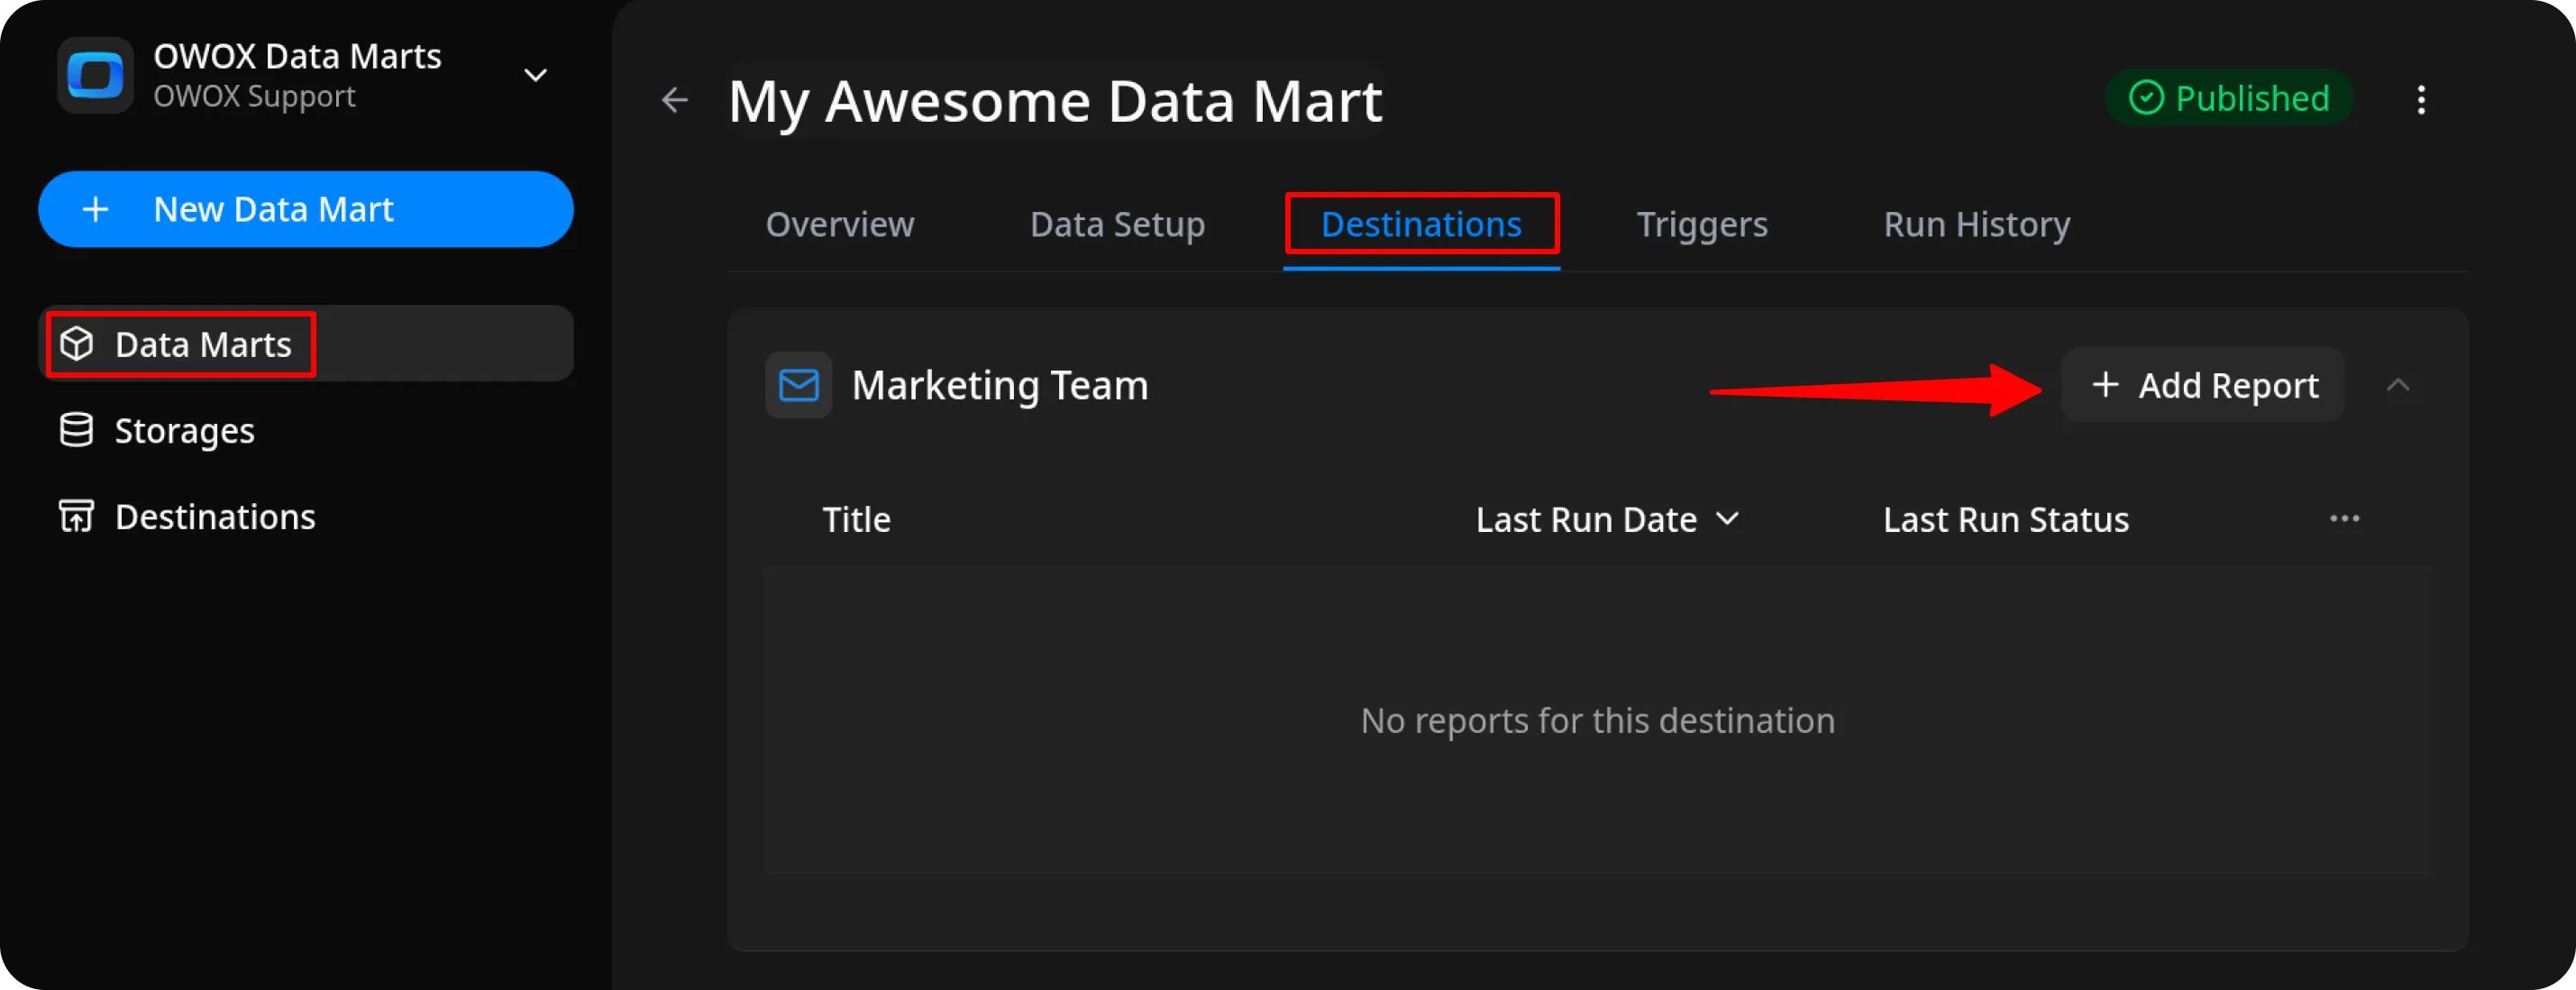
2.1. Open the Data Mart page
Section titled “2.1. Open the Data Mart page”Go to your Data Mart and open the Destinations tab.
2.2. Add a new report
Section titled “2.2. Add a new report”In the block labeled with the name of your Destination, click + Add report.
2.3. Configure general settings
Section titled “2.3. Configure general settings”Enter a report title and make sure the report is assigned to the correct Destination.
You can also view and copy the list of report recipients.
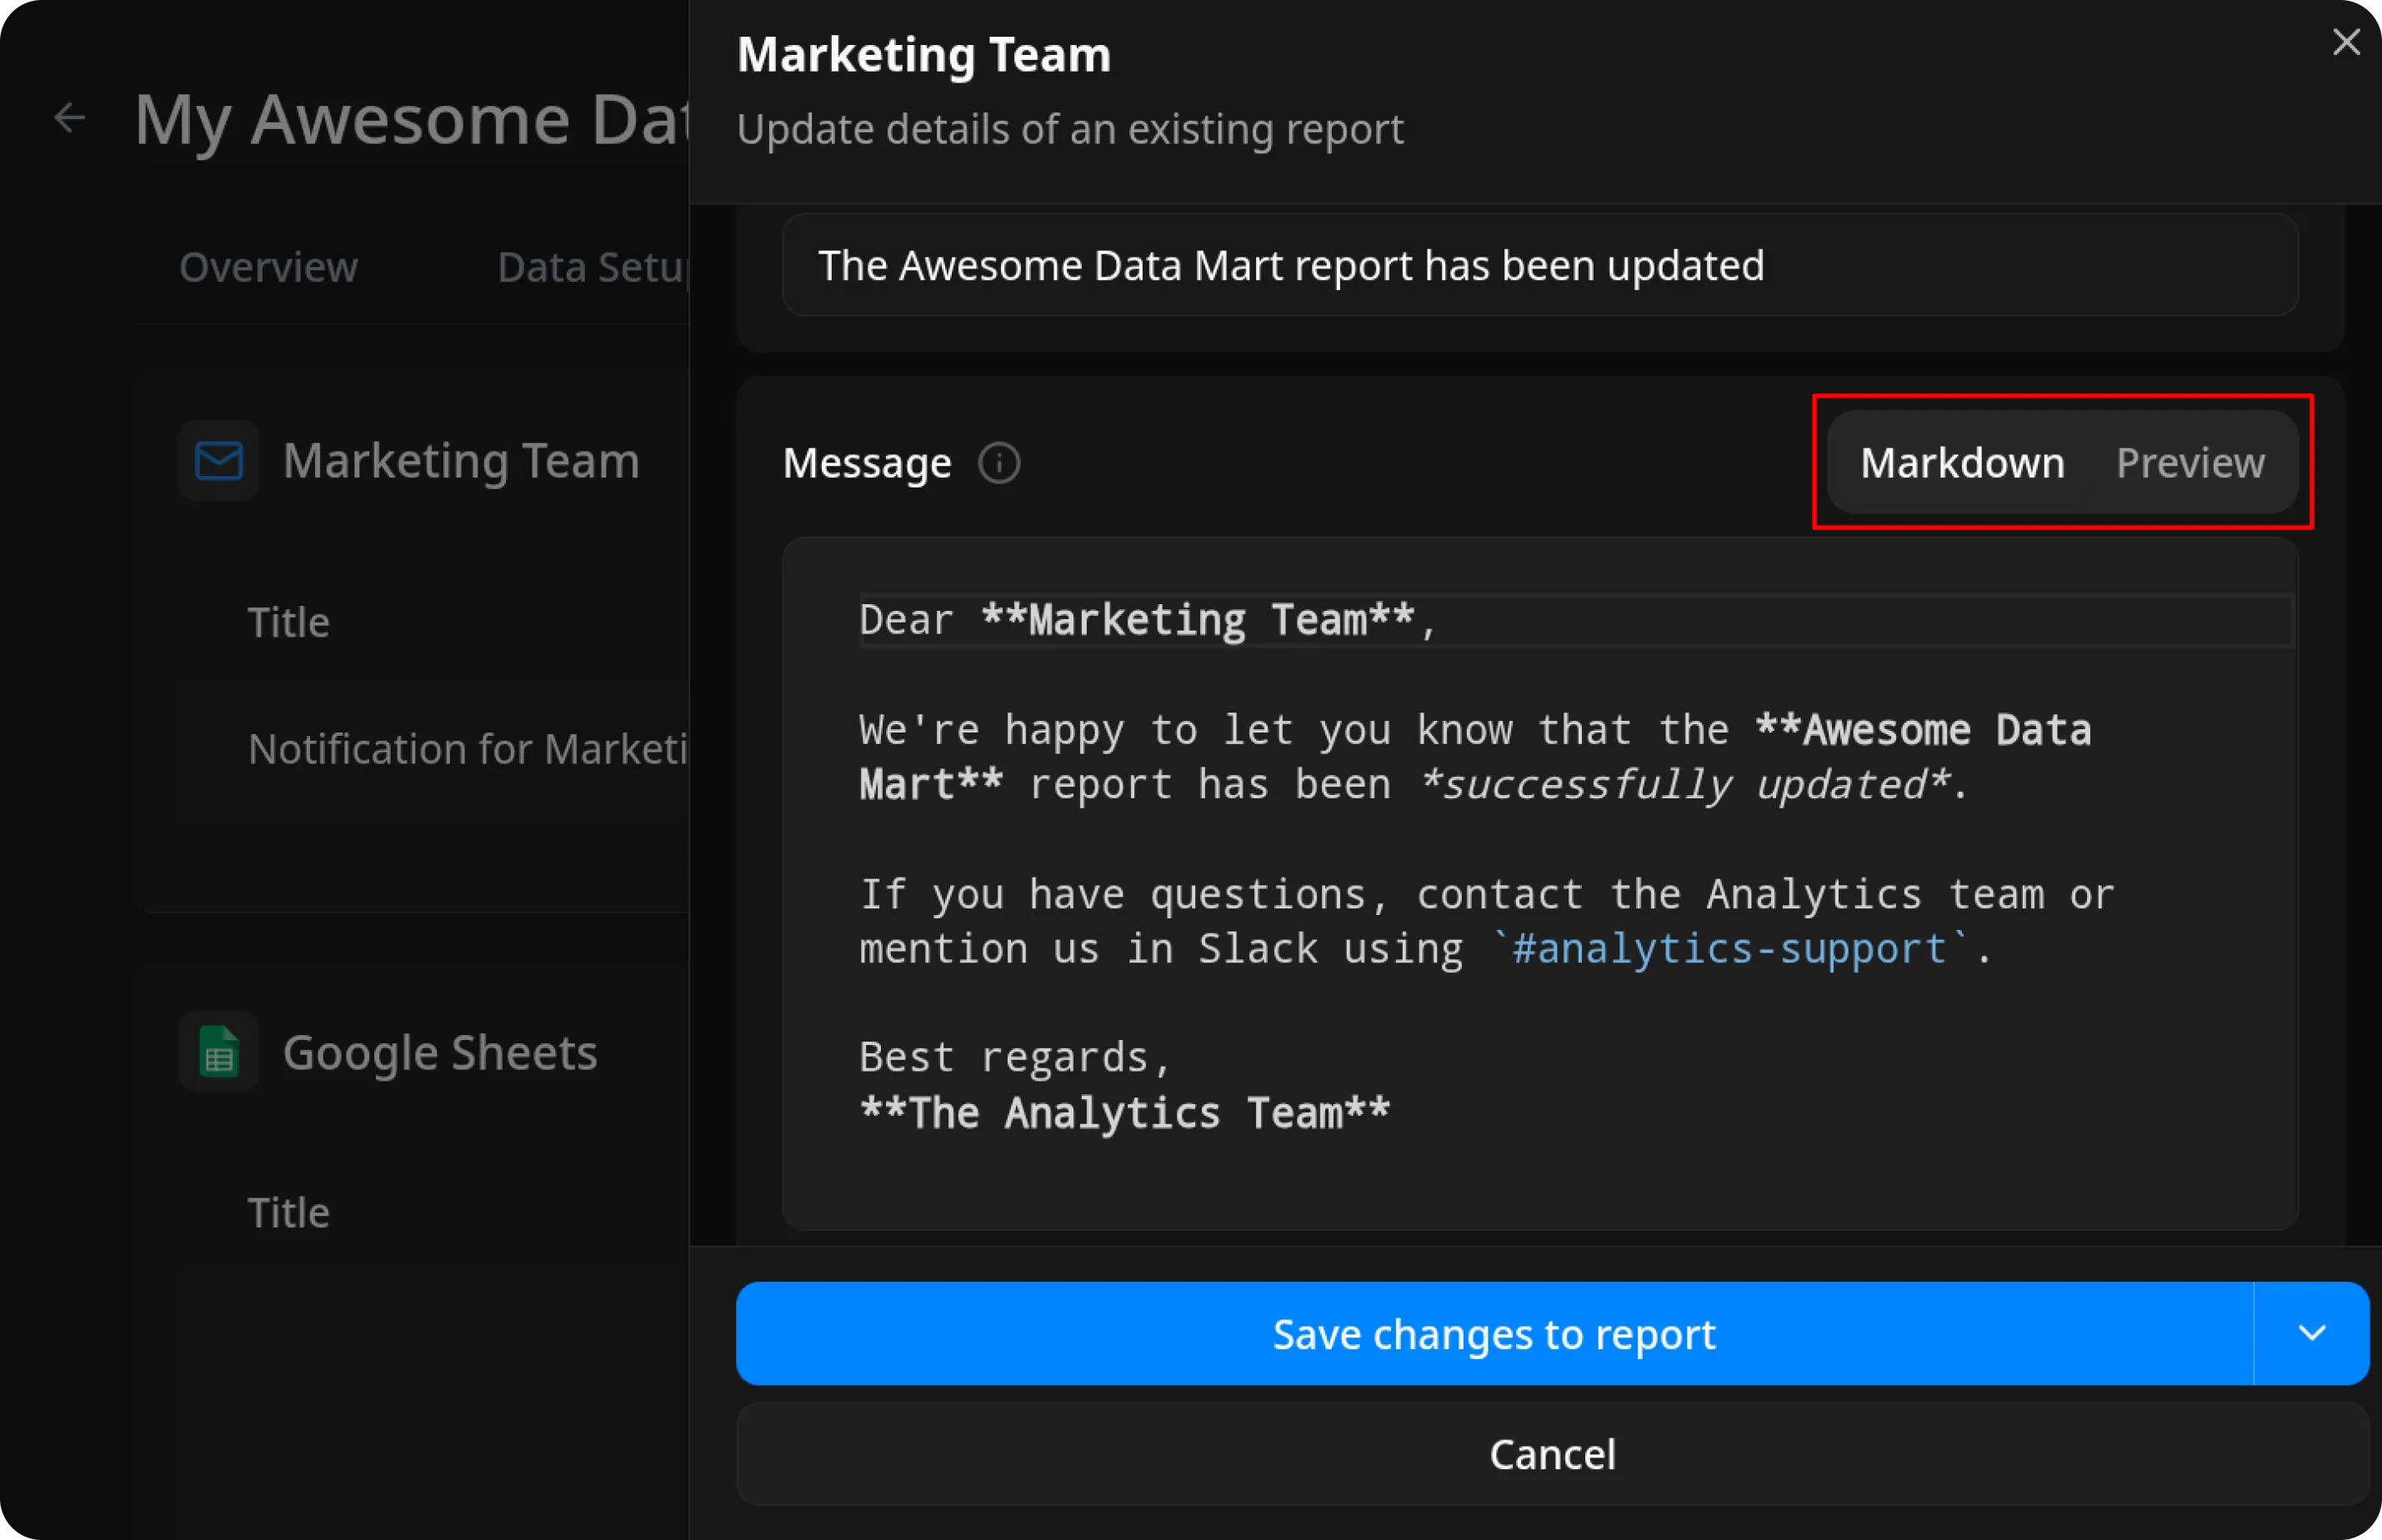
2.4. Configure the template
Section titled “2.4. Configure the template”Add a Subject and write the Message using Markdown.
Switch to Preview to check how the email will appear to recipients.
Tags and Variables
Section titled “Tags and Variables”You can use the {{table}} tag to render your Data Mart results as a table in the email. Type / in the editor to insert a tag quickly, or paste it manually.
Options available when you type / in the editor:
Table — Inserts a data table for the specified source.
Default: {{table}}
If you use the
{{table}}tag without additional parameters, the row limit defaults to 100.
Table with limit — Inserts a data table with an explicit row limit.
Default: {{table source="main" limit="100"}}
You can set
limitto any value from 1 to 100.
Value (Path) — Inserts a single cell value using path syntax.
Default: {{value source="main" path=".column_name[1]"}}
Replace
column_namewith the actual column name and1with the target row number.
Value (Column/Row) — Inserts a single cell value using column/row index syntax.
Default: {{value source="main" column="1" row="1"}}
This syntax preserves report accuracy when the schema changes — no updates are needed if a column is renamed.
Optional parameters for {{table}}:
limit— Maximum number of rows to display. Accepts 1 to 100. Default:100(this is also the hard maximum). Example:limit=20columns— Comma-separated list of columns to include. Example:columns="id, revenue"source— Source key to read from. Default:main. Example:source="main"
💡 To display 20 rows showing only
idandrevenue:
{{table limit=20 columns="id, revenue"}}
You can also use {{dataHeadersCount}} to display the total number of columns.
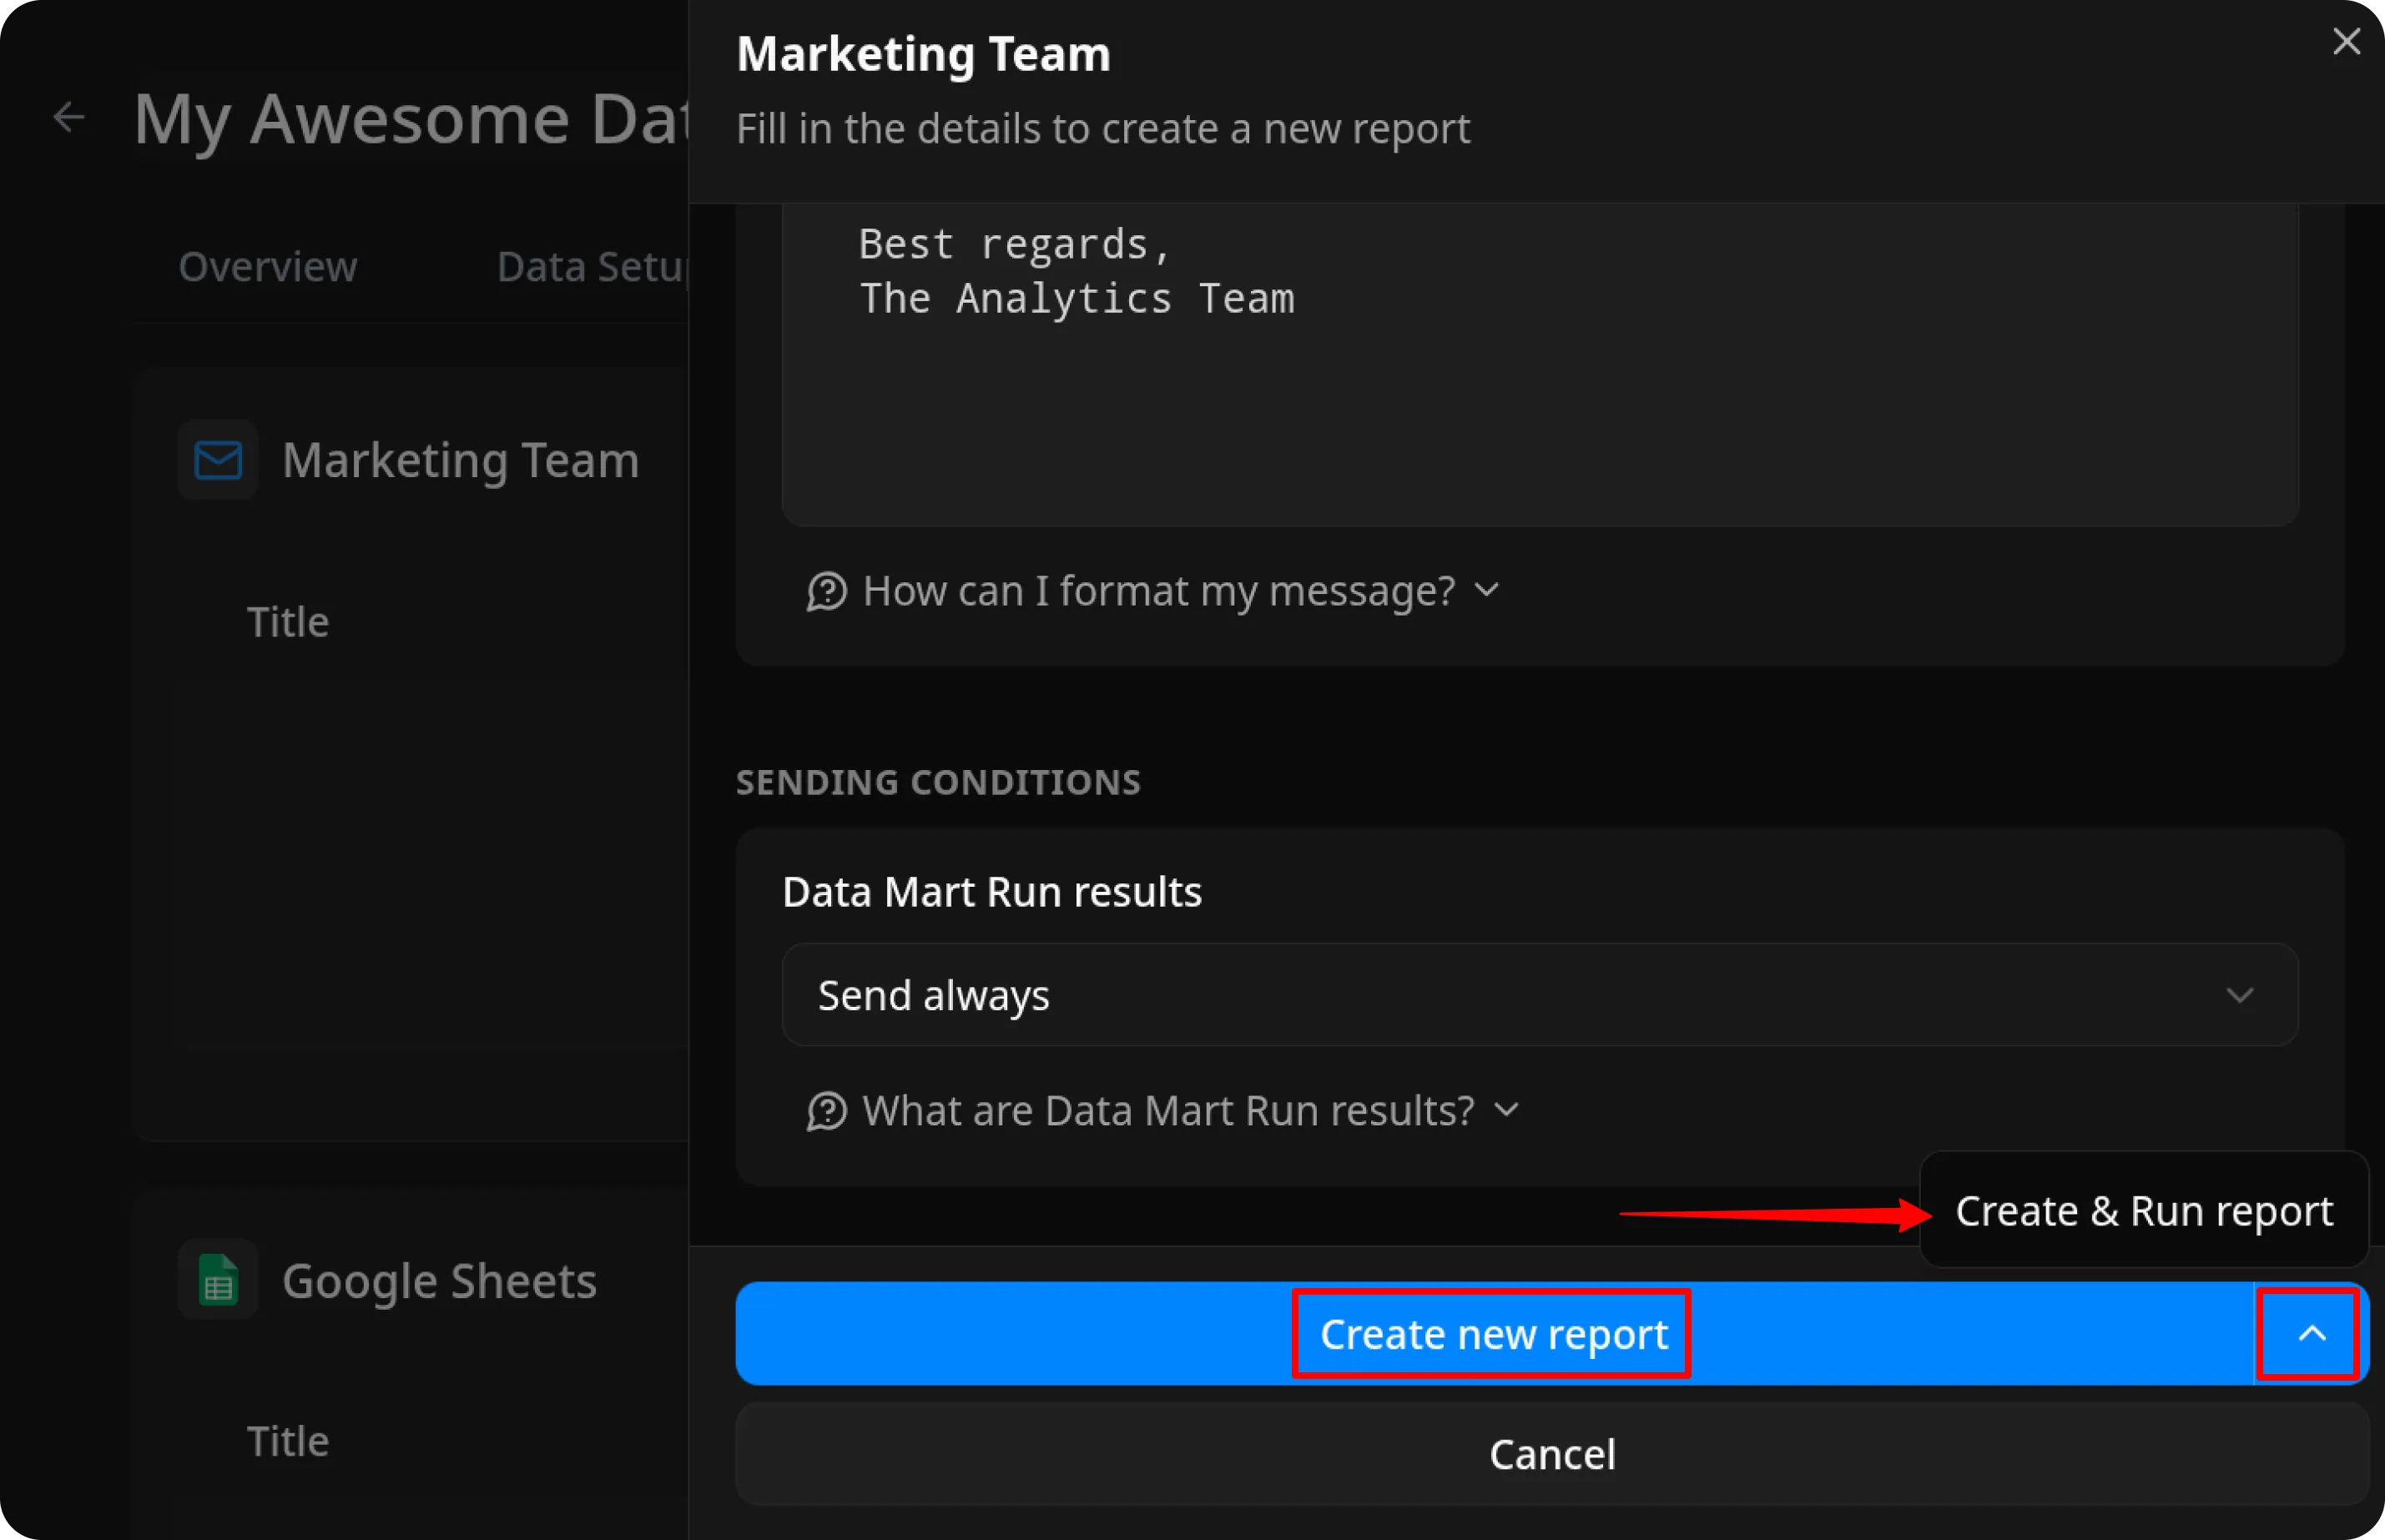
2.5. Set sending conditions
Section titled “2.5. Set sending conditions”Decide when the report should be sent based on the Data Mart run result:
- Send always – the report is sent after every run.
- Send only when result is empty – the report is sent only if the Data Mart returns no data.
- Send only when result is not empty – the report is sent only if the Data Mart returns data.
OWOX automatically runs the Data Mart before sending the report and checks the result. Your selected condition determines whether the report is sent.

2.6. (Optional) Scheduling
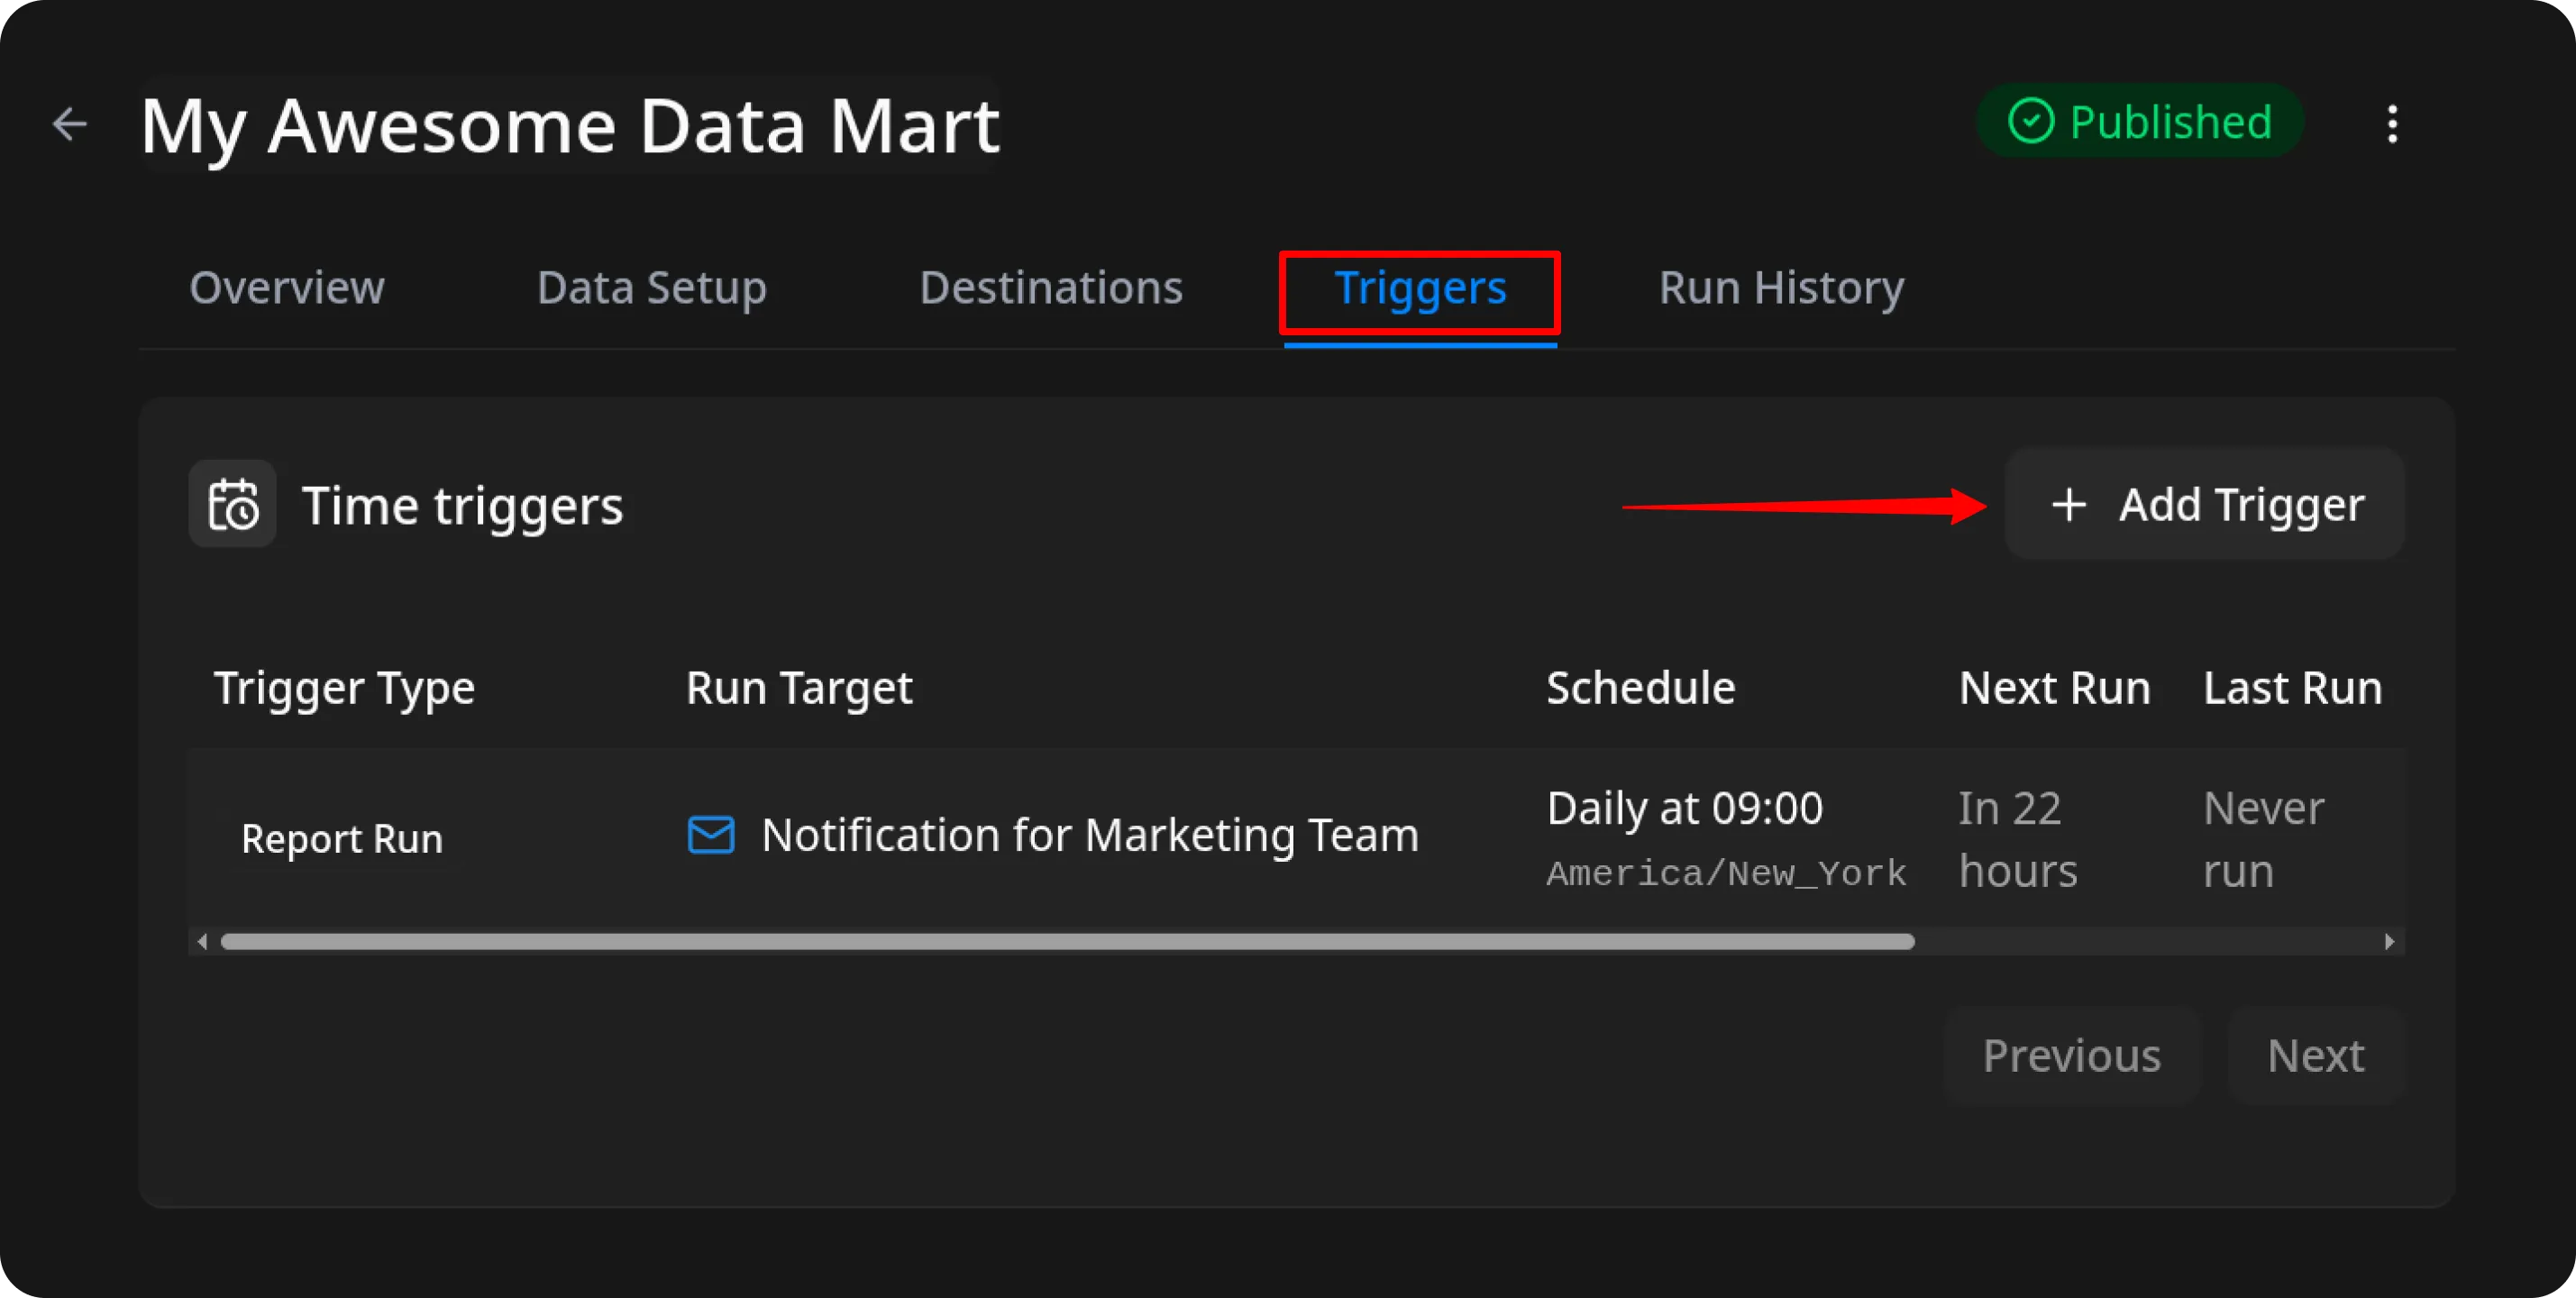
Section titled “2.6. (Optional) Scheduling”To run this report automatically on a schedule (for example, every 5 minutes or every Monday and Wednesday at 3:00 PM), create a new trigger in the Automate Report Runs section.
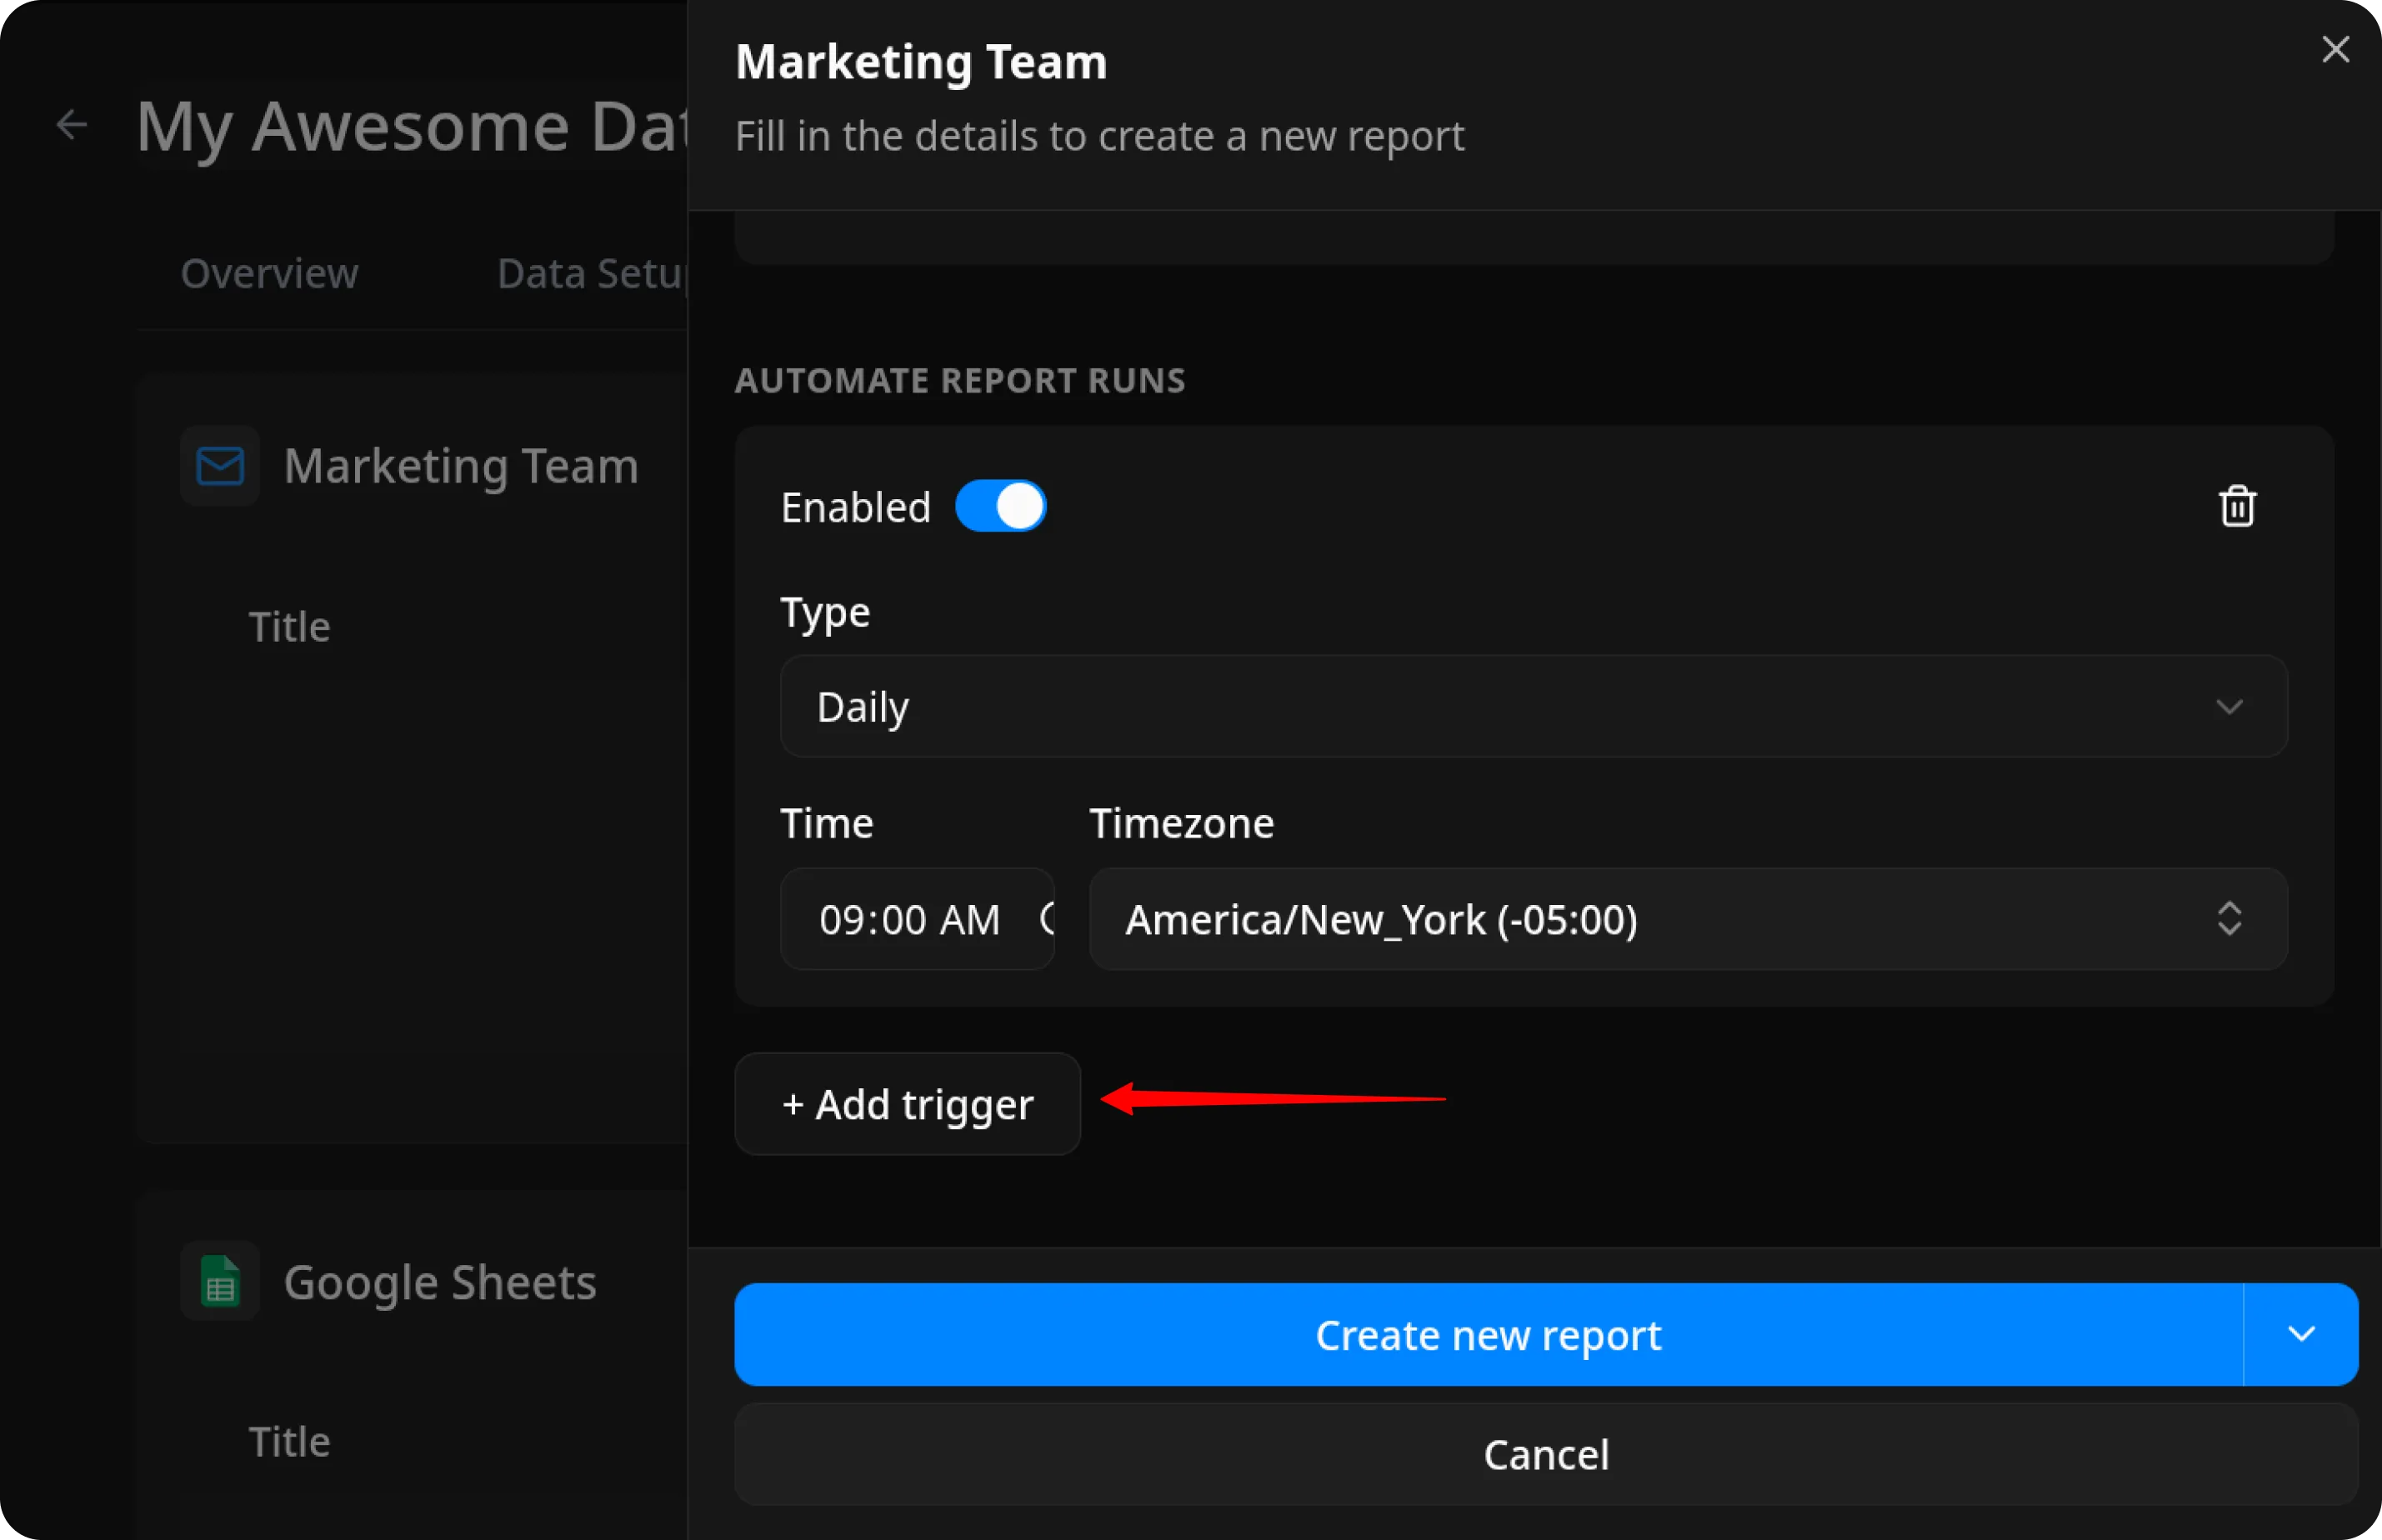
You can also add the trigger later in the Triggers tab of your Data Mart.
2.7. Create the report
Section titled “2.7. Create the report”Click Create New Report to apply the report settings. If you want to run the report immediately, click Create & Run report instead.
Have questions? Join the OWOX Community.