
Connector-based Data Mart
Try it freeUse a connector-based Data Mart when you want to collect data directly from a platform API like Facebook Ads, TikTok Ads, LinkedIn Ads or other available data sources (or your own custom connector) into any of the supported Data Storages.
You’ll need a data storage available for the data mart setup. Here is how to add a data storage
Step 1: Choose the platform
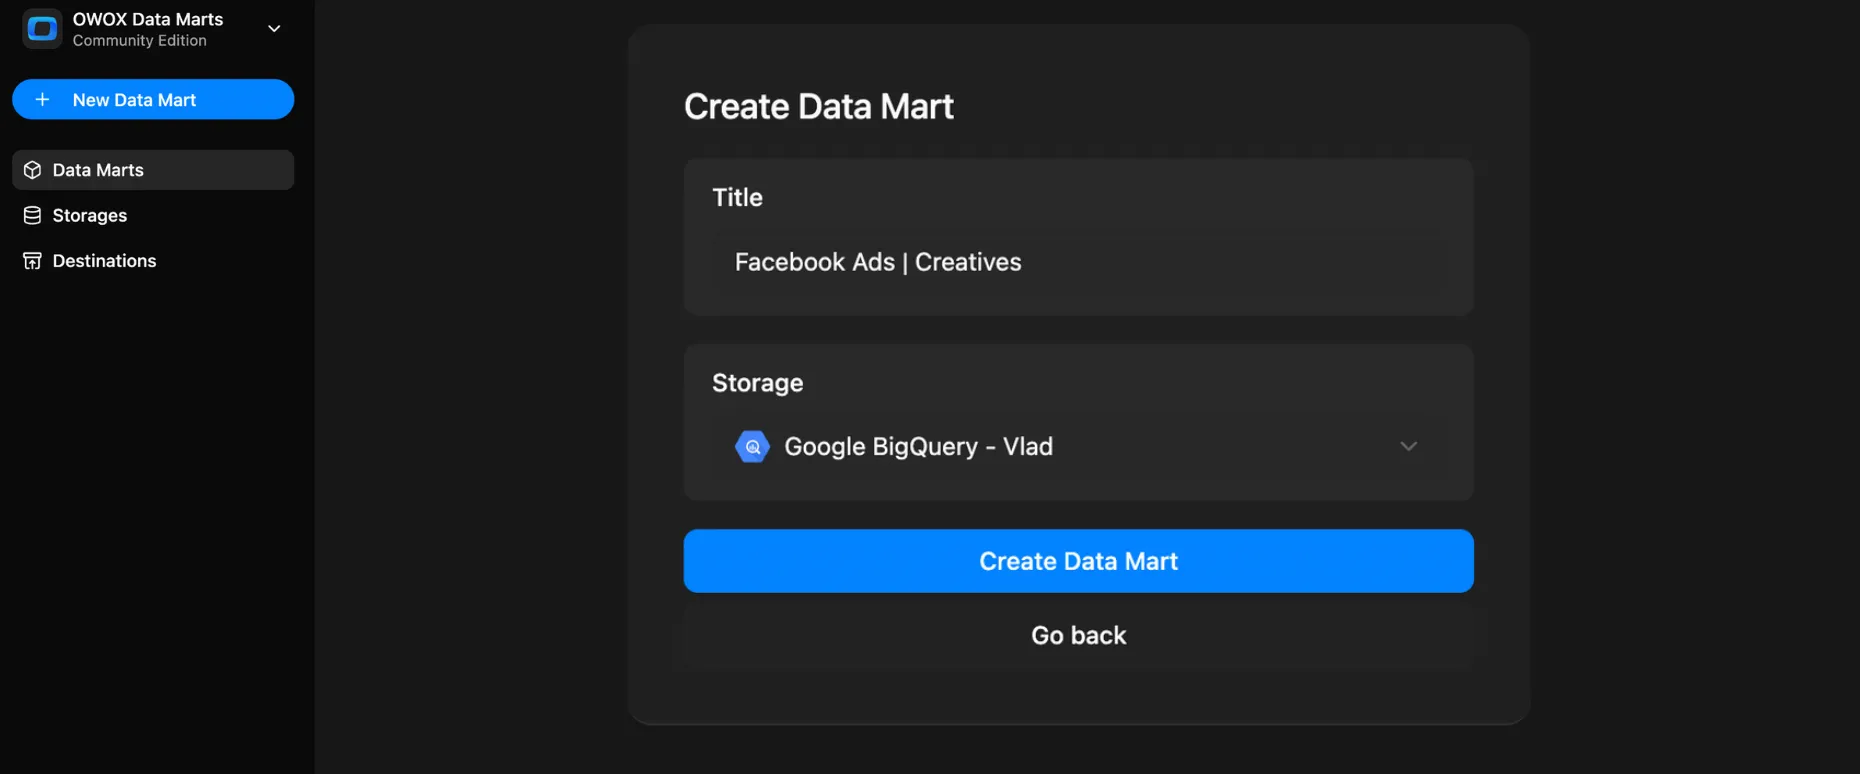
Section titled “Step 1: Choose the platform”Click + New Data Mart.
Give it a friendly Title, e.g., Facebook Ads | Creatives.
Select the Data Storage from the list.
Click Create Data Mart.
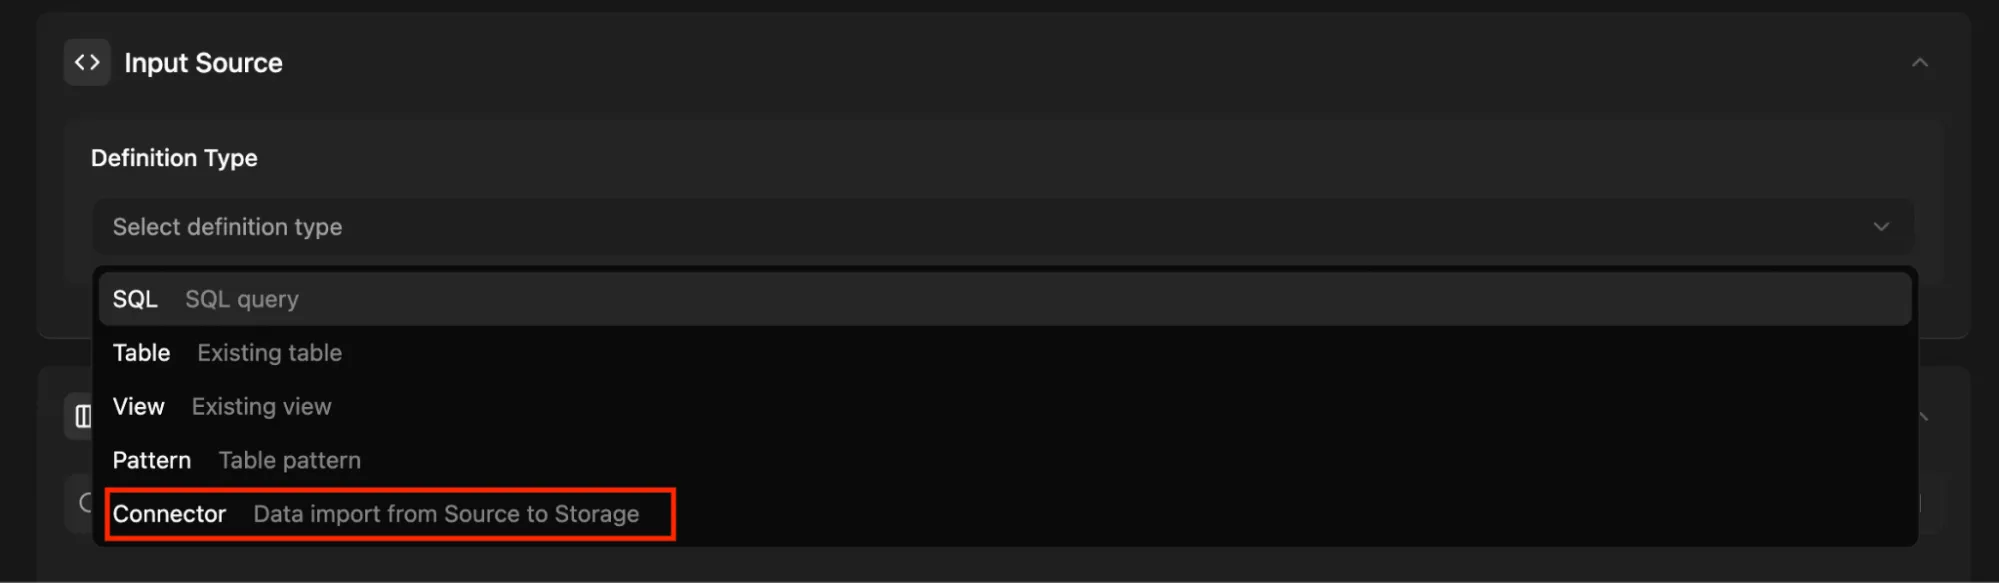
In the Input Source panel, select Definition Type – Connector. Click Setup Connector.
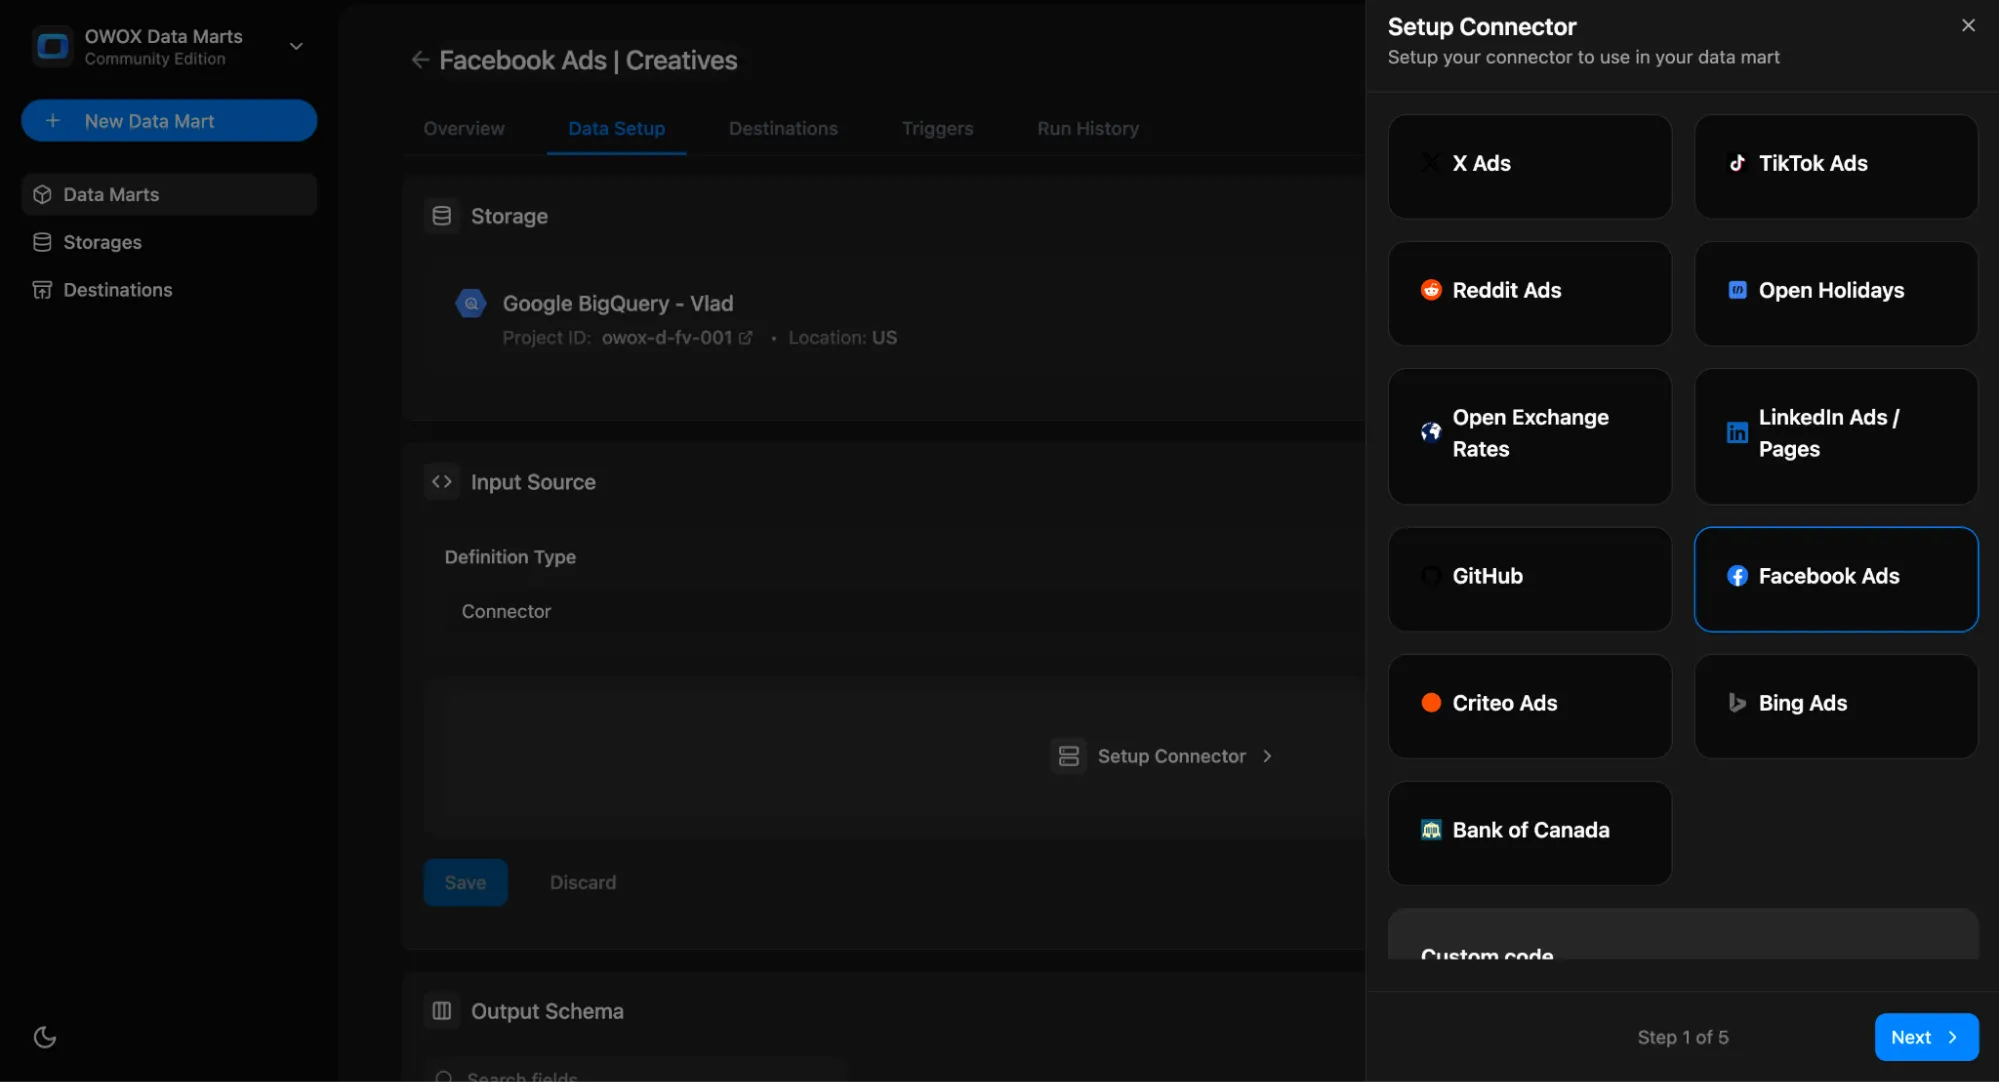
Select the platform you want to connect to (e.g., Facebook Ads, TikTok Ads) from the list of available connectors and click Next. Connectors built in your project are listed under Custom Connectors; to build one, see Connector Builder.
Step 2: Configure parameters
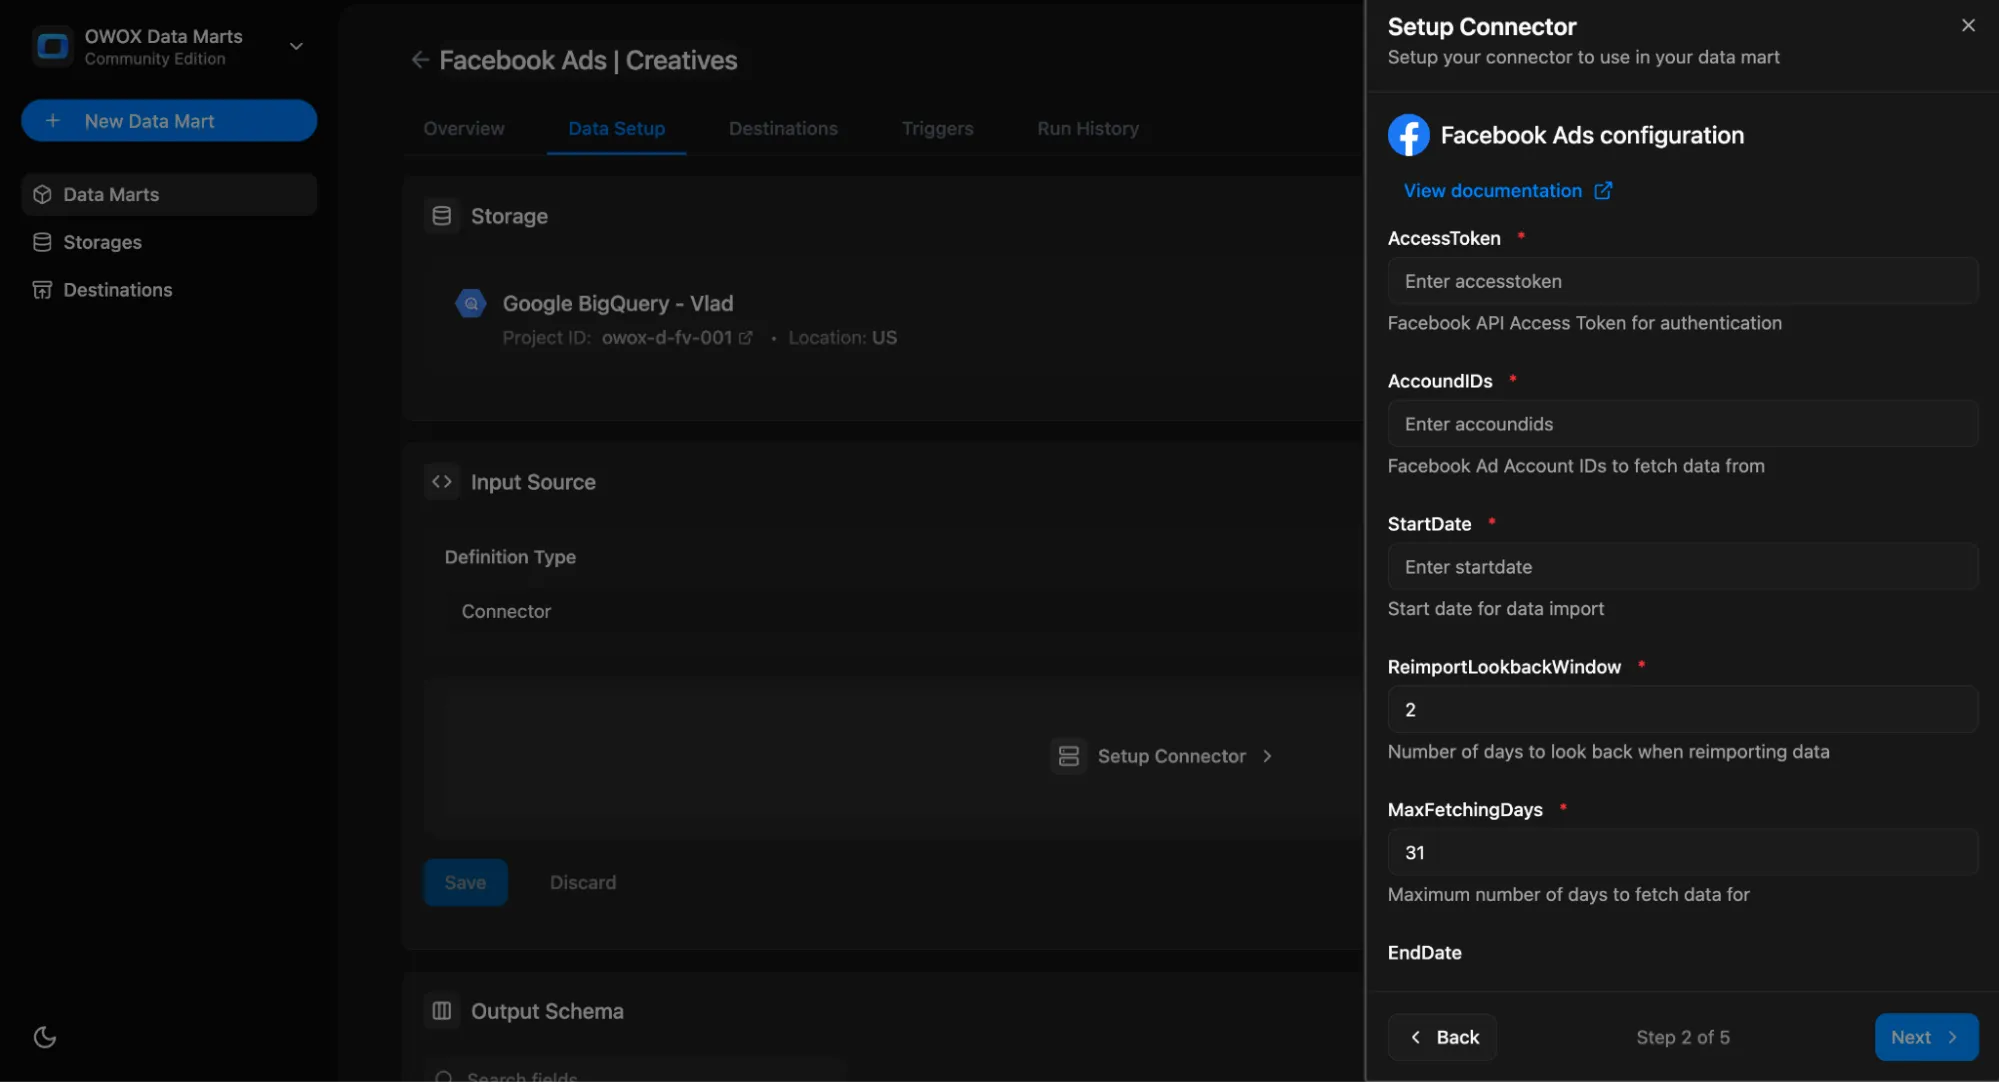
Section titled “Step 2: Configure parameters”Each connector has a set of required parameters. The most common ones include:
| Parameter | Description |
|---|---|
account_id | ID of the ad account or business you’re pulling data from |
start_date | Start date for the data import |
end_date | End date for the data import |
reimport_lookback_window | How many days of data to re-import during each run |
max_fetching_days | Max days per API call to avoid rate limits |
cleanup_to_keep_window | How many days of data to keep before automatic cleanup |
📌 Some connectors may have additional parameters — see their setup guides.
Some parameters use a fixed list of values. Choose these before moving to field selection, especially when the parameter changes the reporting grain. For example, TikTok Ads Data Level changes which fields are required for performance endpoints.
Step 3: Add Access Credentials
Section titled “Step 3: Add Access Credentials”Each connector requires authentication. Here is how you can obtain the required credentials for each of the ad platforms:
- Facebook Ads
- TikTok Ads
- Linkedin Ads
- X Ads
- Microsoft Ads
- Reddit Ads
- Criteo Ads
- Open Exchange Rates
- Other platforms
Use the credentials screen to manage access per platform.
Copy a configuration from another Data Mart
Section titled “Copy a configuration from another Data Mart”The Copy from… option reuses a connector configuration from another Data Mart, including its stored credentials.
Copying credentials requires Edit access to the source Data Mart. You have it in one of these cases:
- You are a Project Admin.
- Your role is Data Owner, and you are a Data Owner of the source Data Mart.
- Your role is Data Owner, and the source Data Mart is Shared for maintenance.
Without this access, saving the Data Mart fails with this error:
You do not have permission to copy connector credentials from the source Data Mart.
To resolve it, choose one of these options:
- Ask an owner of the source Data Mart to add you as a Data Owner.
- Ask them to turn on Shared for maintenance on the source Data Mart.
- If you are a Business User, ask a Project Admin to change your role to Data Owner.
- Enter your own credentials instead of copying.
One more check applies when your role scope is Selected contexts only. You also need a context overlap with the source Data Mart. See Ownership and Sharing for the full access model.
Step 4: Customize export schema
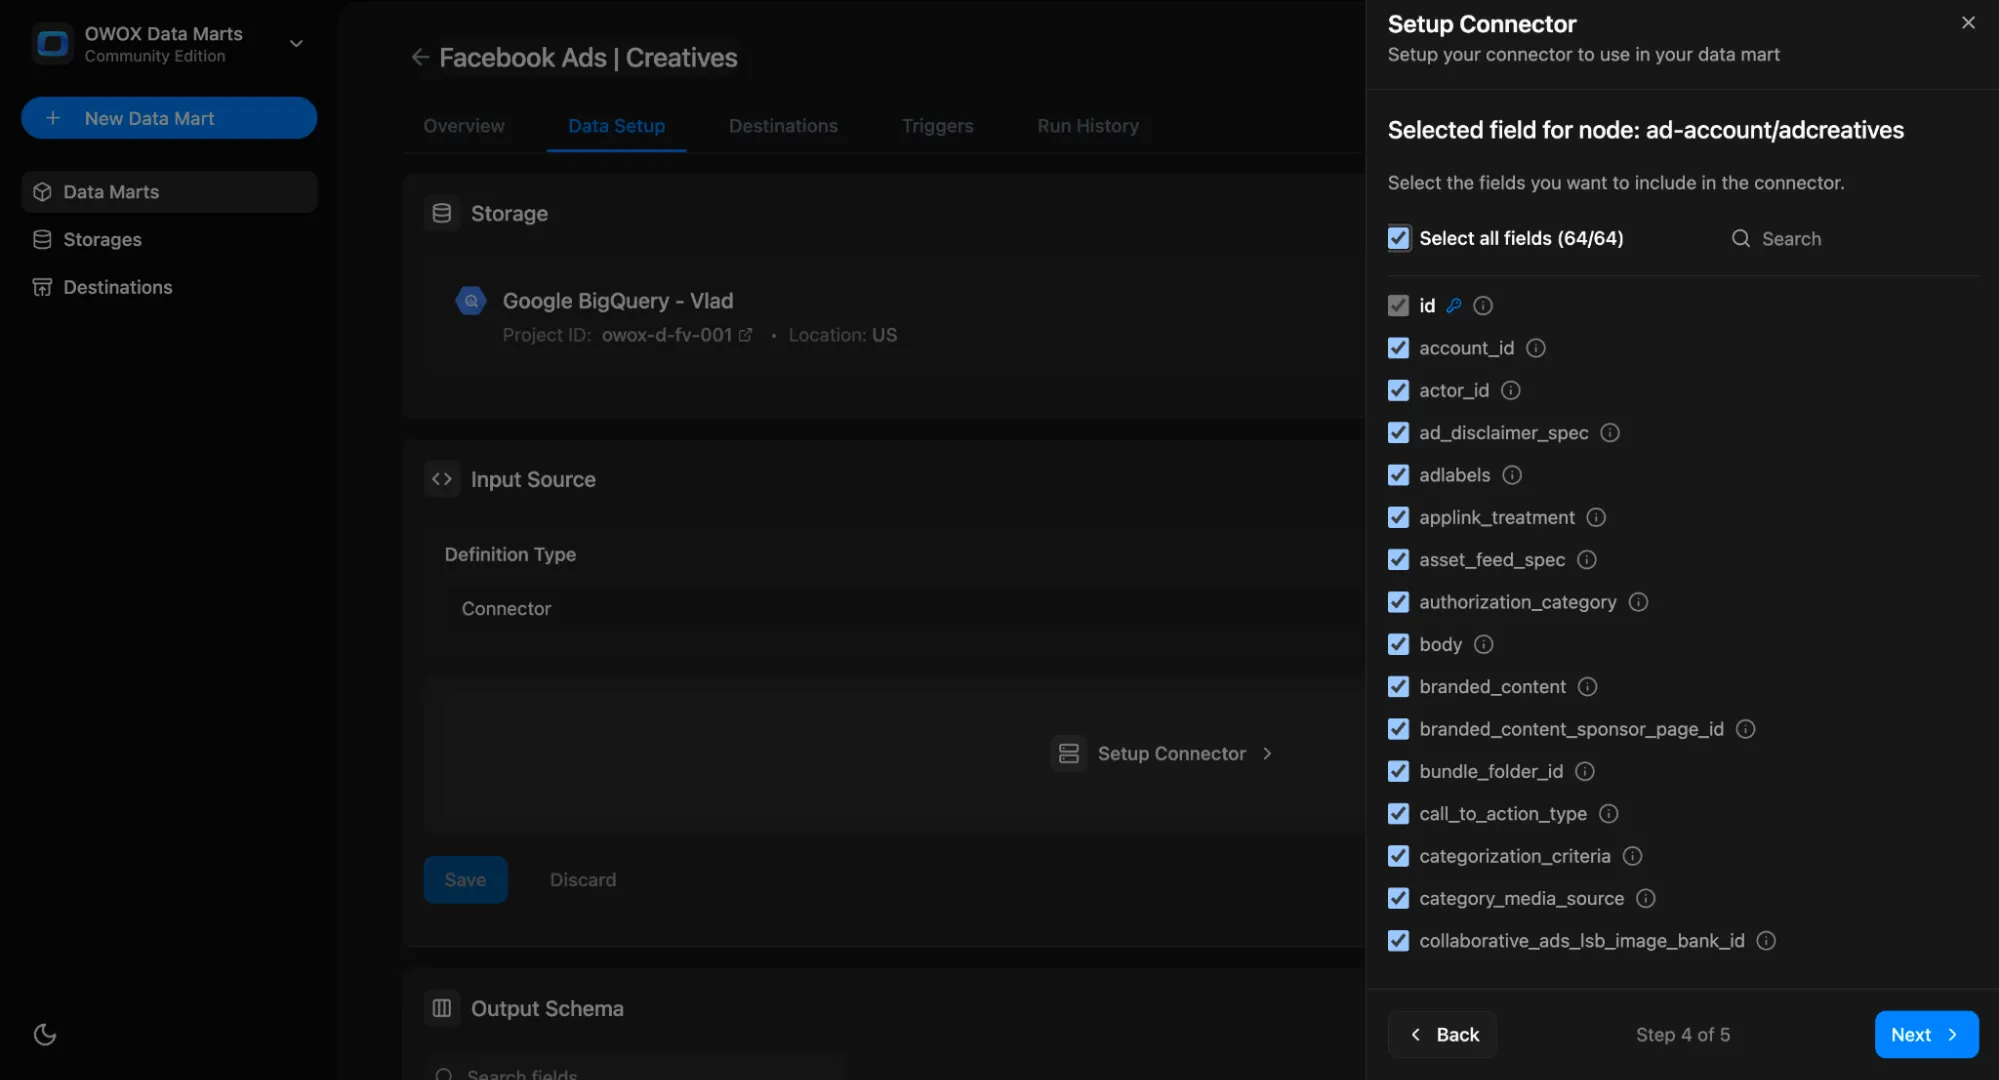
Section titled “Step 4: Customize export schema”Once the connector and parameters are set, click Next to select the node you want to import in this data mart.
Each connector includes one or more data nodes. For example, Facebook Ads has nodes like:
ad_accountsad_accounts/insightsad_accounts/campaigns
👉 Create a separate Data Mart for each node you want to pull data from.
Next, click Select all or select just the fields you want to store in your data warehouse. Required unique-key fields stay selected because the connector needs them to merge data correctly. Some connectors adjust these required fields based on the parameters selected in the previous step.
Step 5: Set up the target in your storage
Section titled “Step 5: Set up the target in your storage”Enter dataset name for your data storage (e.g., dataset name for BigQuery) where the connector can load the data. The dataset will be created automatically if it doesn’t exist.
The table name will be created automatically based on the selected node name, for example:
ad_account_adcreatives
Don’t forget to:
- Click Save at the end of the setup wizard
- Click Publish & Run Data Mart in the page header — publishing starts the first import automatically
To load data again later, use the Manual Run button. It sits in the header of the Input Source card on the Data Setup tab. You can start a run while the card is collapsed.
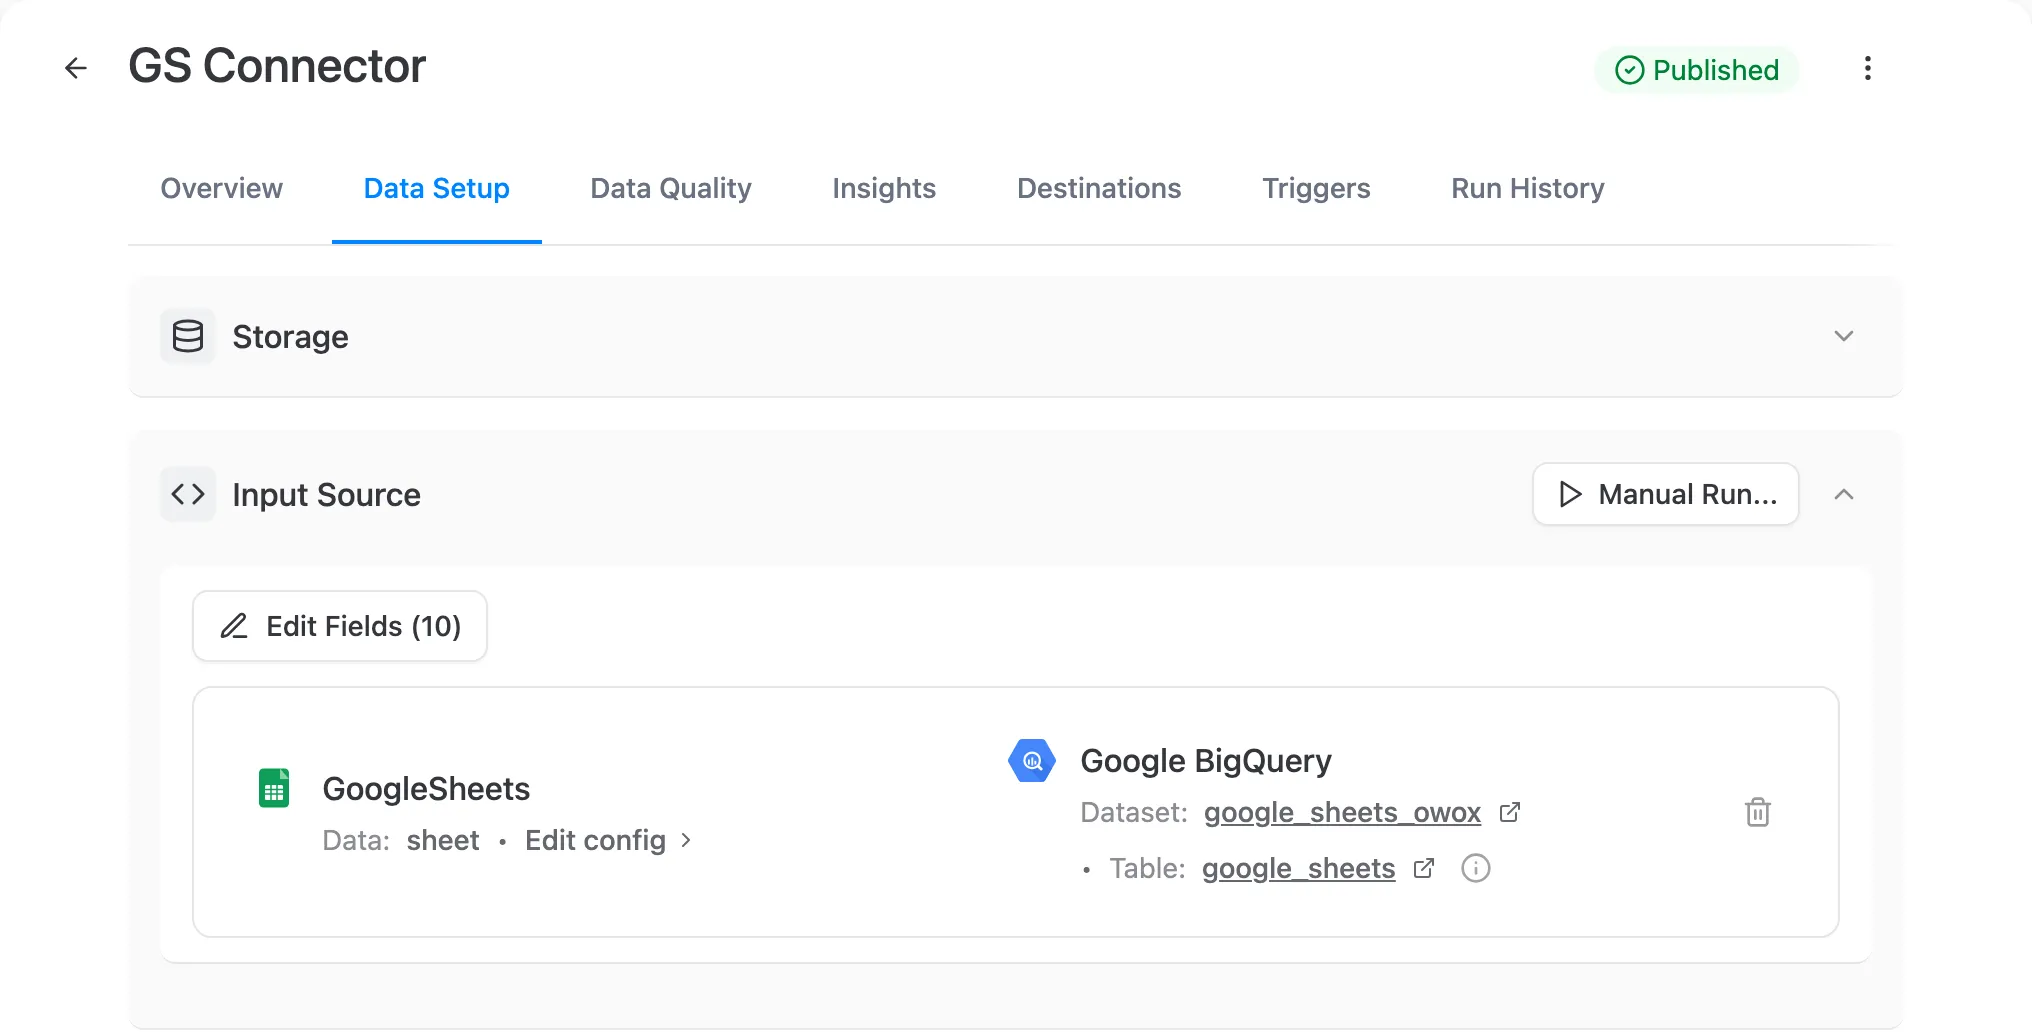
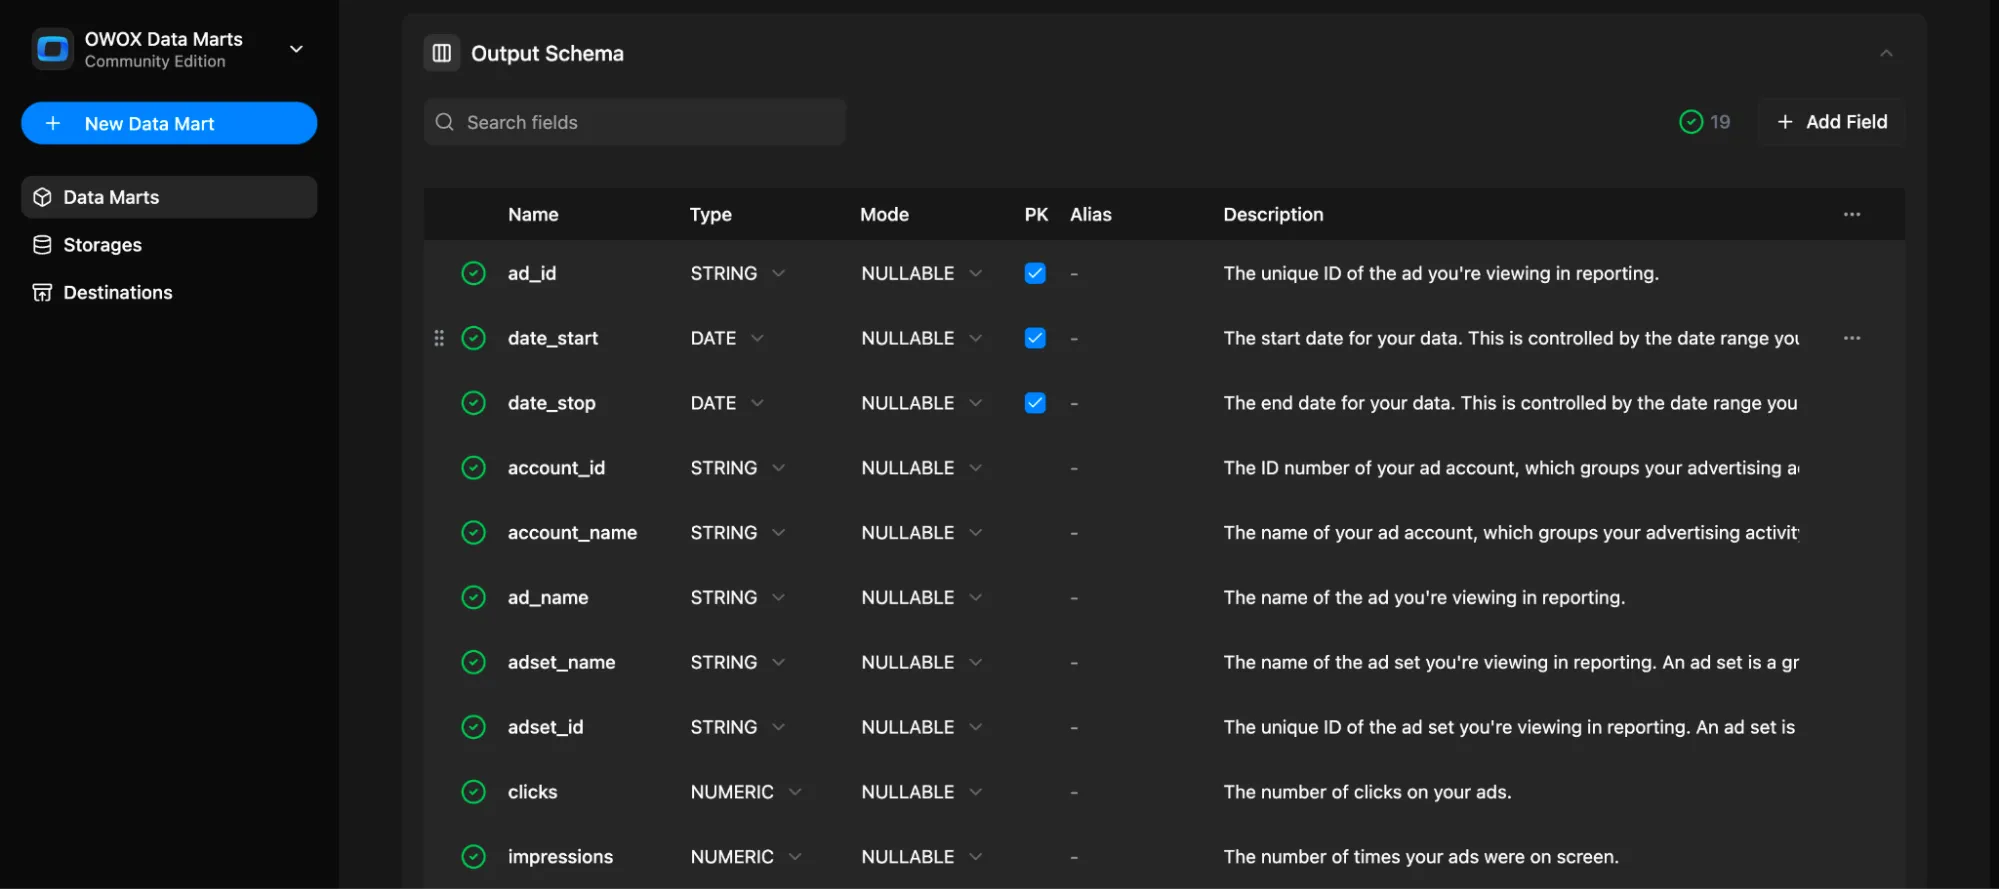
After the first run, you’ll see that the Output schema was generated automatically.
Each field includes:
- Name
- Data type
- Join key metadata
- Description
Next, you can add business-friendly names to improve usability later in BI tools as aliases.
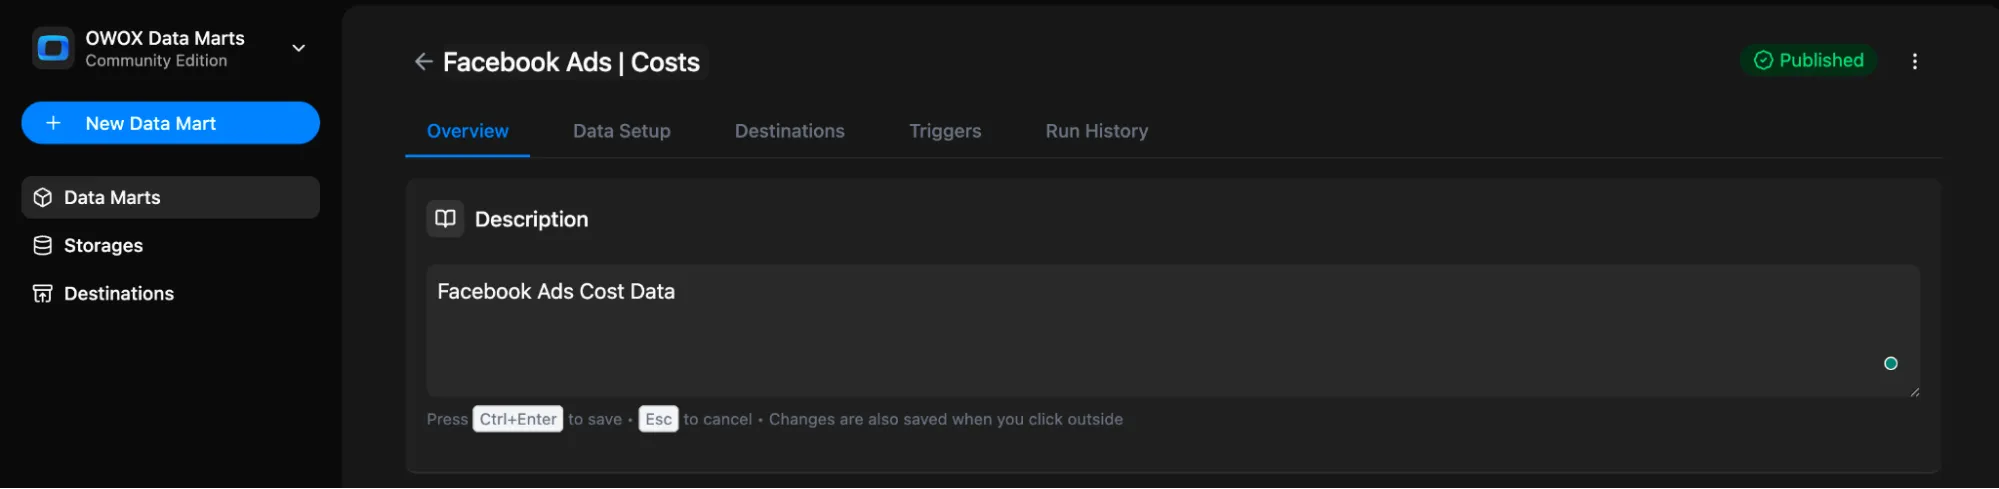
💡 Tip: Add a description to the Data Mart itself so you always know what that is all about.
Also you can check the Run History tab for logs and results
Backfill a custom period
Section titled “Backfill a custom period”Choose Backfill (custom period) in the Manual Run sheet to reload a date range from the source.
One backfill run covers at most 31 days, so a full calendar month fits in one run. The form shows how many days your period covers and rejects longer periods before the run starts. To reload a longer history, run several backfills with consecutive periods, one after another.
If a deploy or restart interrupts a backfill, the automatic retry resumes it. That retry starts from the day after the last one it fully loaded. It does not reload the days it already imported. Starting a backfill yourself always loads the whole period you choose. Shopify and TikTok Ads always reload the whole period.
Step 6: Set Triggers (Optional but Recommended)
Section titled “Step 6: Set Triggers (Optional but Recommended)”You can automate the connector by setting a trigger to run it on a schedule.
- Go to the Triggers tab and click + Add Trigger
- Choose Trigger Type:
Connector Run - Set schedule:
- Daily → choose time & timezone
- Weekly → select days of the week, time & timezone
- Monthly → select dates, time & timezone
- Interval → e.g., every 15 minutes
What’s Next?
Section titled “What’s Next?”- Create reports using this Data Mart
- Add a destination (Google Sheets, Data Studio, etc.)
- Explore the data in the Output Schema tab
- Share it with business users so they can build reports