Data Studio
Data Studio is a powerful data visualization tool that allows users to create interactive dashboards and reports.
Integration with Data Studio as a Destination for OWOX Data Marts enables seamless data access and visualization.
Step 1. Create a Destination entity
Section titled “Step 1. Create a Destination entity”- In the OWOX Data Marts web application, navigate to Destinations from the main navigation pane and click + New Destination.
- Select Data Studio from the Destination Type dropdown.
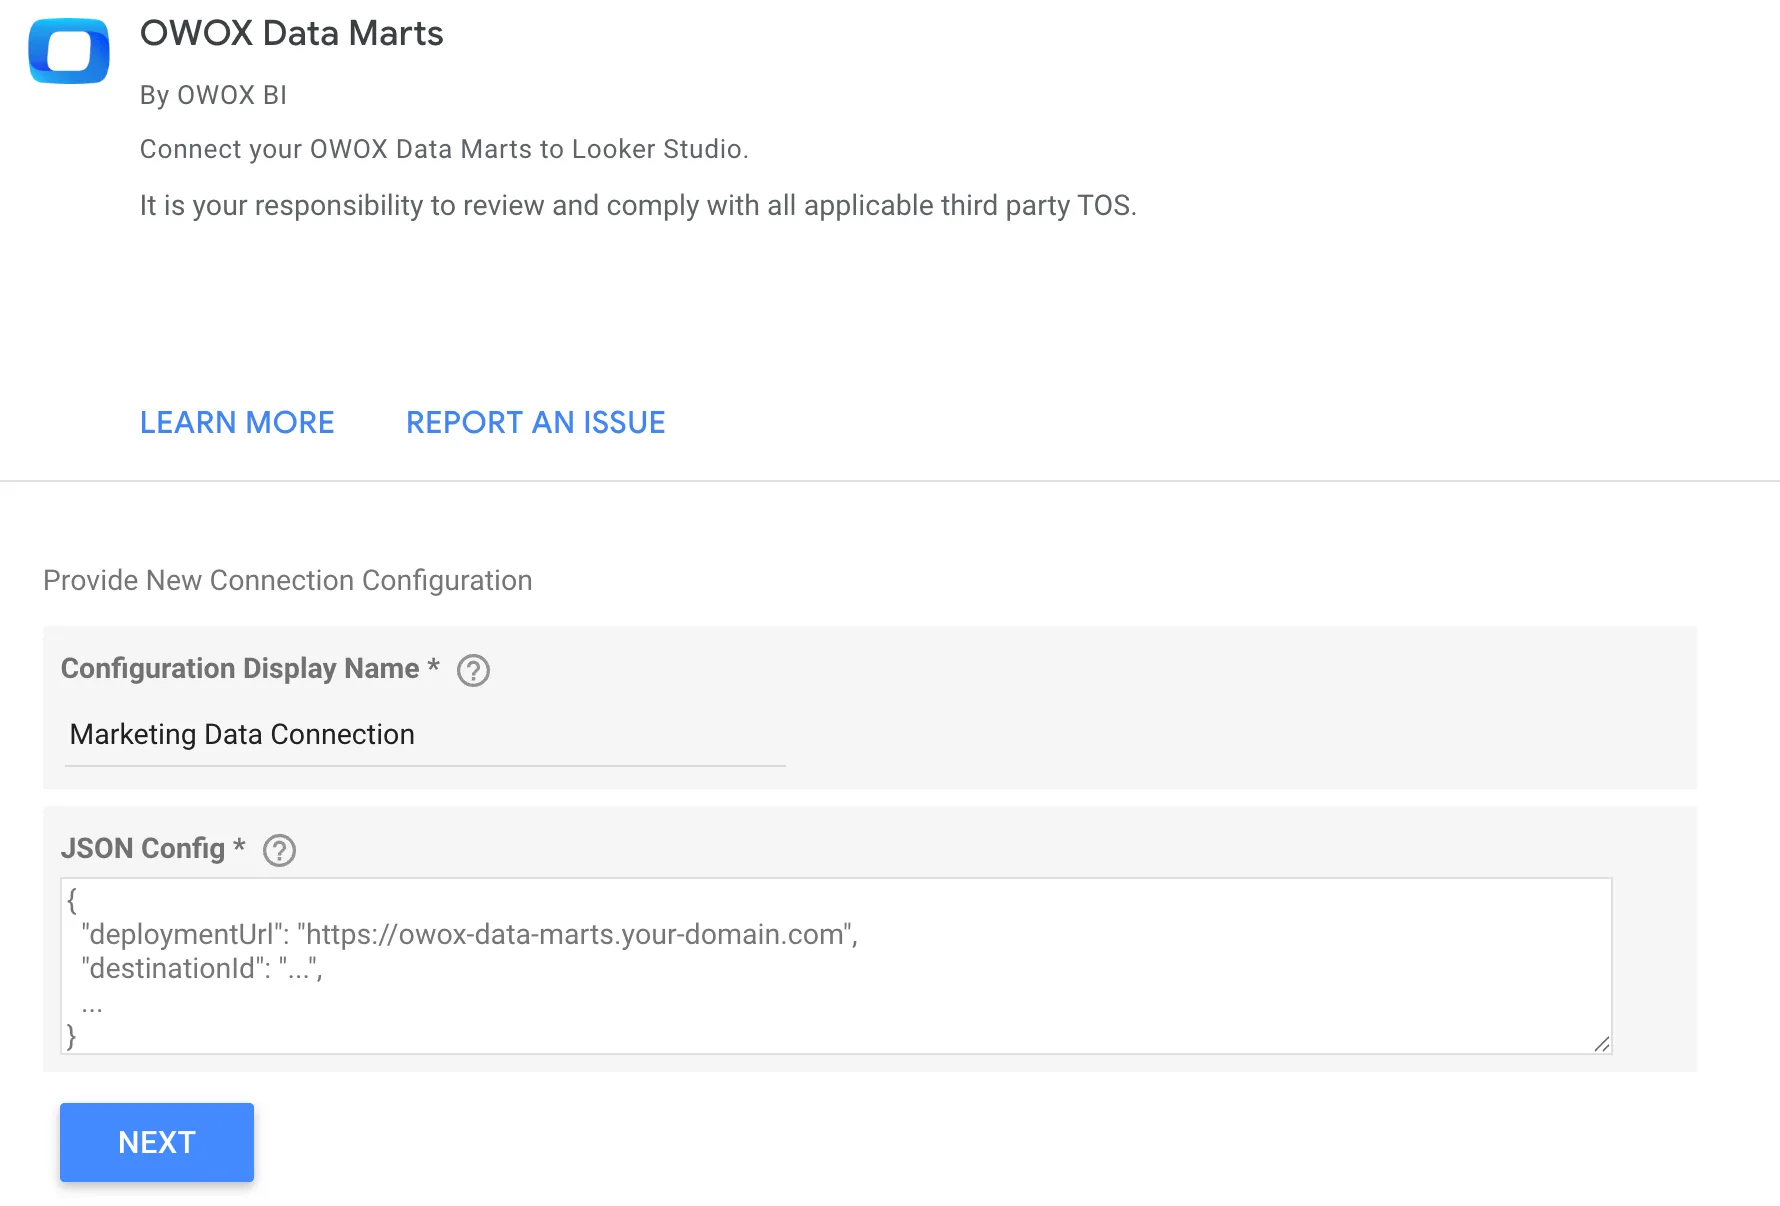
- Provide a Title — a unique name for this Destination (e.g., “Data Studio Access (Marketing Team)”).
- Enter the Deployment URL that Data Studio will use to initiate the connection to OWOX Data Marts:
- Use a secure URL (HTTPS is recommended) to protect data in transit. Example:
https://owox-data-marts.yourdomain.com. - Ensure your OWOX Data Marts server is deployed with a publicly accessible endpoint (e.g., via a domain or load balancer).
- If you use additional authorization to access your OWOX Data Marts server, make sure URLs with the pattern
/api/external/looker/*are accessible over the internet and point to your OWOX Data Marts instance.
- If you use additional authorization to access your OWOX Data Marts server, make sure URLs with the pattern
- Use a secure URL (HTTPS is recommended) to protect data in transit. Example:
- Copy the JSON Config to your clipboard and click Save.
- Click Save.
Step 2. Make a Data Mart accessible for Data Studio
Section titled “Step 2. Make a Data Mart accessible for Data Studio”- Open the Data Mart you want to make accessible in Data Studio and go to the Destinations tab.
- In corresponding Data Studio Destination, enable toggle with a single click to make the current Data Mart available for Data Studio.
- If needed, click on on the row in Destination section to adjust default Cache Lifetime based on how you want to control data freshness when Data Studio requests this data:
- This setting defines the period during which results from previous query executions are served from the storage-side cache, eliminating the need to re-execute the query.
Step 3. Add a Data Source in Data Studio
Section titled “Step 3. Add a Data Source in Data Studio”- Find the OWOX Data Marts connector in Data Studio’s Gallery.
- Authorize with your Google Account (Data Studio requires authorization to connect to data).
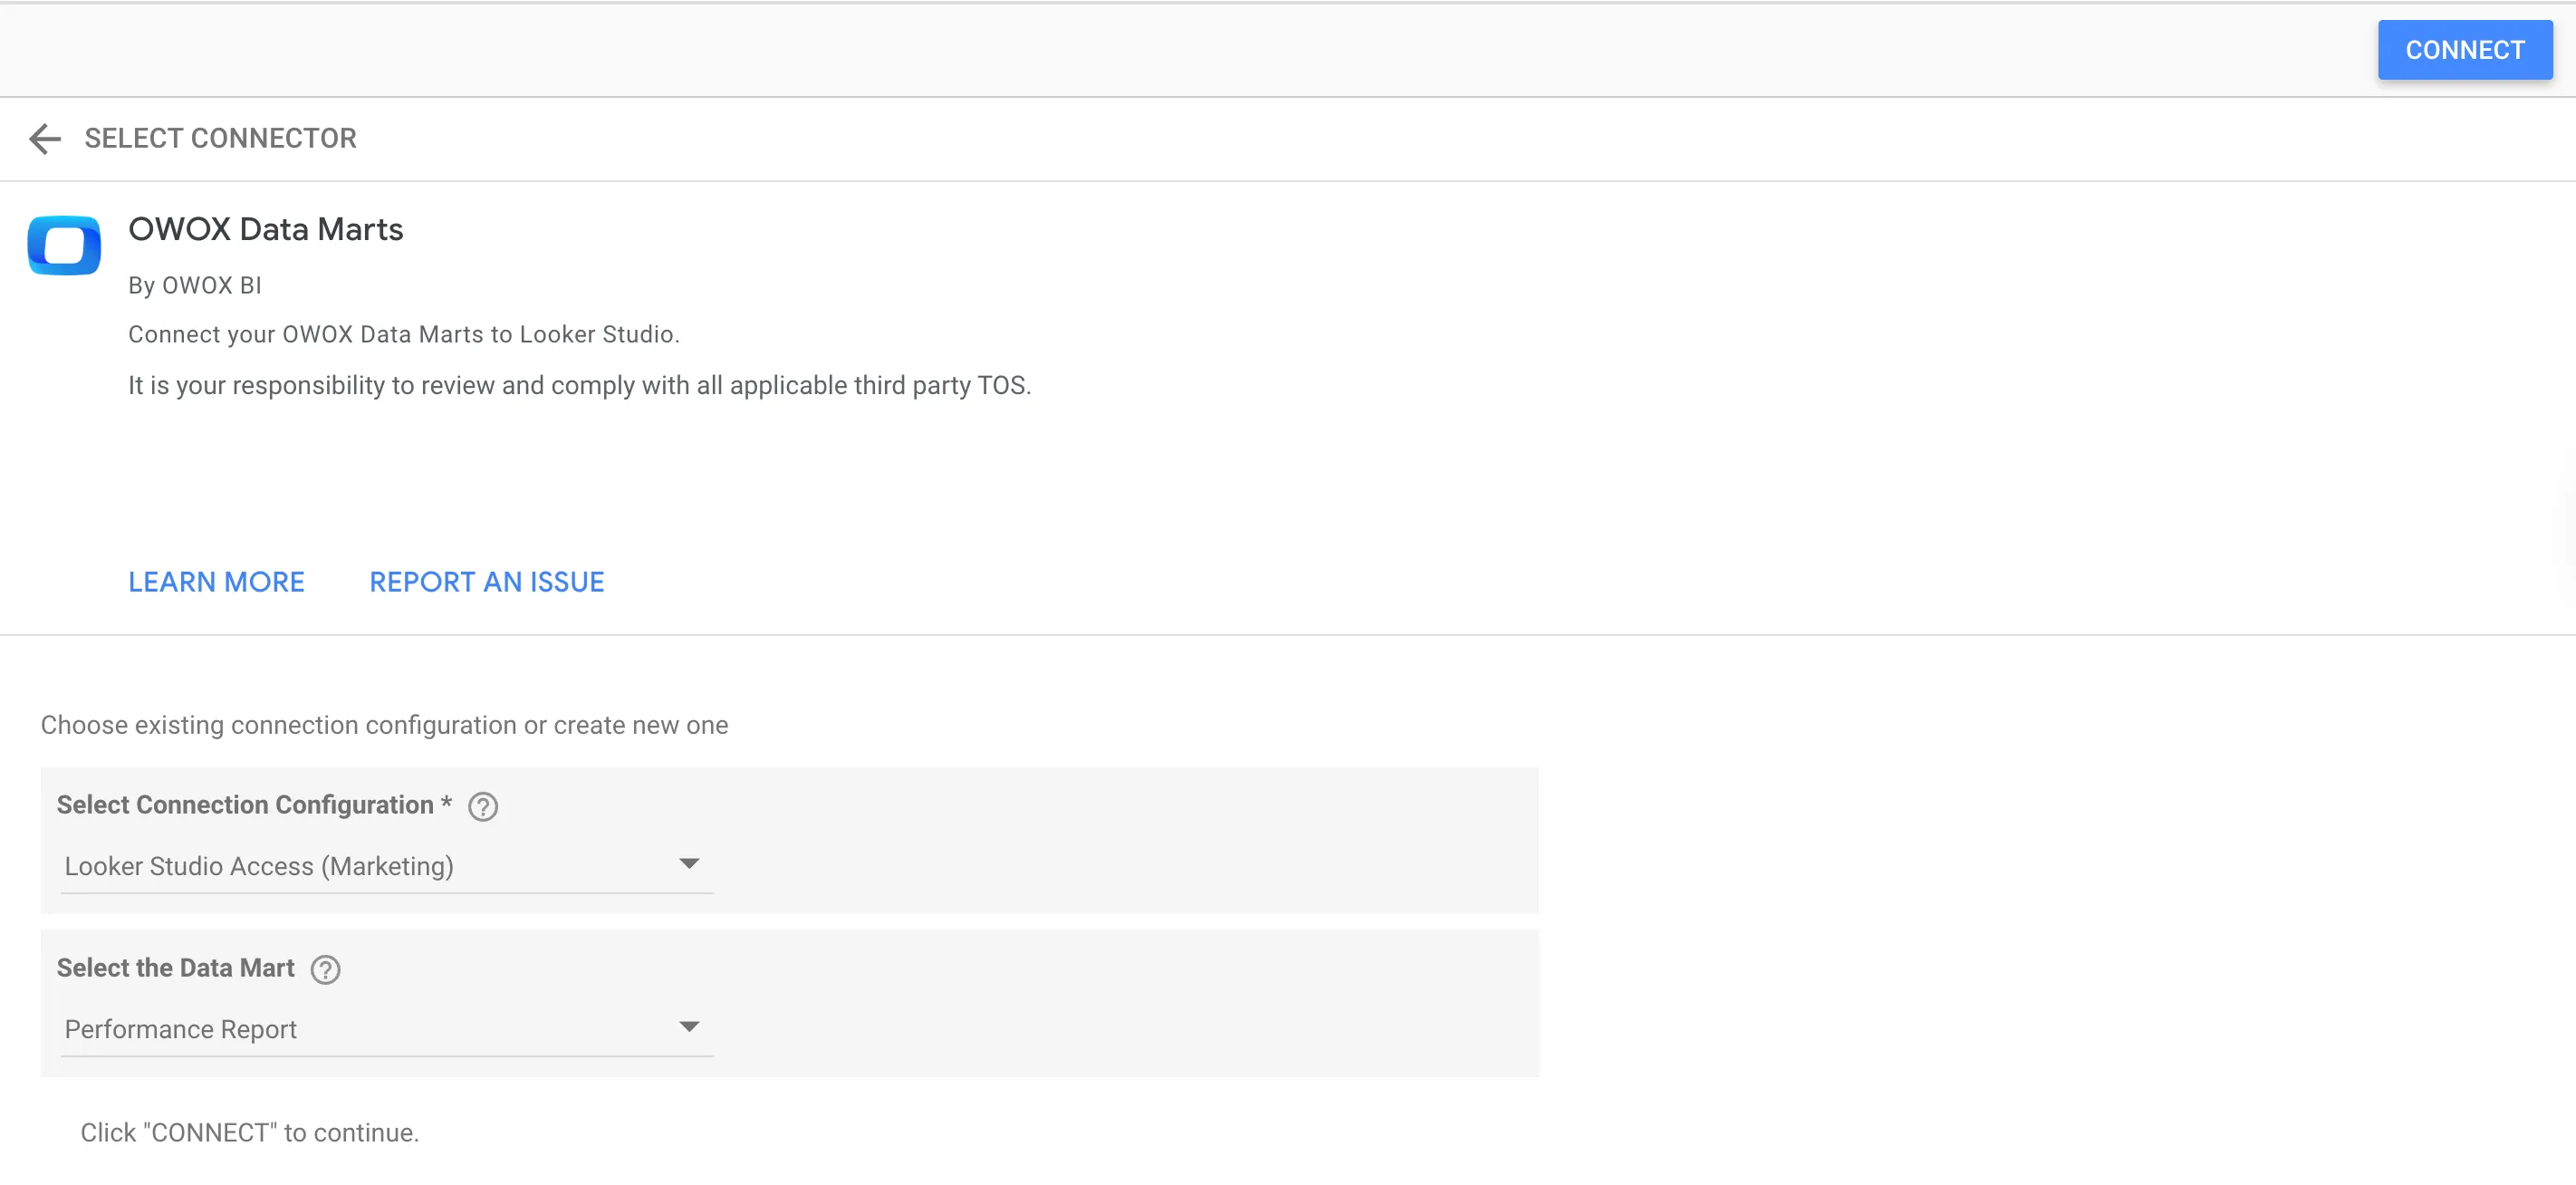
- Provide a Configuration Display Name — a unique name to help you distinguish different connections (e.g., “Data Studio Access (Marketing)”).
- Paste the value from your clipboard into the JSON Config field and click Next.
- Select the Connection Configuration you created previously and click Next.
- Select a Data Mart and click Connect.
- Make sure all the required fields are connected this Data Studio’s data source and click Create Report or Explore.
- You can control the name and description of fields shown in Data Studio via the Output Schema of the Data Mart in your OWOX Data Marts web application.
⚠️ Note: Data from Data Marts is delivered to Data Studio via streaming, so each
getData()call must stay within Data Studio’s limit of 1,000,000 rows or 50 MB of data. Refer to the official documentation for more details. If you encounter issues or slow performance, try reducing the number of rows you request to stay under the limit.
Connector in Data Studio (first step):
Connector in Data Studio (second step):
For additional guidance or troubleshooting, refer to the OWOX Community