LinkedIn Ads
This guide will walk you through the process of collecting the LinkedIn Ads data directly into Google Sheets. It provides access to advertiser information, campaigns, ad groups, ads, performance metrics, and custom audiences.
Step 1: Configure the connector
Section titled “Step 1: Configure the connector”To initiate the data import process from LinkedIn Ads, begin by creating a copy of a LinkedIn Ads → Google Sheets Template
Once you have copied the template, proceed with the configuration steps:
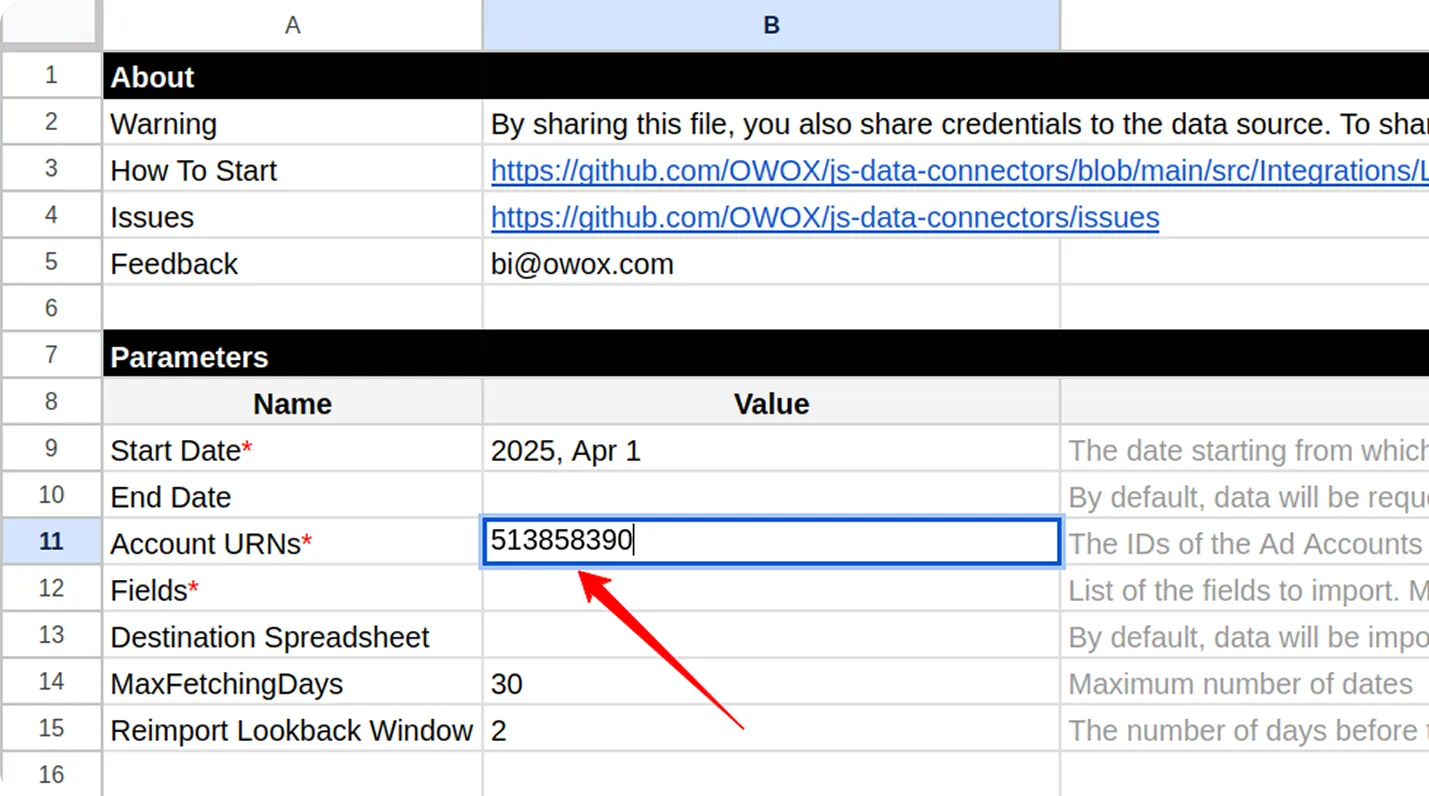
- In your newly copied spreadsheet, navigate to the “Config” sheet and add the Account URN.
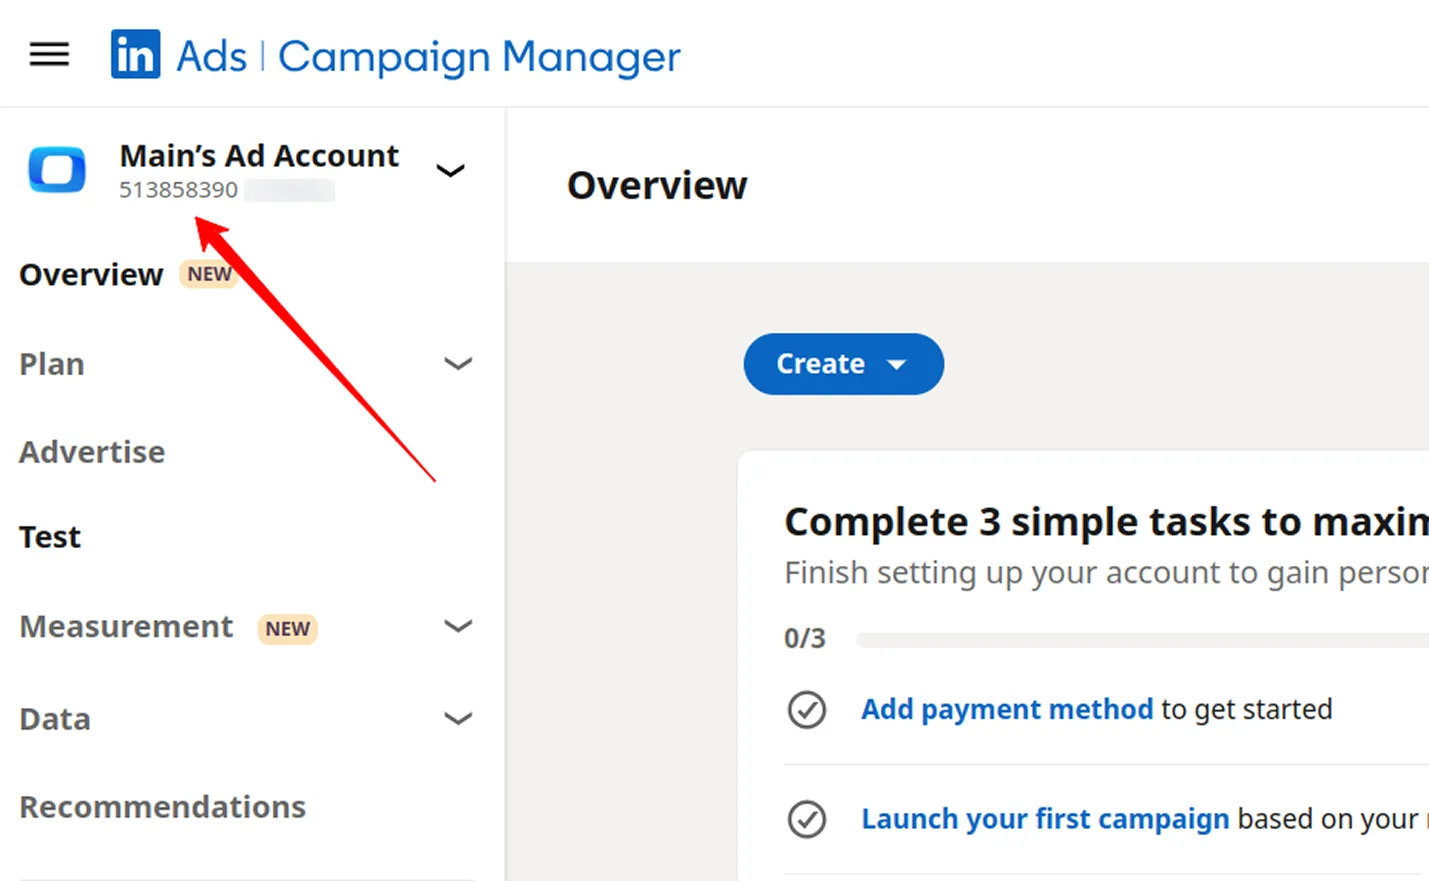
You can find your Account URN on the homepage of your LinkedIn Ads account:
Copy and paste the URN into the appropriate field in the spreadsheet:
Step 2: Select Fields to Import
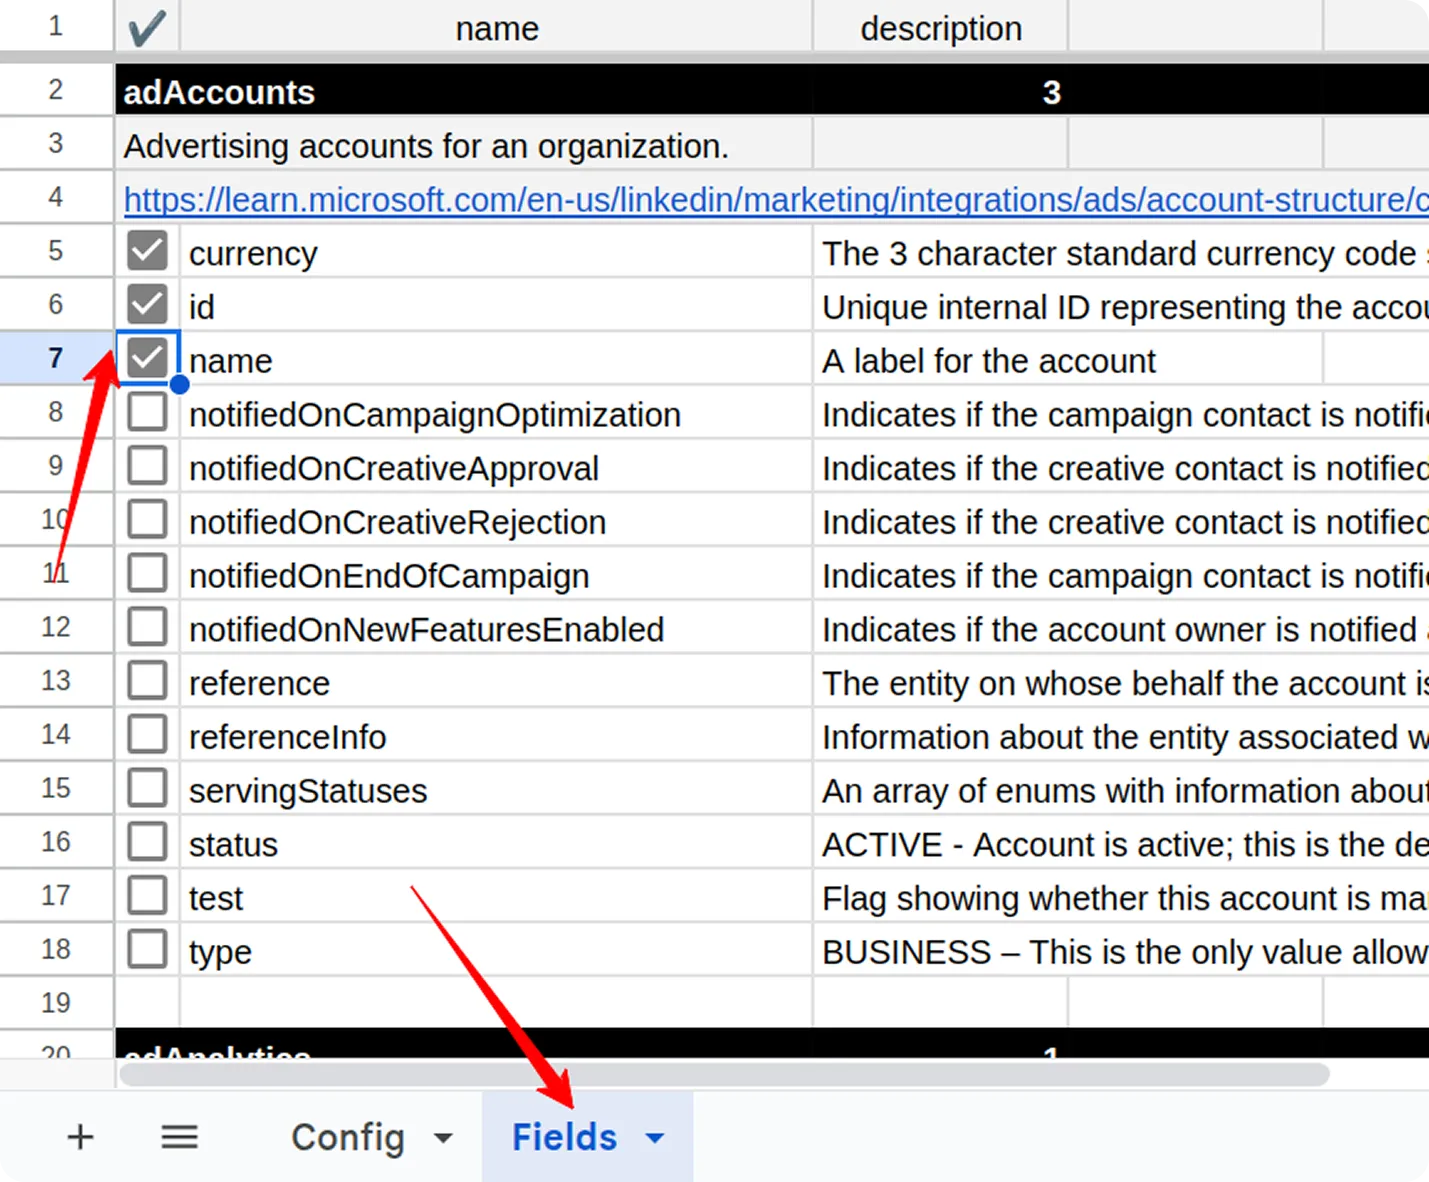
Section titled “Step 2: Select Fields to Import”Several common data fields are pre-selected by default. To include additional fields in your import, go to the “Fields” tab and check the boxes next to the desired fields.
Step 3: Fill in Access Credentials
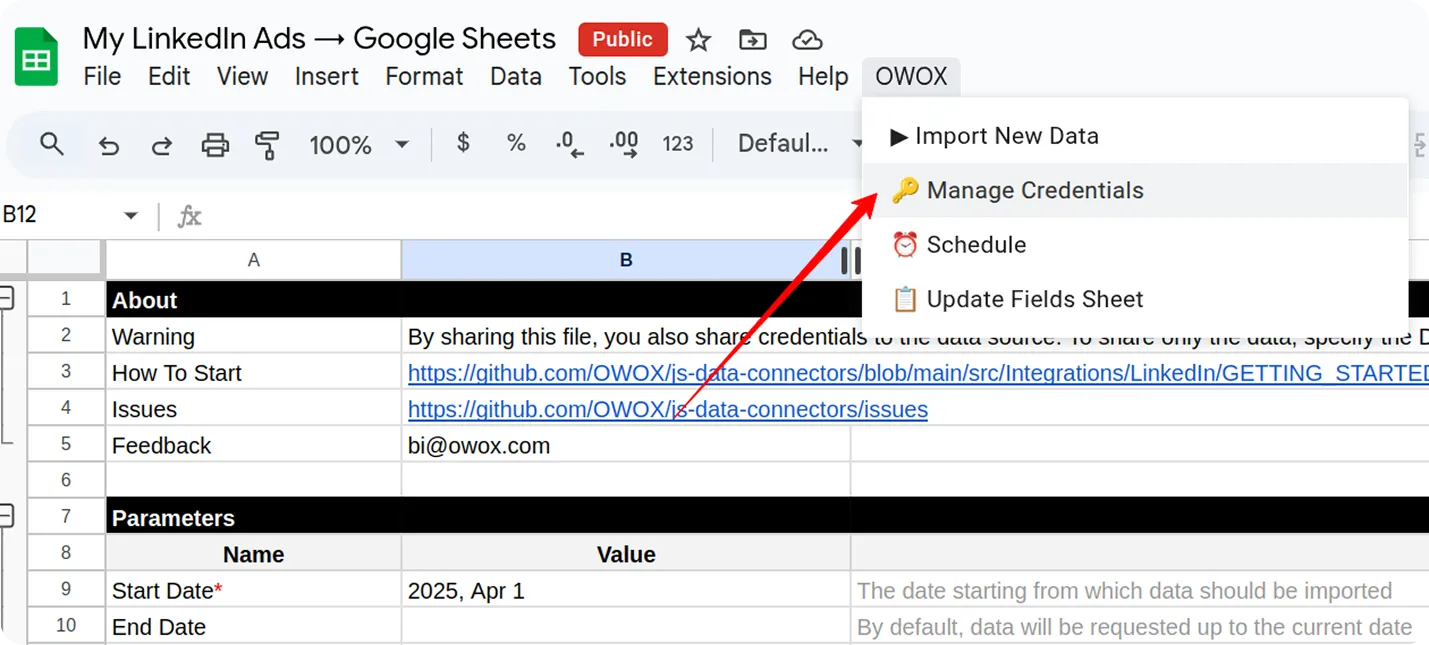
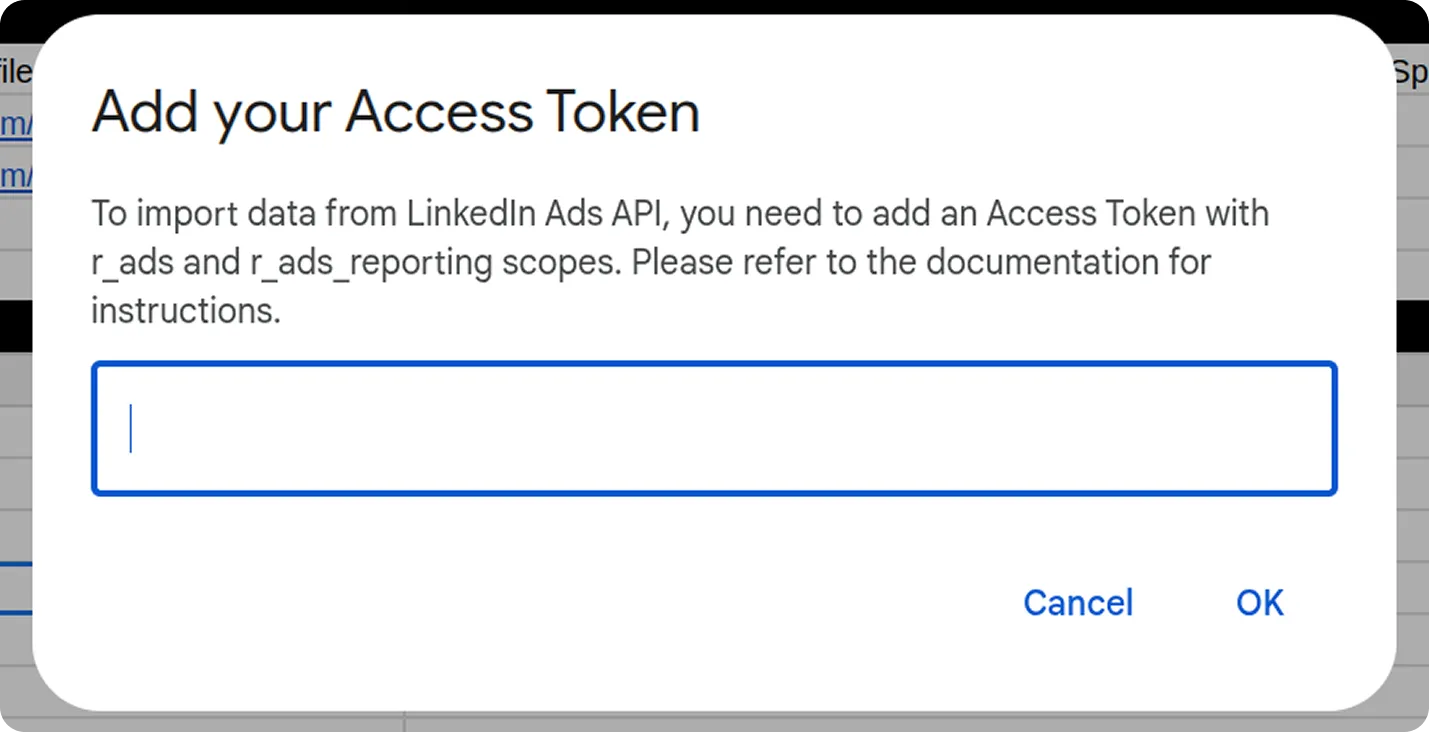
Section titled “Step 3: Fill in Access Credentials”Next, access the custom menu: OWOX → Manage Credentials.
Enter your Access Token obtained by following this tutorial: How to obtain the credentials for the LinkedIn Ads connector.
Step 3: Run connector
Section titled “Step 3: Run connector”Now you have two options for importing LinkedIn Ads data:
Option 1: Import Current Day’s Data
Section titled “Option 1: Import Current Day’s Data”Choose OWOX → Import New Data to load data for the current day.
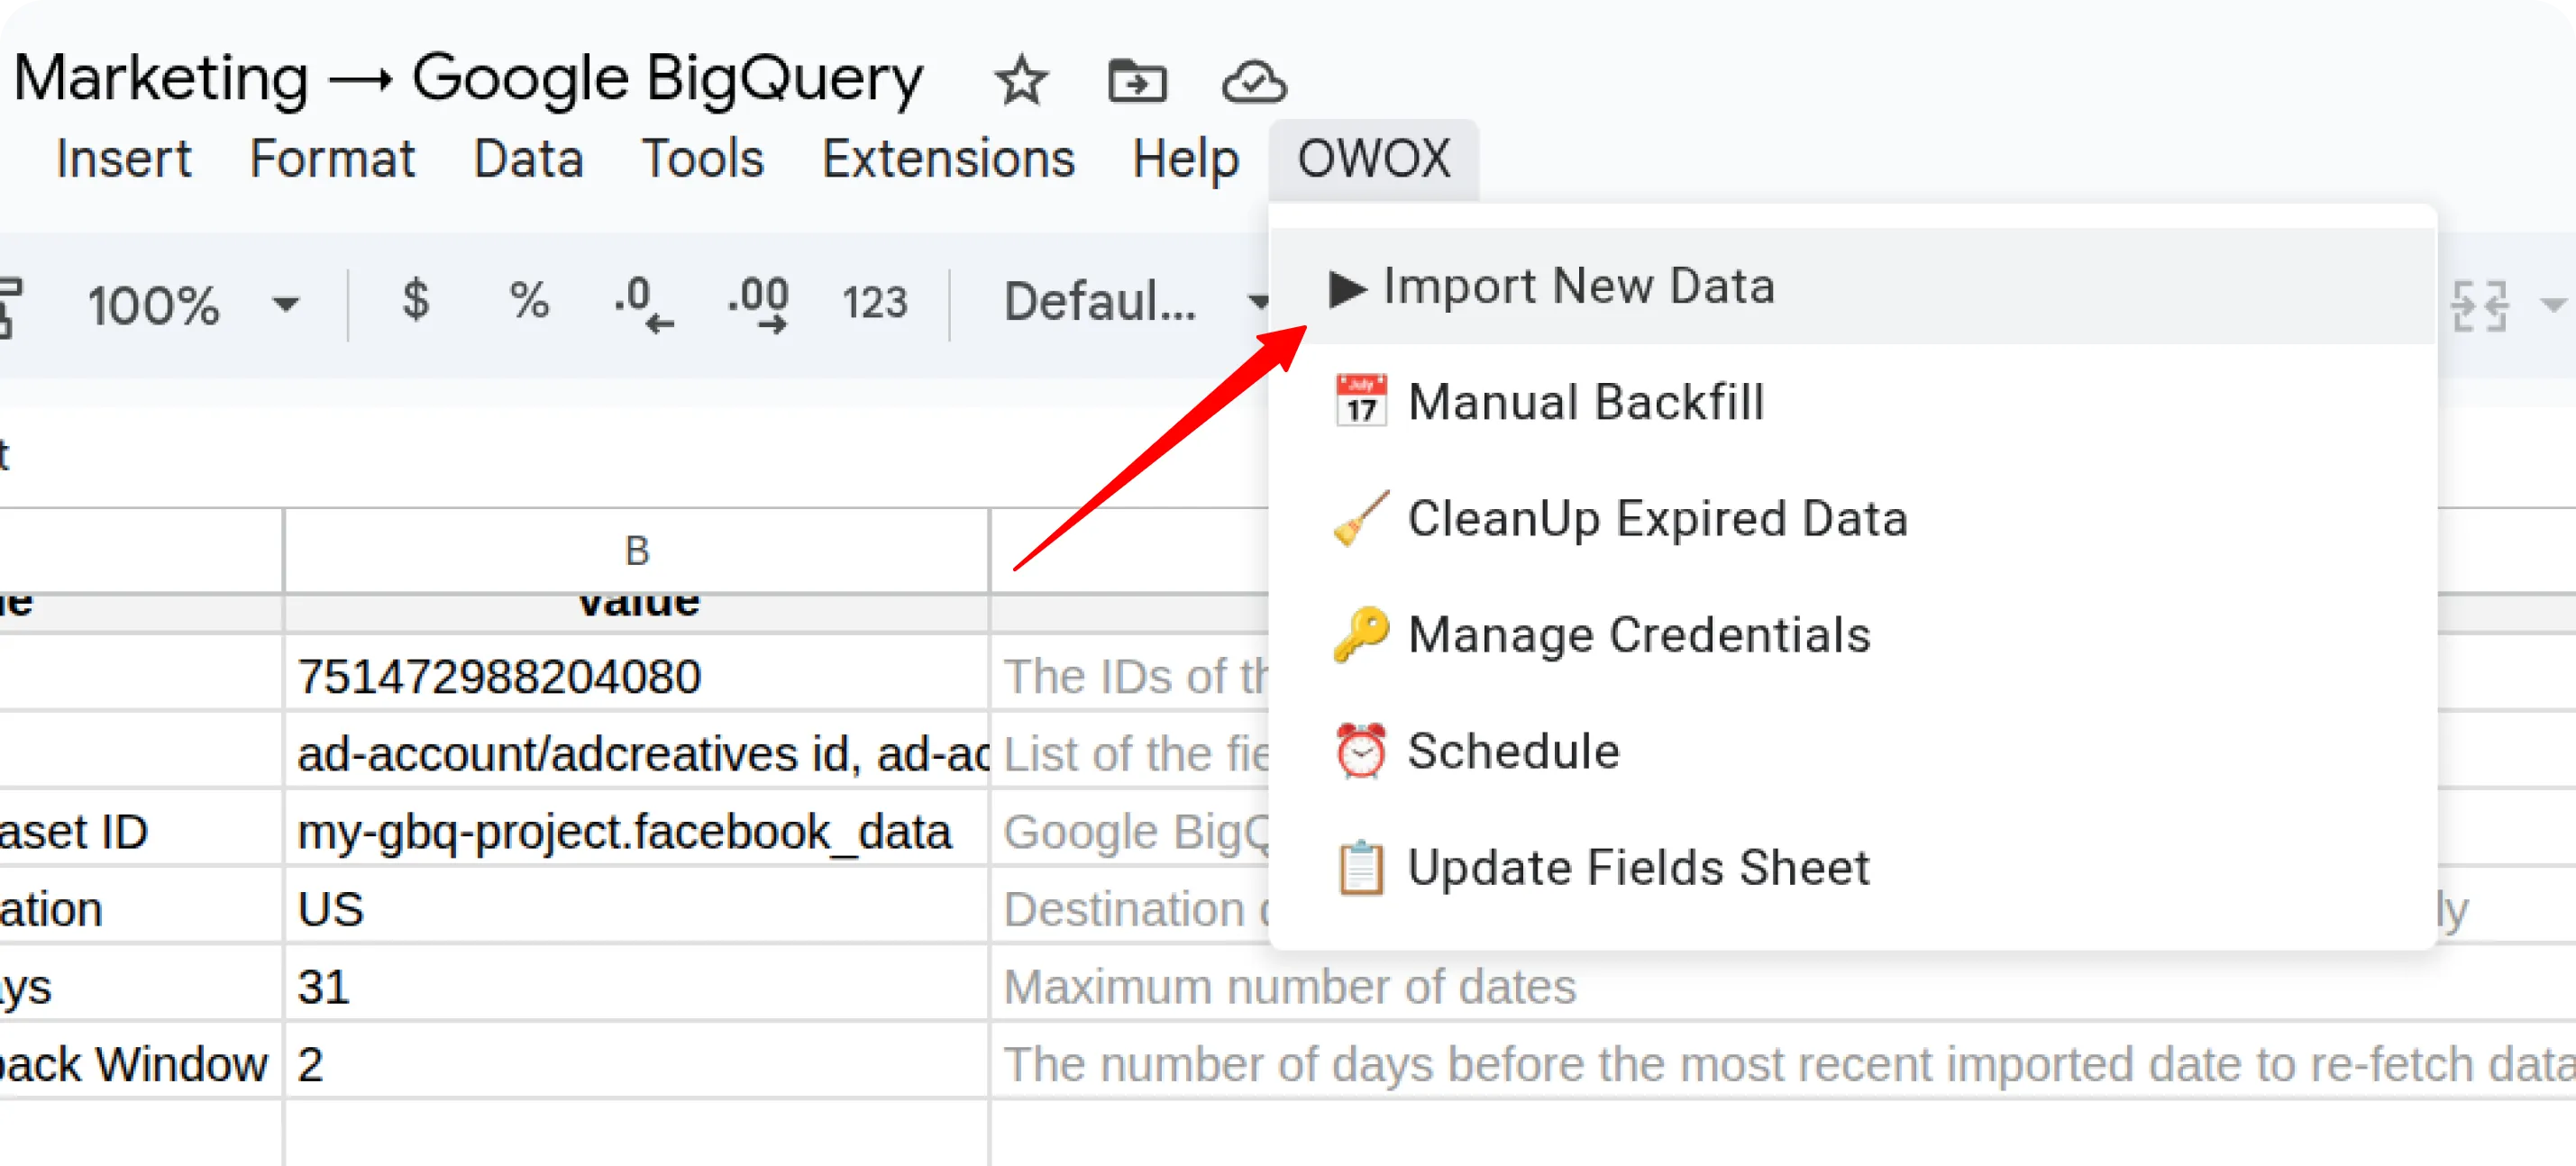
ℹ️ If you click Import New Data again after a successful initial load,
the connector will import: Current day’s data, plus Additional days, based on the value in the Reimport Lookback Window field.
Option 2: Manual Backfill for Specific Date Range
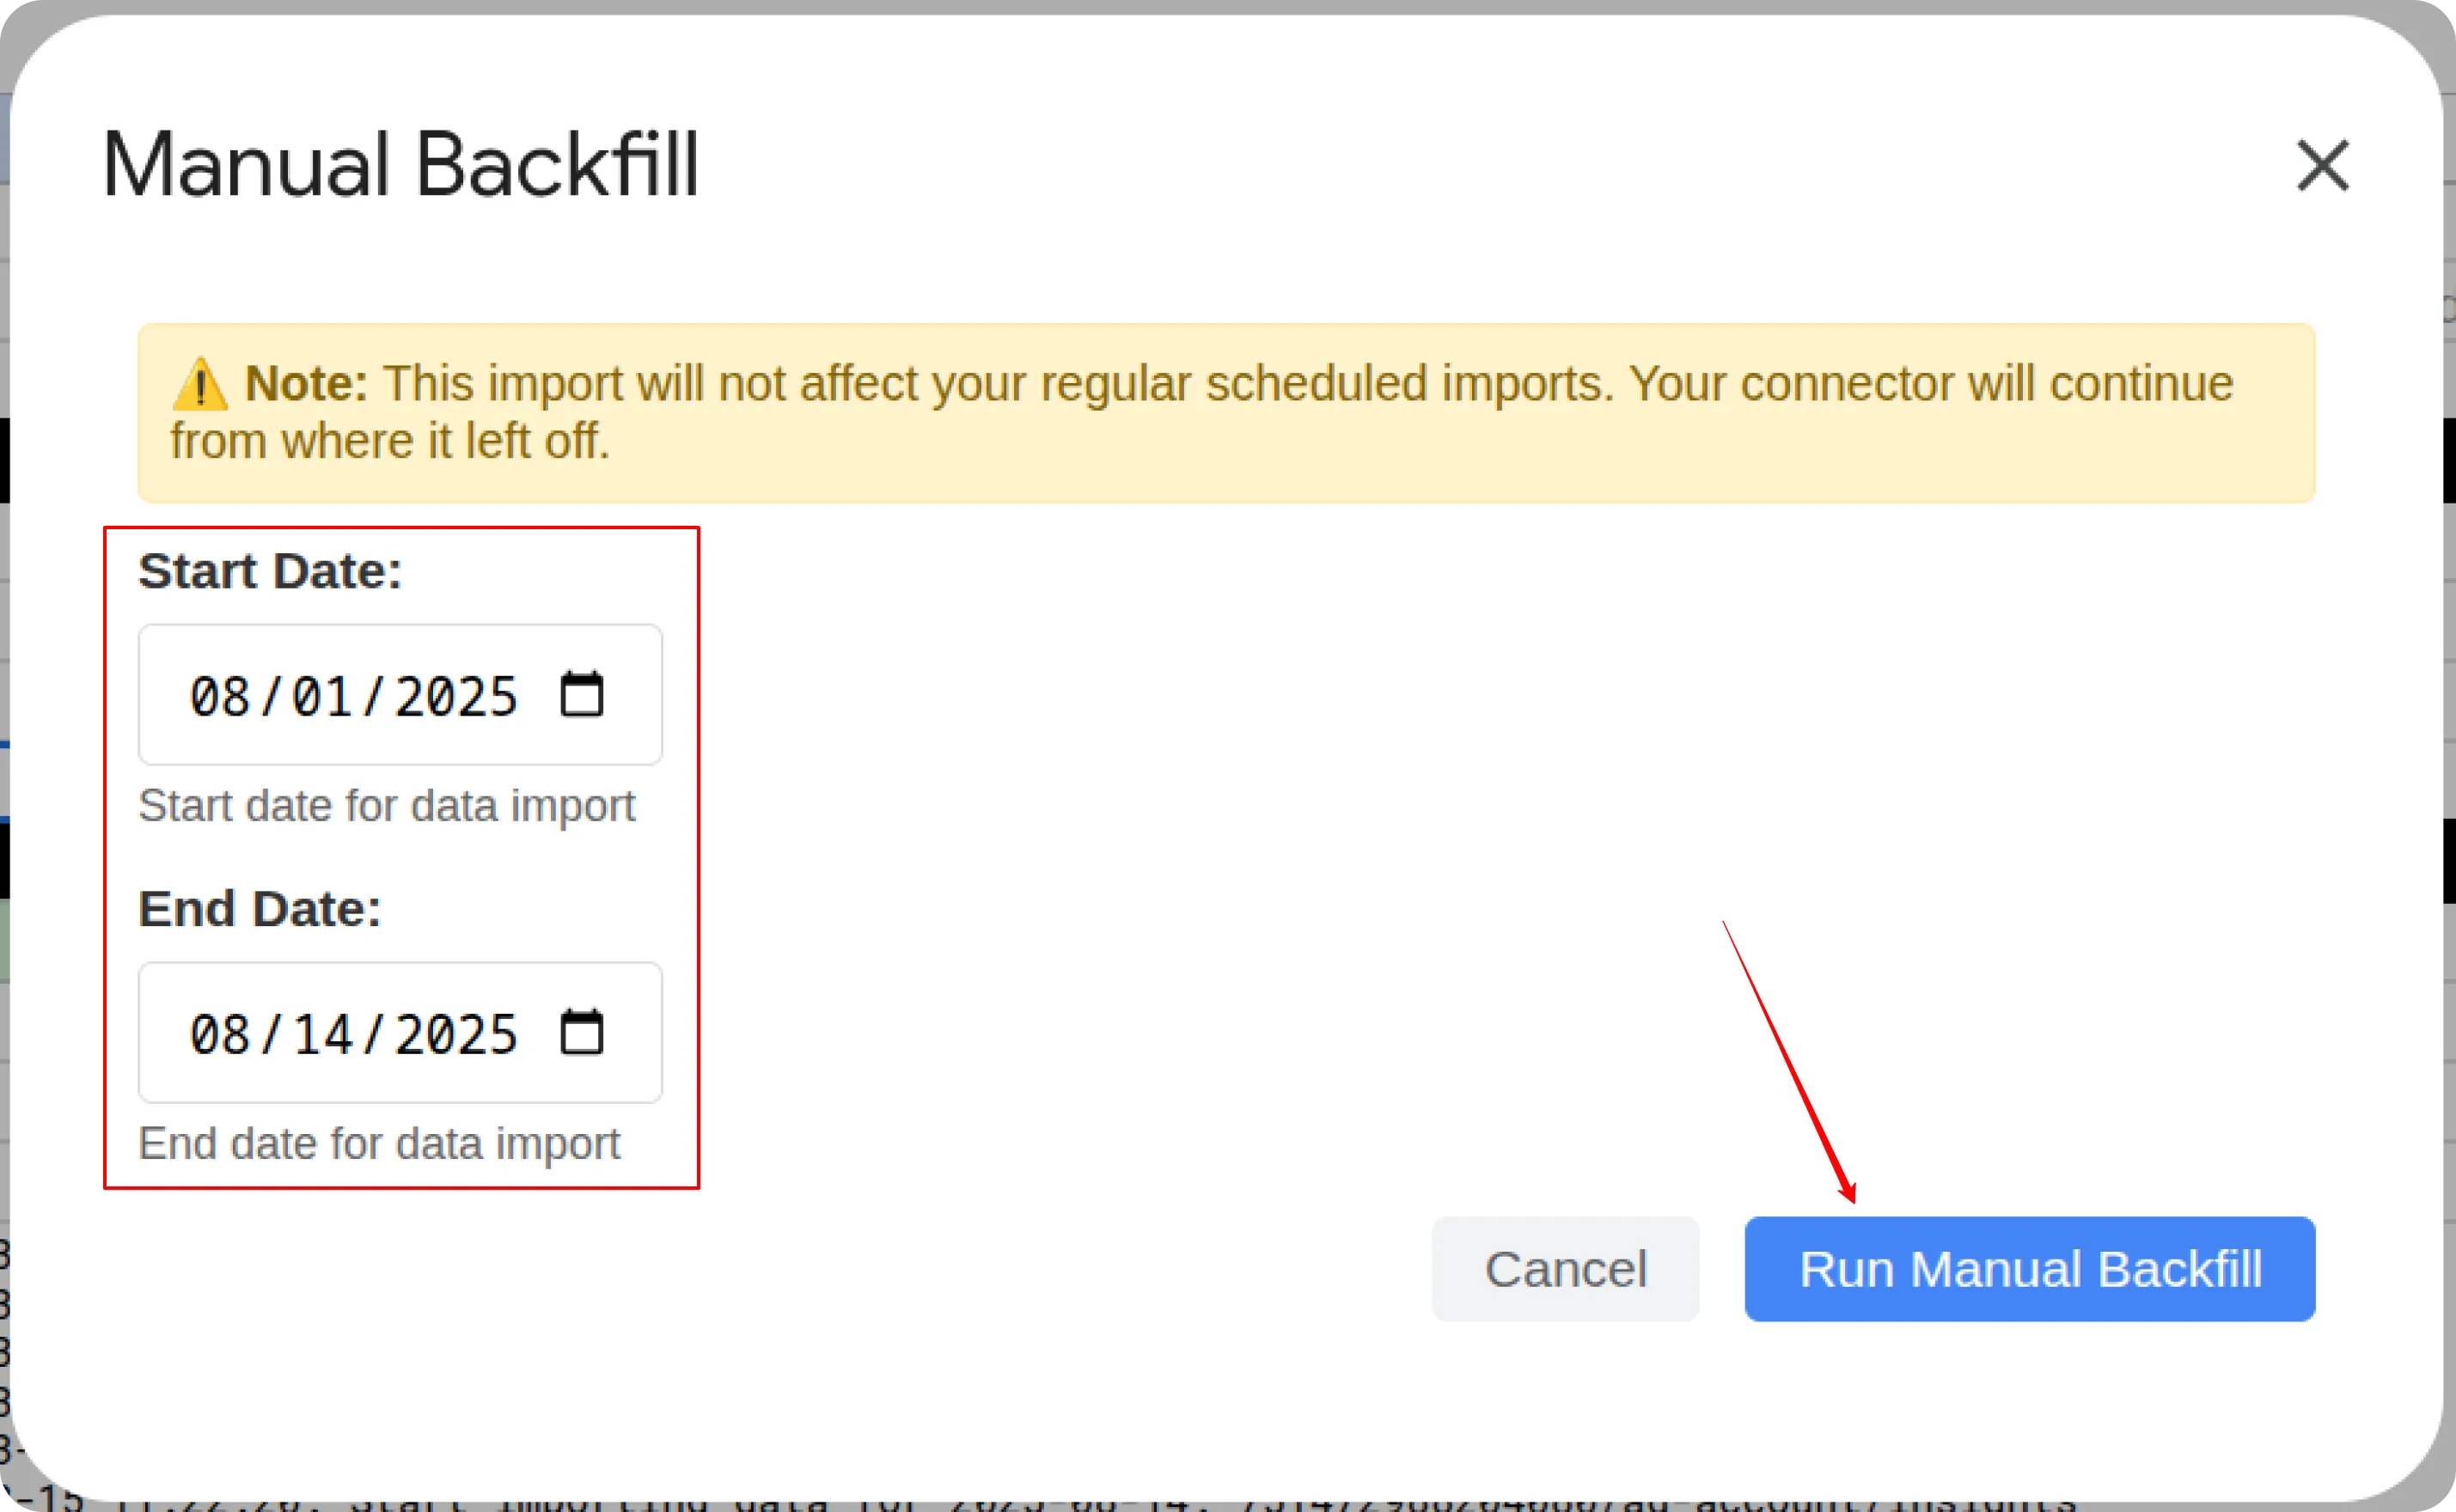
Section titled “Option 2: Manual Backfill for Specific Date Range”Choose Manual Backfill to load historical data for a custom time range.
- Select the Start Date and End Date
- Click the Run Manual Backfill button
The process is complete when the Log field shows the message:
“Import is finished”
Finally, your data will appear in new tabs labeled with the corresponding API endpoint types.
To import more data:
- Select the additional fields you need in the Fields tab.
- Go to OWOX → Import New Data or OWOX → Run Manual Backfill again.
Step 4: Schedule Your Connector
Section titled “Step 4: Schedule Your Connector”- Daily Schedule: To set up an automatic daily import, select “OWOX” > “Schedule” > “Set Daily Schedule”
- Hourly Schedule: To configure an automatic hourly import, select “OWOX” > “Schedule” > “Set Hourly Schedule”
- Remove Schedules: To disable all existing scheduled runs, select “OWOX” > “Schedule” > “Delete All Schedules”
Getting Help
Section titled “Getting Help”Should you encounter any issues or questions not addressed in this guide:
- Check Logs: Review the “Logs” sheet in your spreadsheet for specific error messages, which can often provide clues to the problem.
- Visit Q&A: Before opening a new issue, please check the existing discussions and answers in our Q&A section.
- Report a Bug: If you identify a bug, please open an issue on our GitHub repository.
- Join the Discussion: Feel free to join our discussion forum to ask questions, share insights, or propose improvements to the source.
License
Section titled “License”This source is part of the OWOX Data Marts project and is distributed under the MIT license.