Google BigQuery
1. Go to the Storages Page
Section titled “1. Go to the Storages Page”In the OWOX Data Marts web application, navigate to Storages from the main navigation pane and click + New Storage.
2. Choose Storage Type
Section titled “2. Choose Storage Type”Click Google BigQuery to create a new Storage configuration.
☝️ Upon selecting the + New Storage button and specifying the desired storage type, a Storage entry is created. You can create Data Mart entities and model a data structure for your project prior to configuring the Storage.
Note that Data Mart cannot be validated or published until the associated Storage is fully configured.
3. Add title
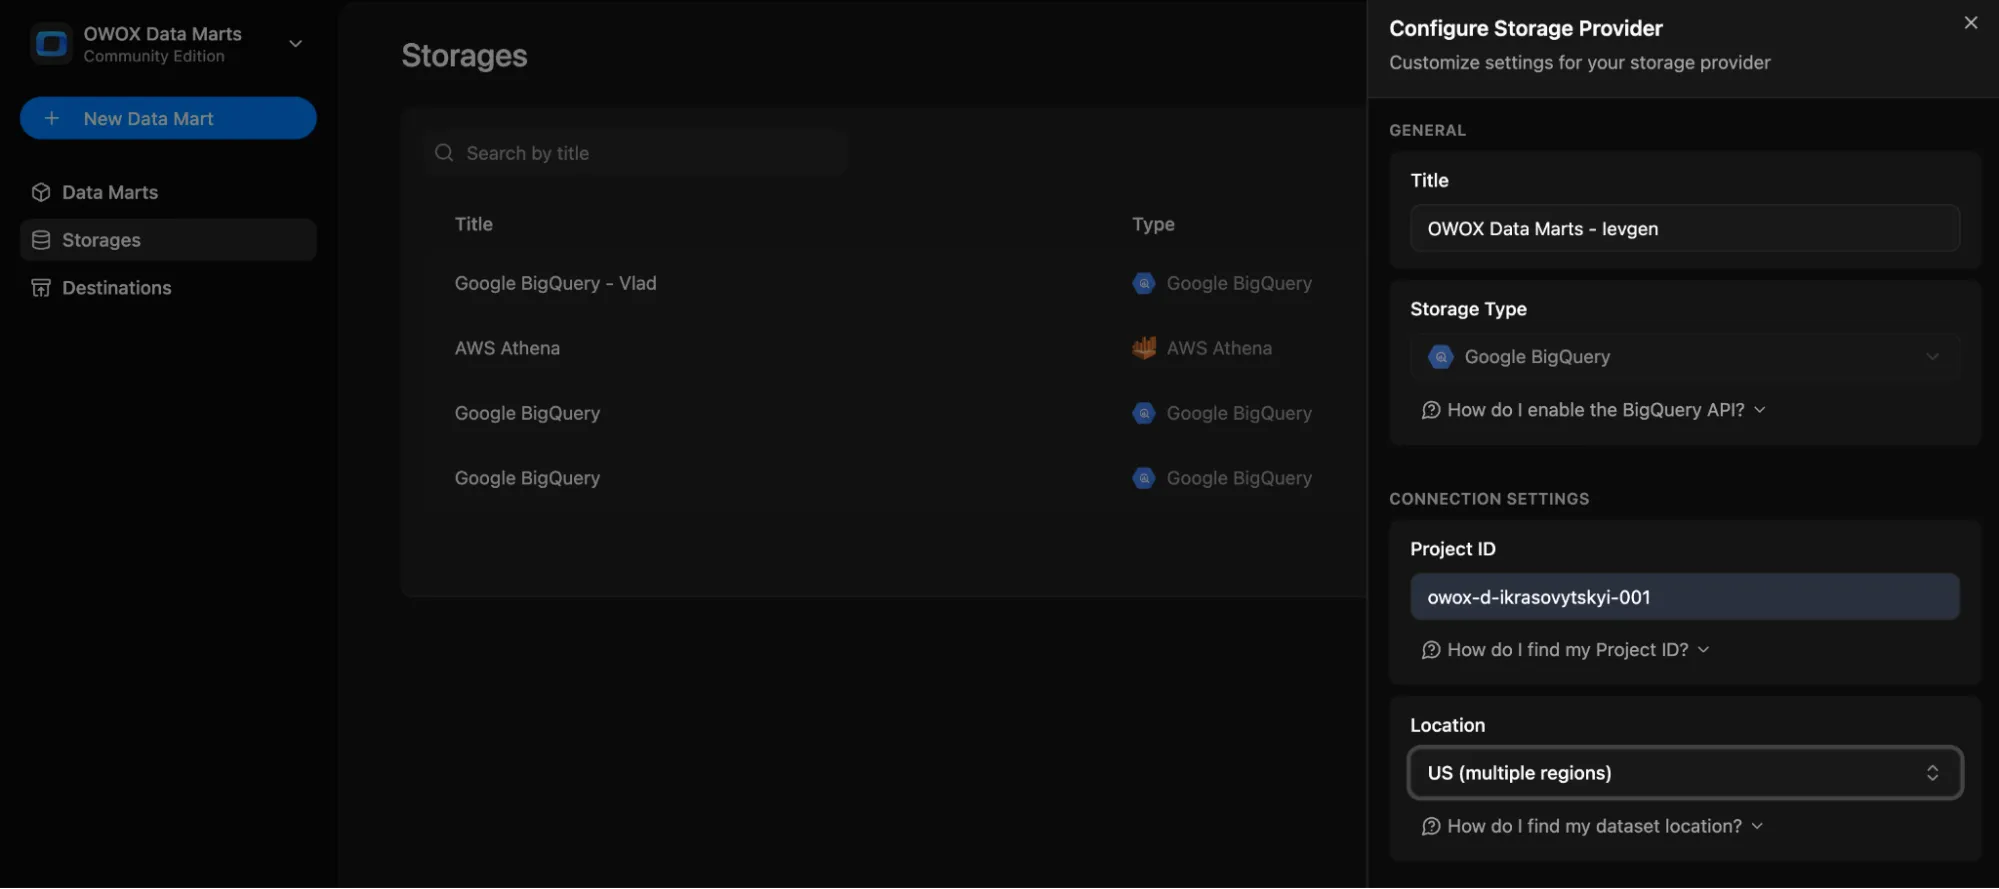
Section titled “3. Add title”Give the storage configuration a clear title, eg OWOX Data Marts – Your Name.
4. Set General Settings and Connection Details
Section titled “4. Set General Settings and Connection Details”Enter Project ID
Section titled “Enter Project ID”- Go to the Google Cloud Console
- Click the project selector dropdown at the top
- Find your project and copy the Project ID
NOTE: BigQuery usage costs will be applied to this project.
Select location
Section titled “Select location”- Choose a data location (e.g.,
US,EU) from the dropdown menu
Choose Authentication Method
Section titled “Choose Authentication Method”OWOX Data Marts supports two authentication methods for BigQuery:
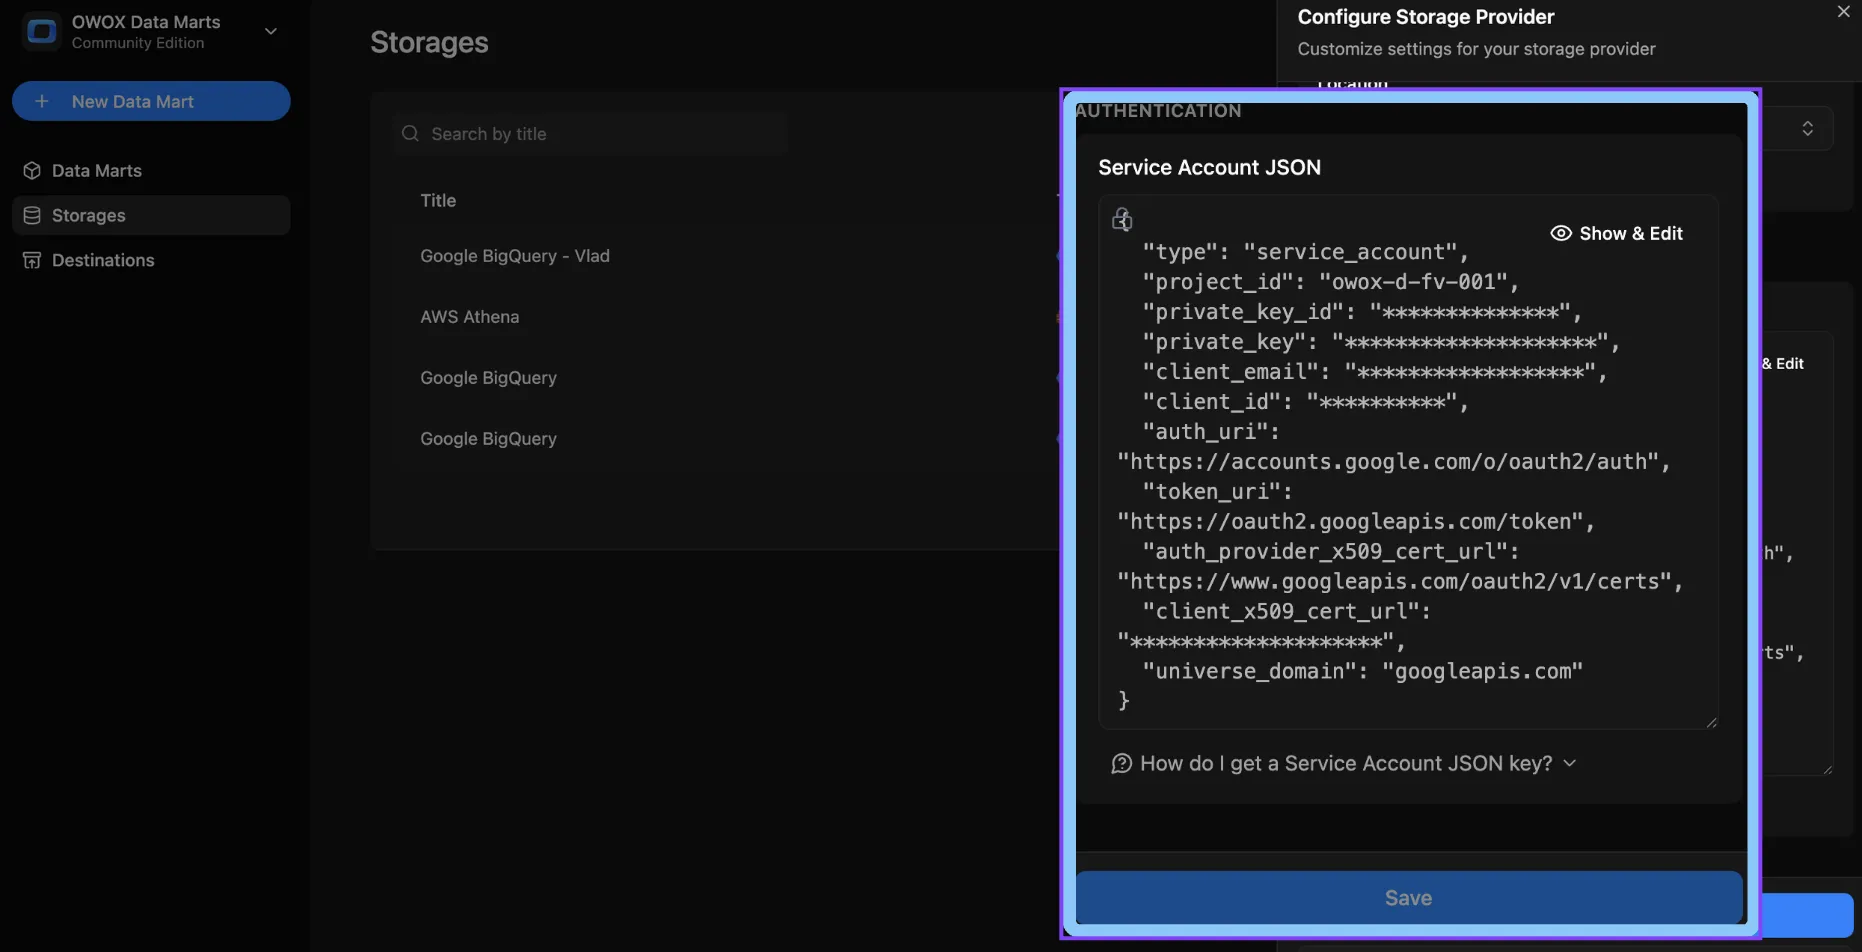
Option A: Service Account (JSON Key)
Section titled “Option A: Service Account (JSON Key)”To get the JSON key, you’ll need to create or use an existing service account in Google Cloud.
✅ Best Practice: Always use a dedicated service account with least-privilege access for security and auditability.
How to obtain the service account key
Section titled “How to obtain the service account key”- Go to the Service Accounts page
- Navigate to IAM & Admin → Service Accounts
- Create a new account or choose an existing one
- Assign the roles:
BigQuery Data EditorBigQuery Job User
- Go to the Keys tab, click Add key → Create new key
- Choose JSON, click Create, and download the file
- Copy the contents of the JSON file and paste it into the Service Account JSON field
Option B: Google OAuth
Section titled “Option B: Google OAuth”Click Connect Google Account to authenticate using your personal Google account via OAuth. You will be redirected to Google’s consent screen to grant BigQuery access. Once authorized, your account will be linked to this Storage.
Note: The authenticated Google account must have
BigQuery Data EditorandBigQuery Job Userroles in the target project. OAuth tokens are automatically refreshed. If your session expires or access is revoked, you can reconnect at any time.
Enable BigQuery API
Section titled “Enable BigQuery API”- Open the BigQuery API Library page
- Ensure the correct Google Cloud project is selected
- If the API isn’t enabled, click Enable
- If already enabled, you’ll see the API dashboard
5. Finalize Setup
Section titled “5. Finalize Setup”Review your entries and click Save to add the Storage configuration, or Cancel to exit without saving.