How to Import Data from the GitHub Source
Before proceeding, please make sure that you have set up OWOX Data Marts and created at least one storage in the Storages section.
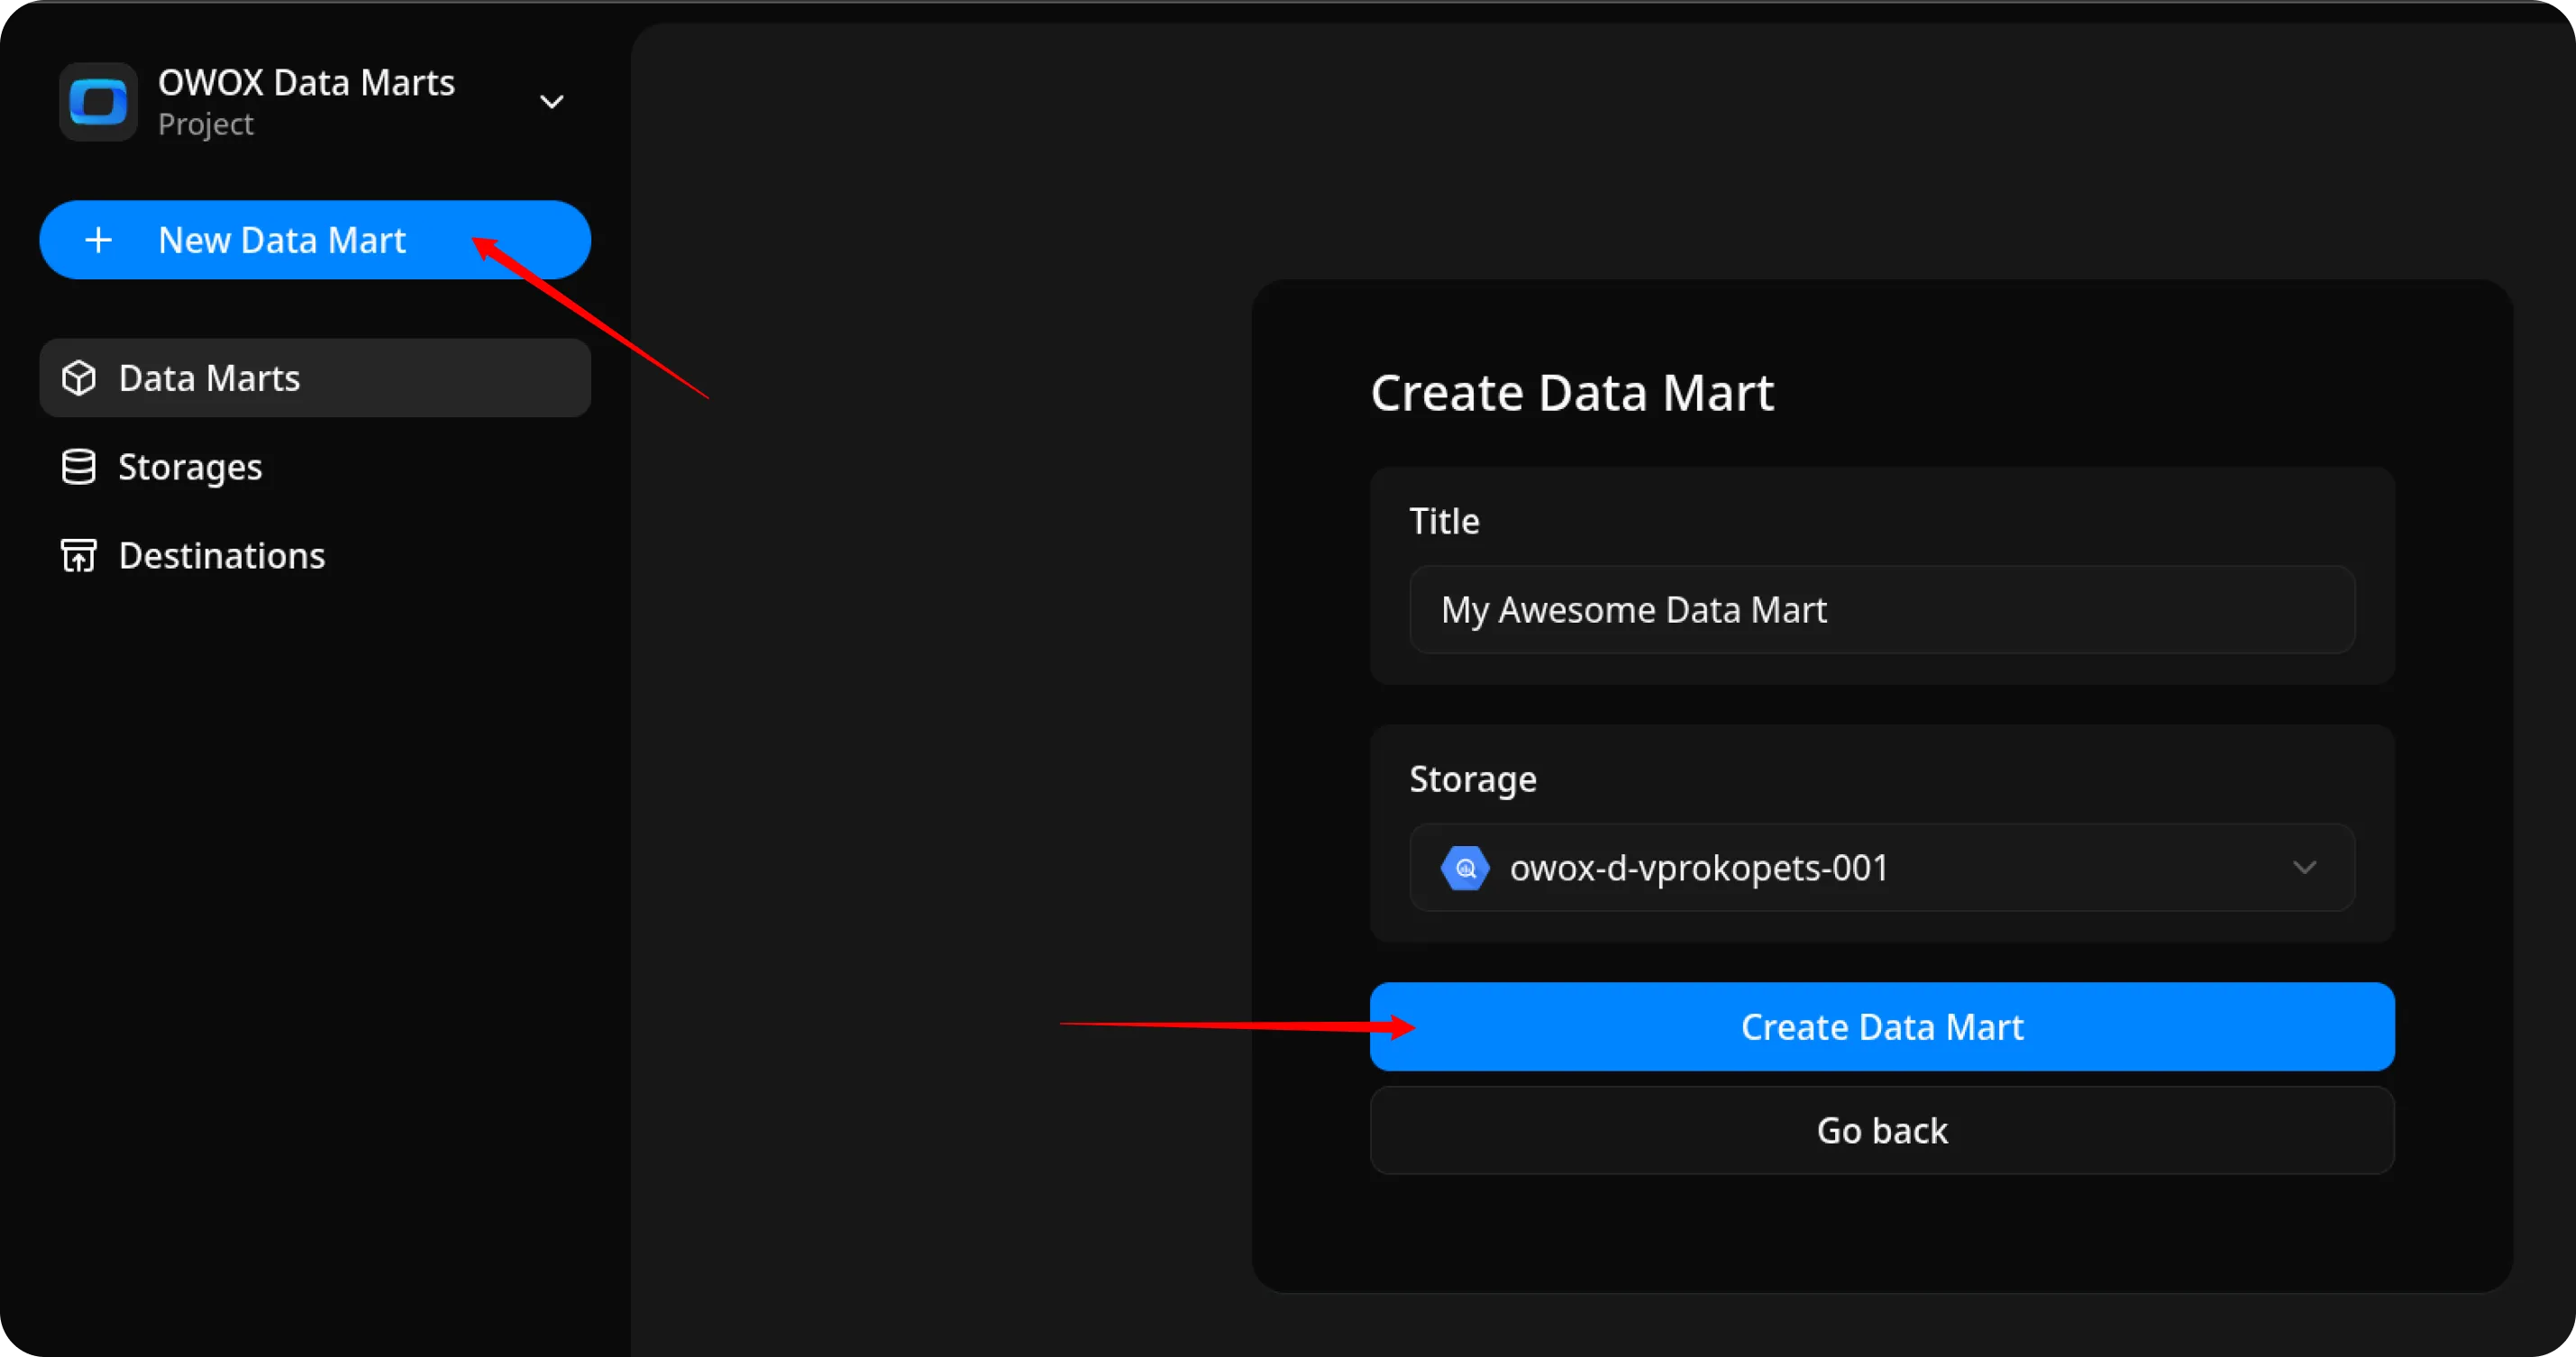
Create the Data Mart
Section titled “Create the Data Mart”- Click New Data Mart.
- Enter a title and select the Storage.
- Click Create Data Mart.
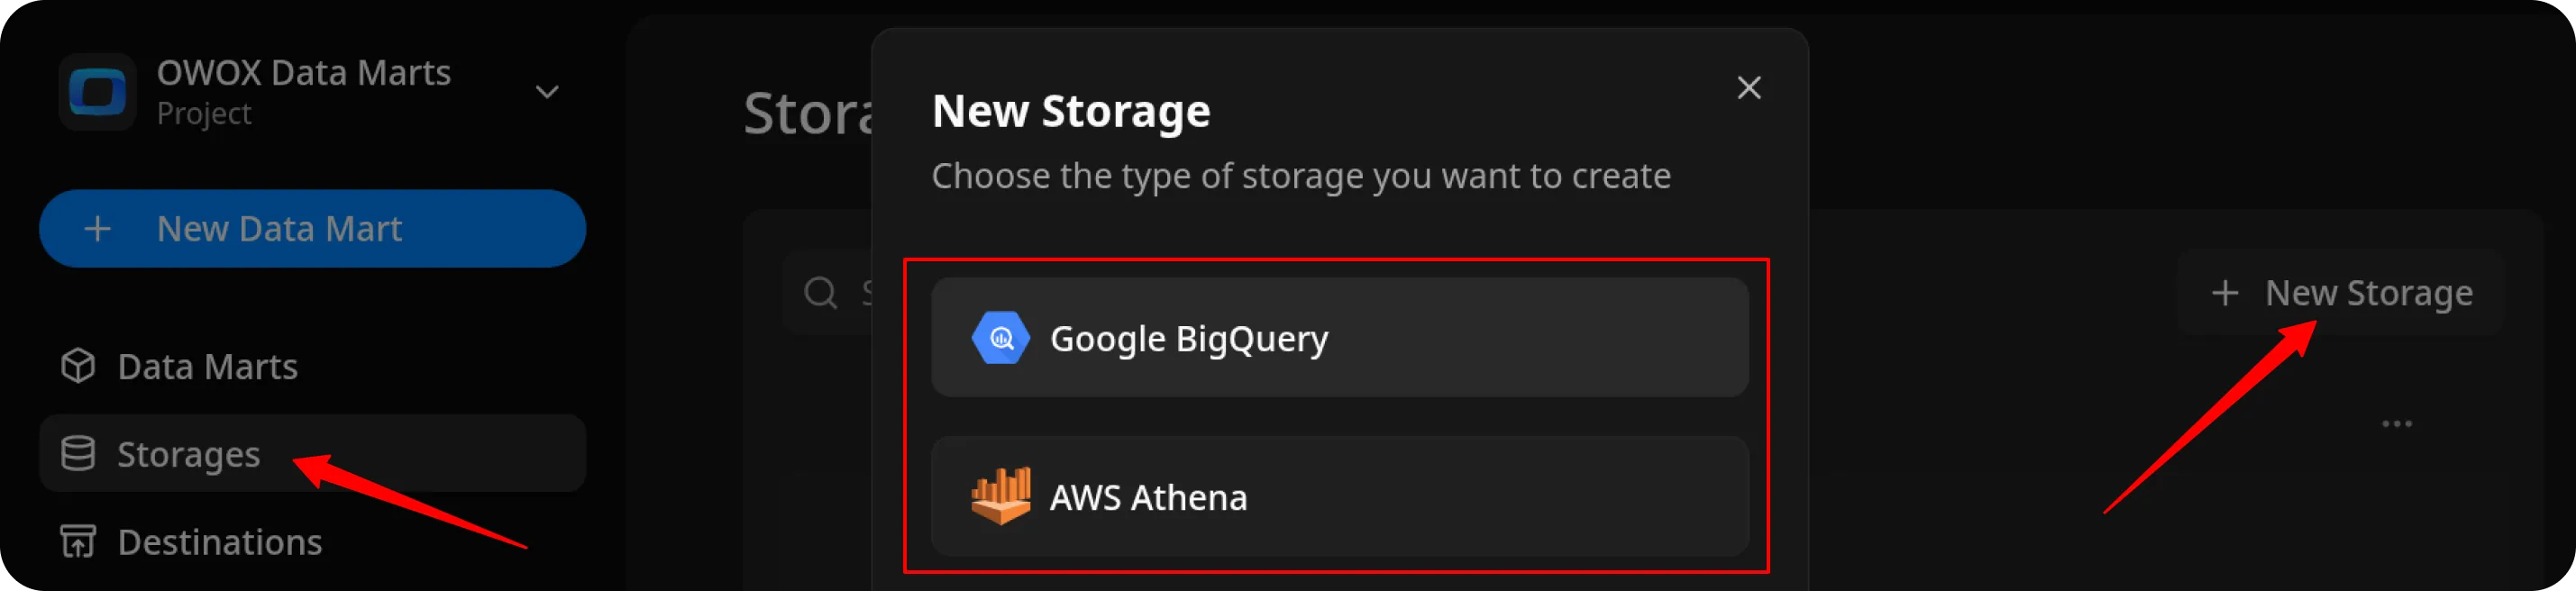
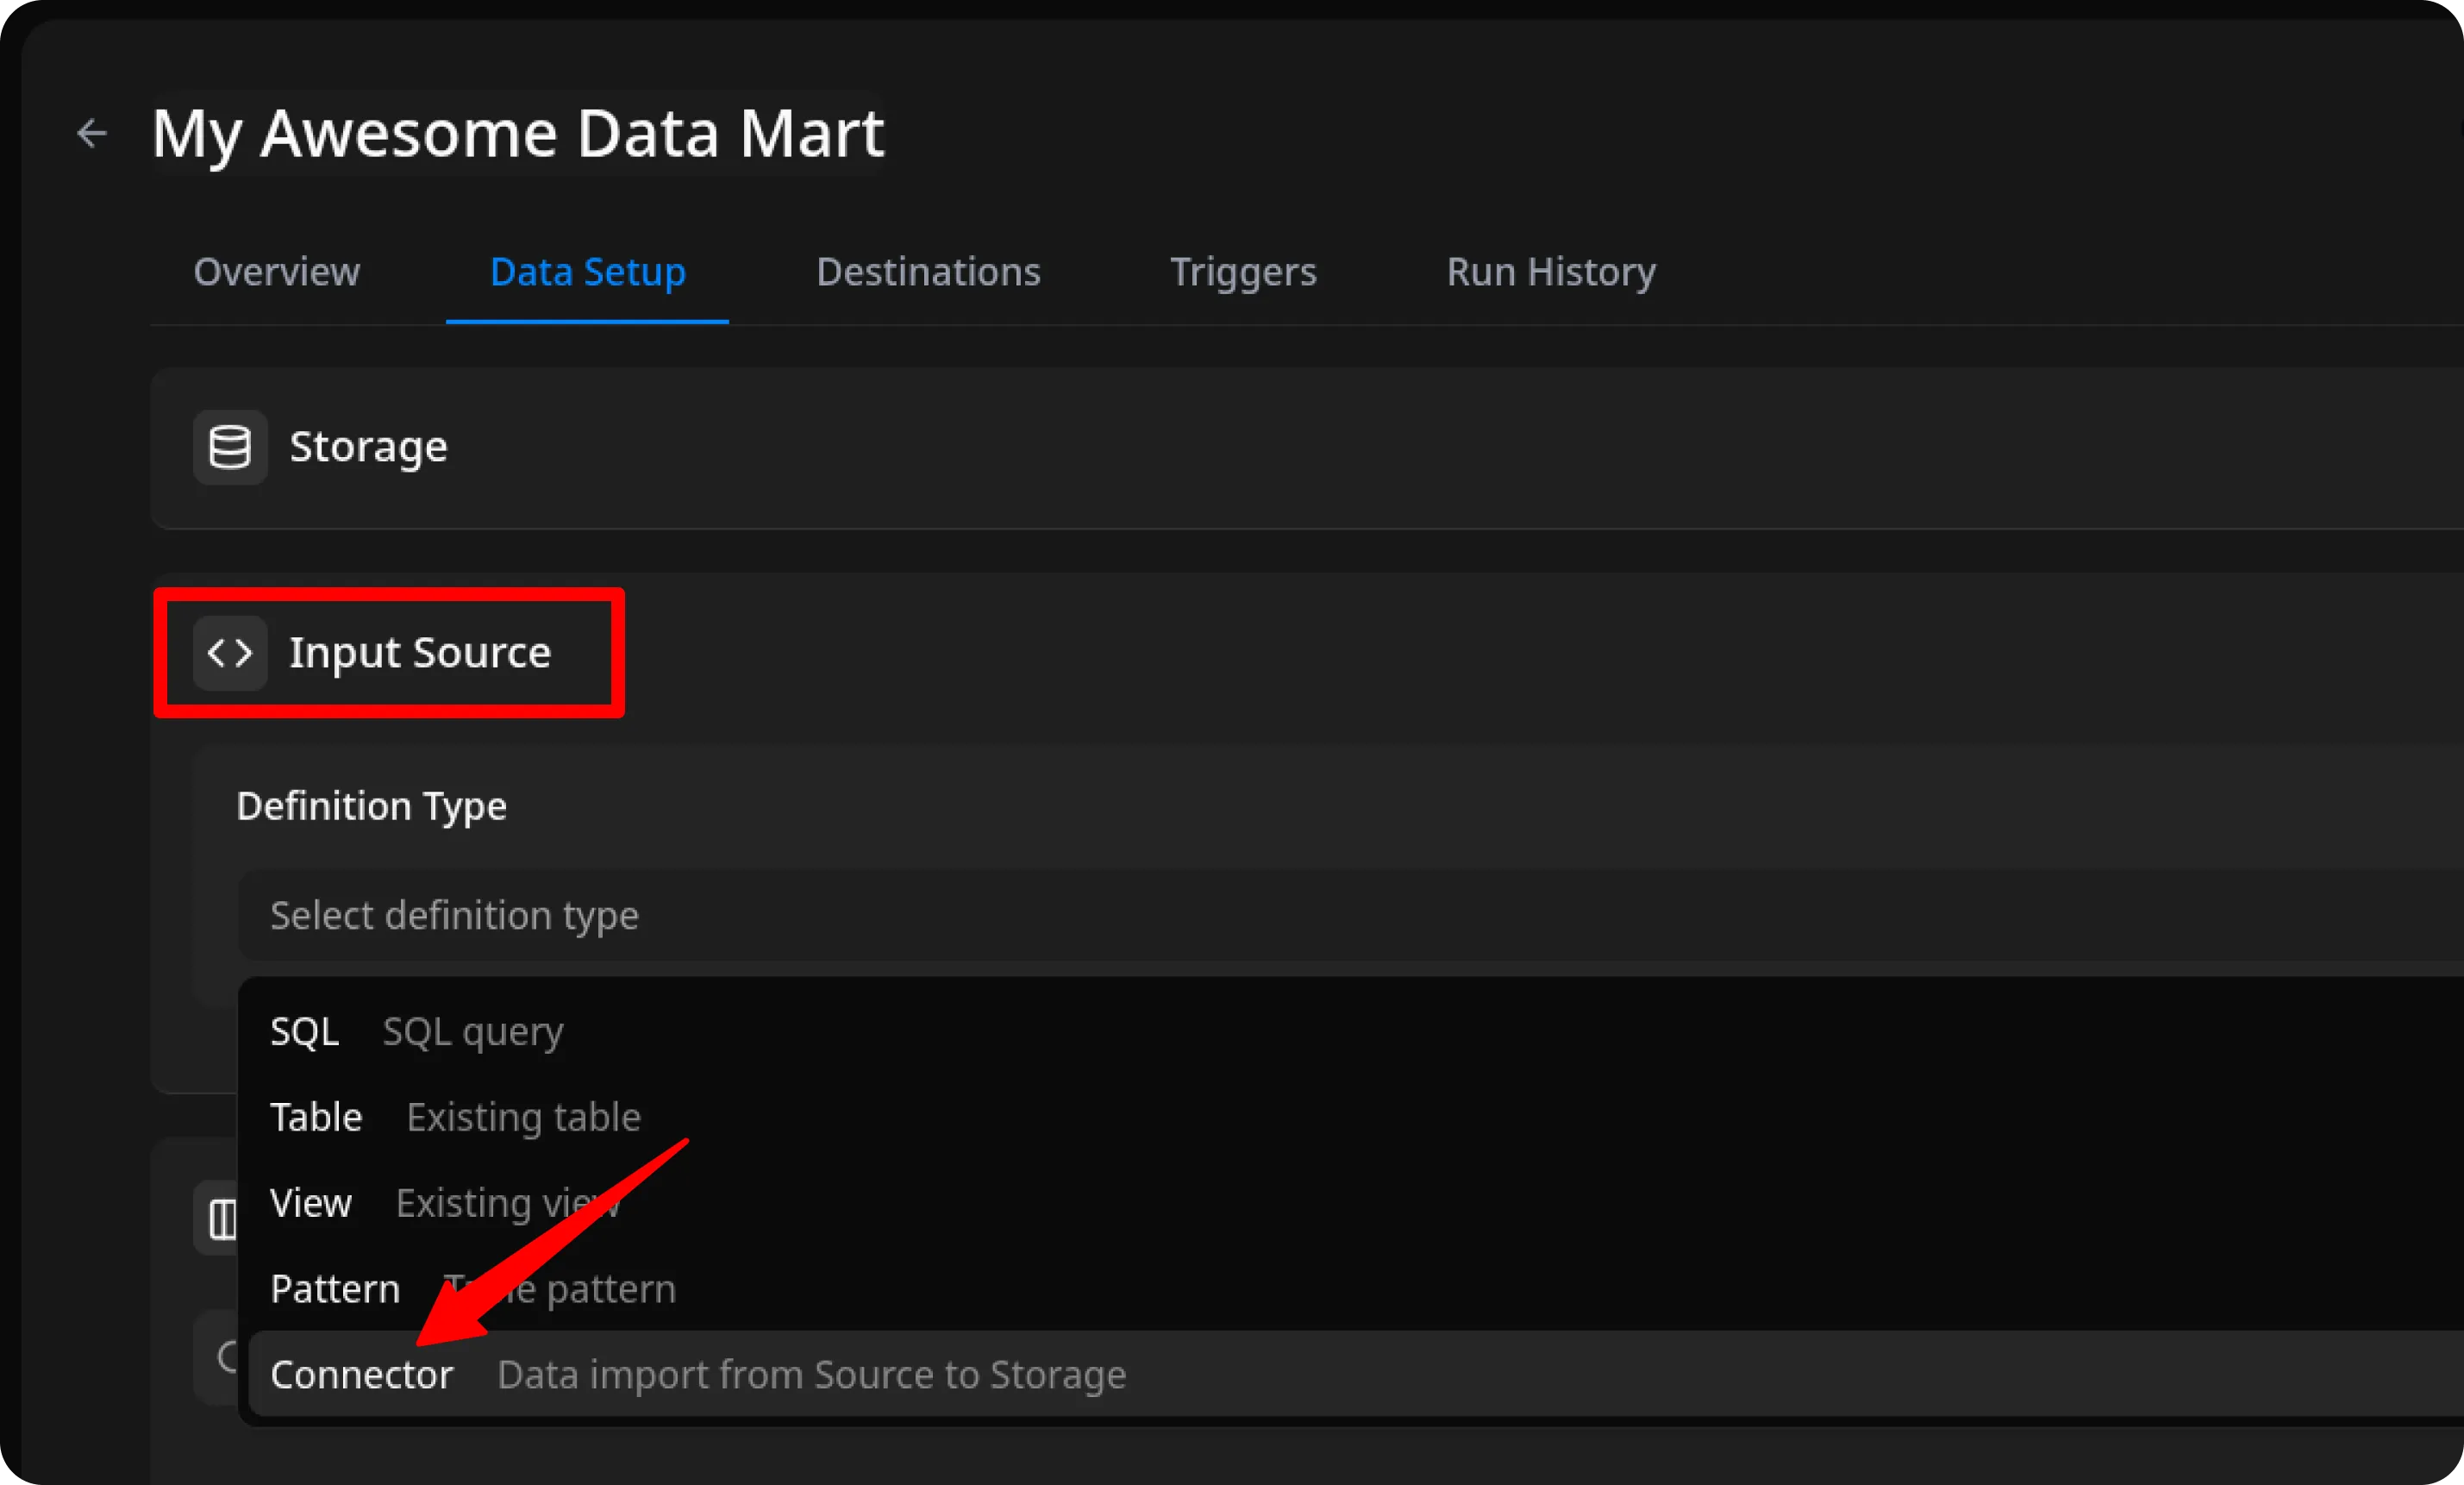
Set Up the Connector
Section titled “Set Up the Connector”- Select Connector as the input source type.
- Сhoose GitHub.
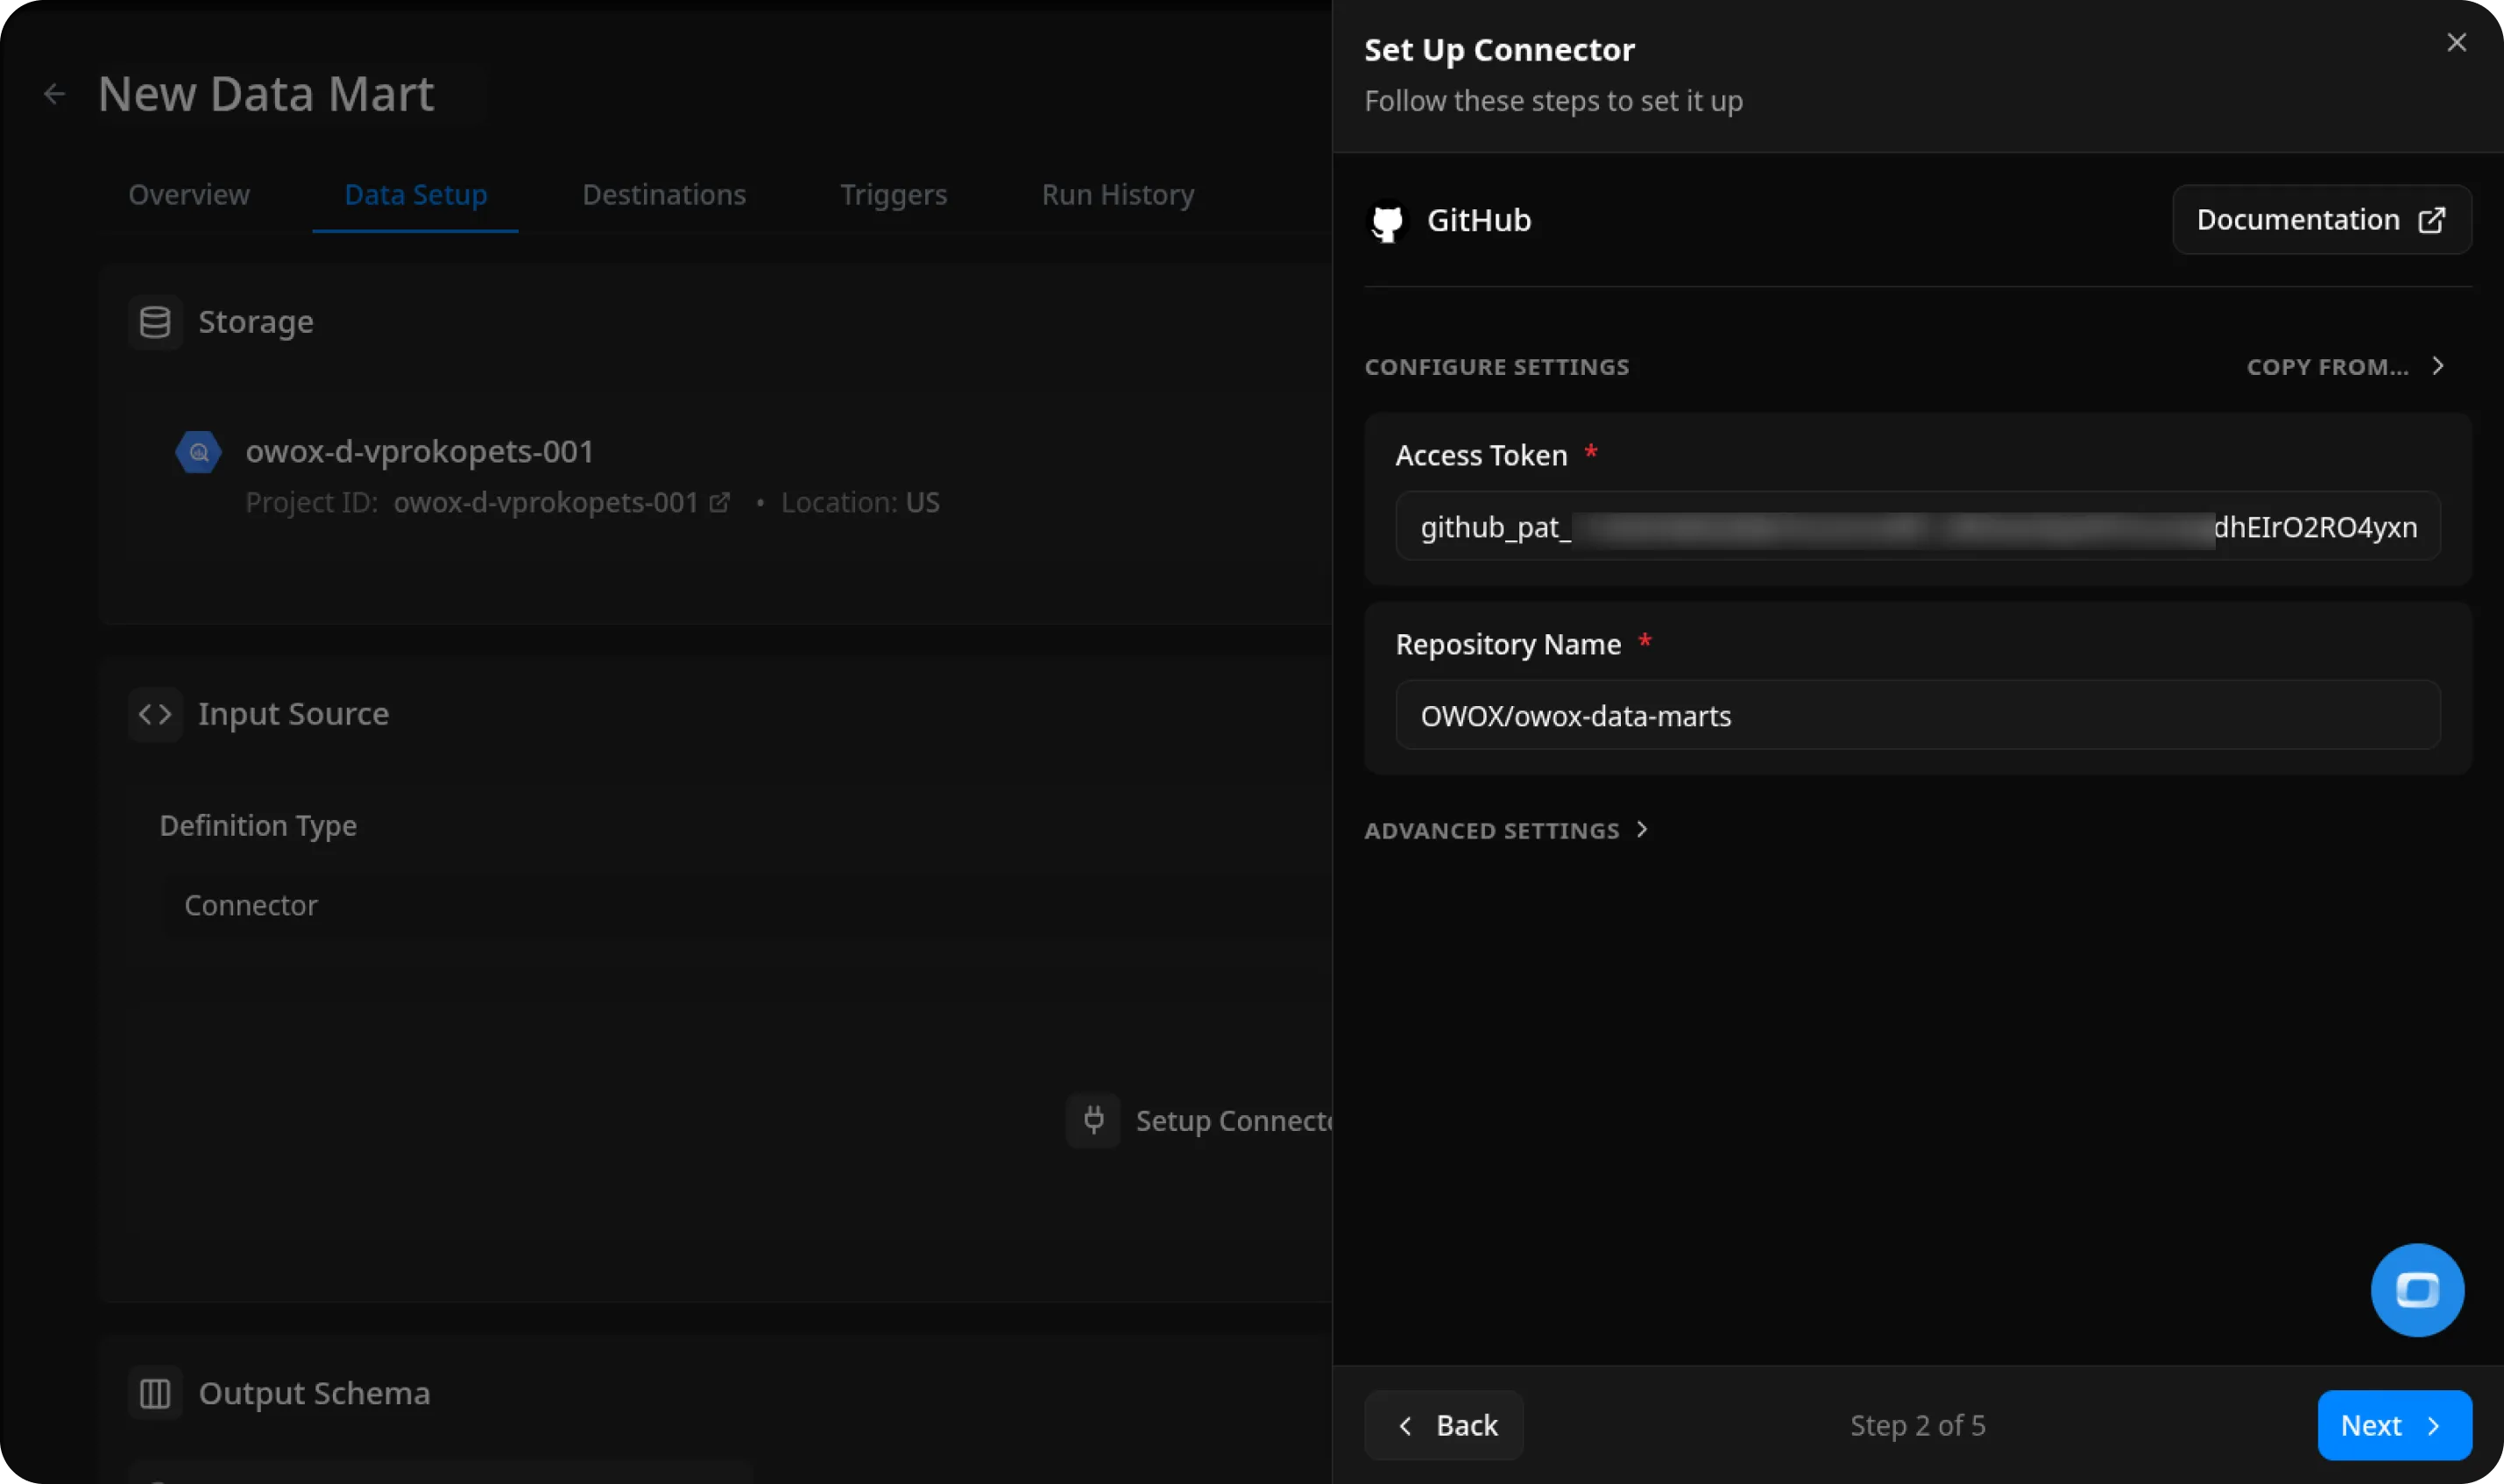
- Fill in the required fields:
- Access token – paste the token you generated on GitHub personal access tokens page.
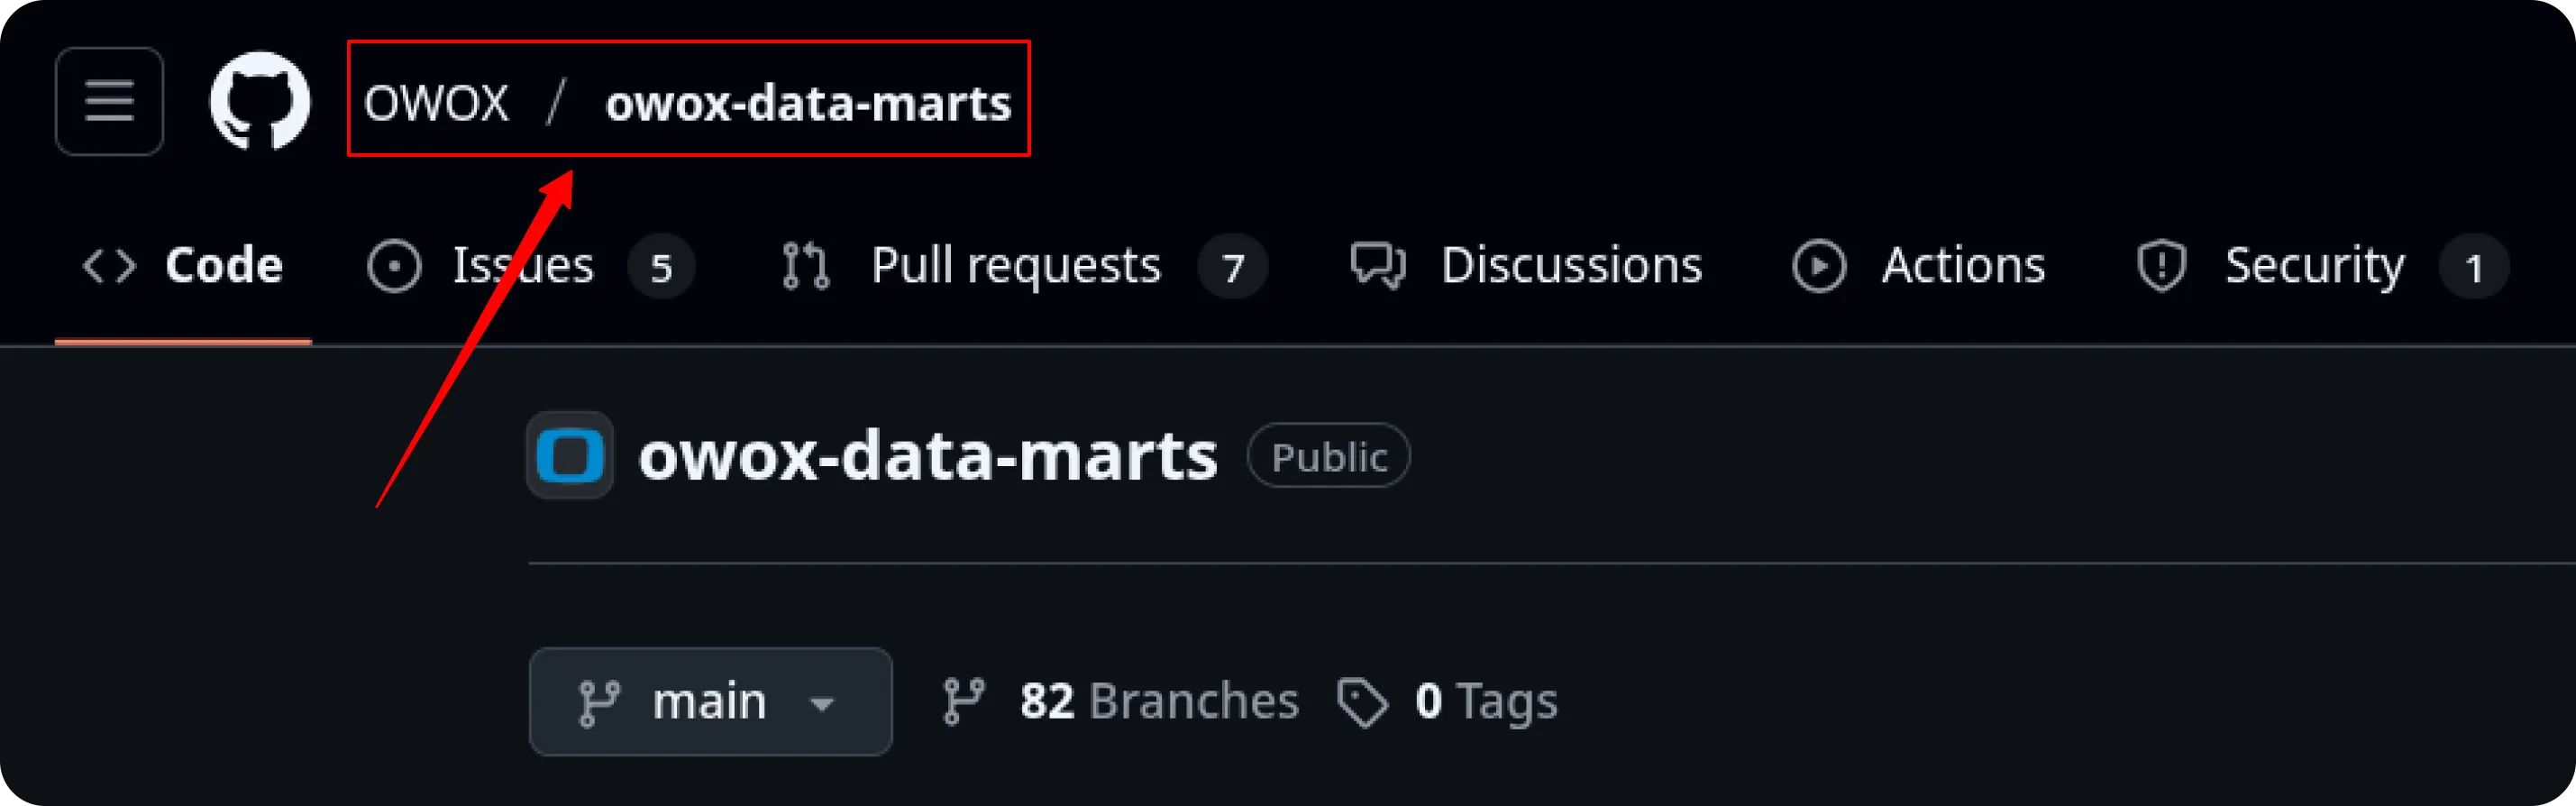
- Repository Name – enter the full repository path in the format
owner/repo.- You can find this on the main page of your repository on GitHub.
- Example:
OWOX/owox-data-marts
- Leave the other fields as default and proceed to the next step.
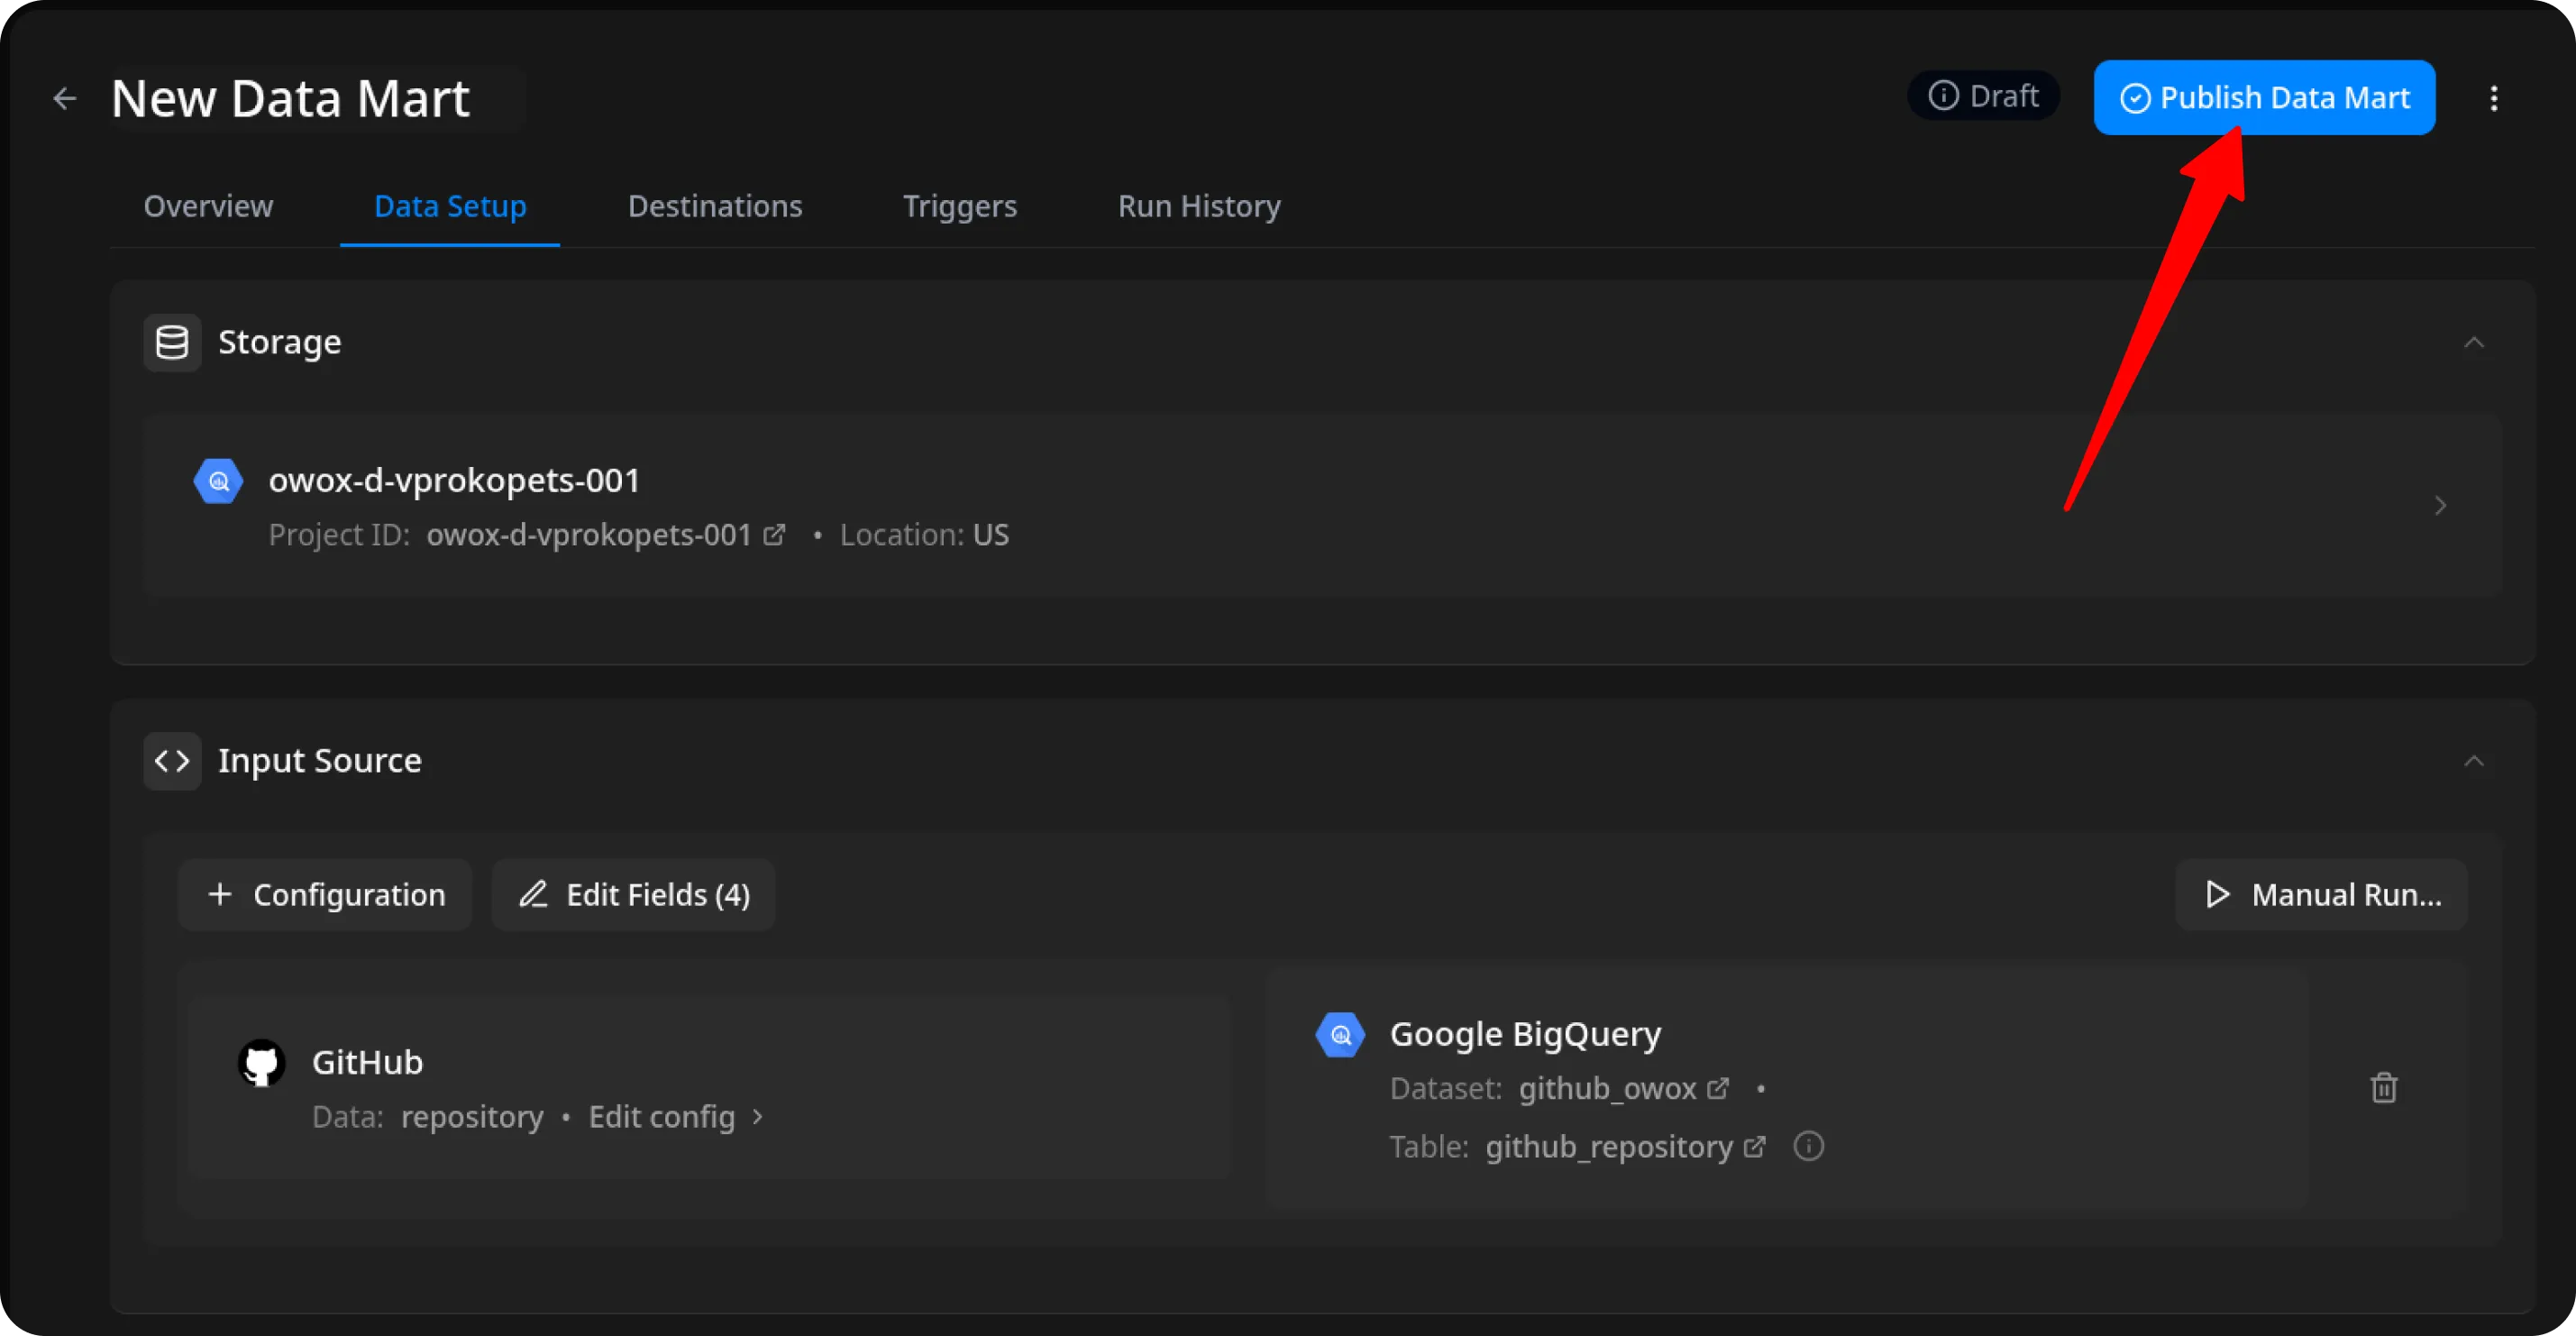
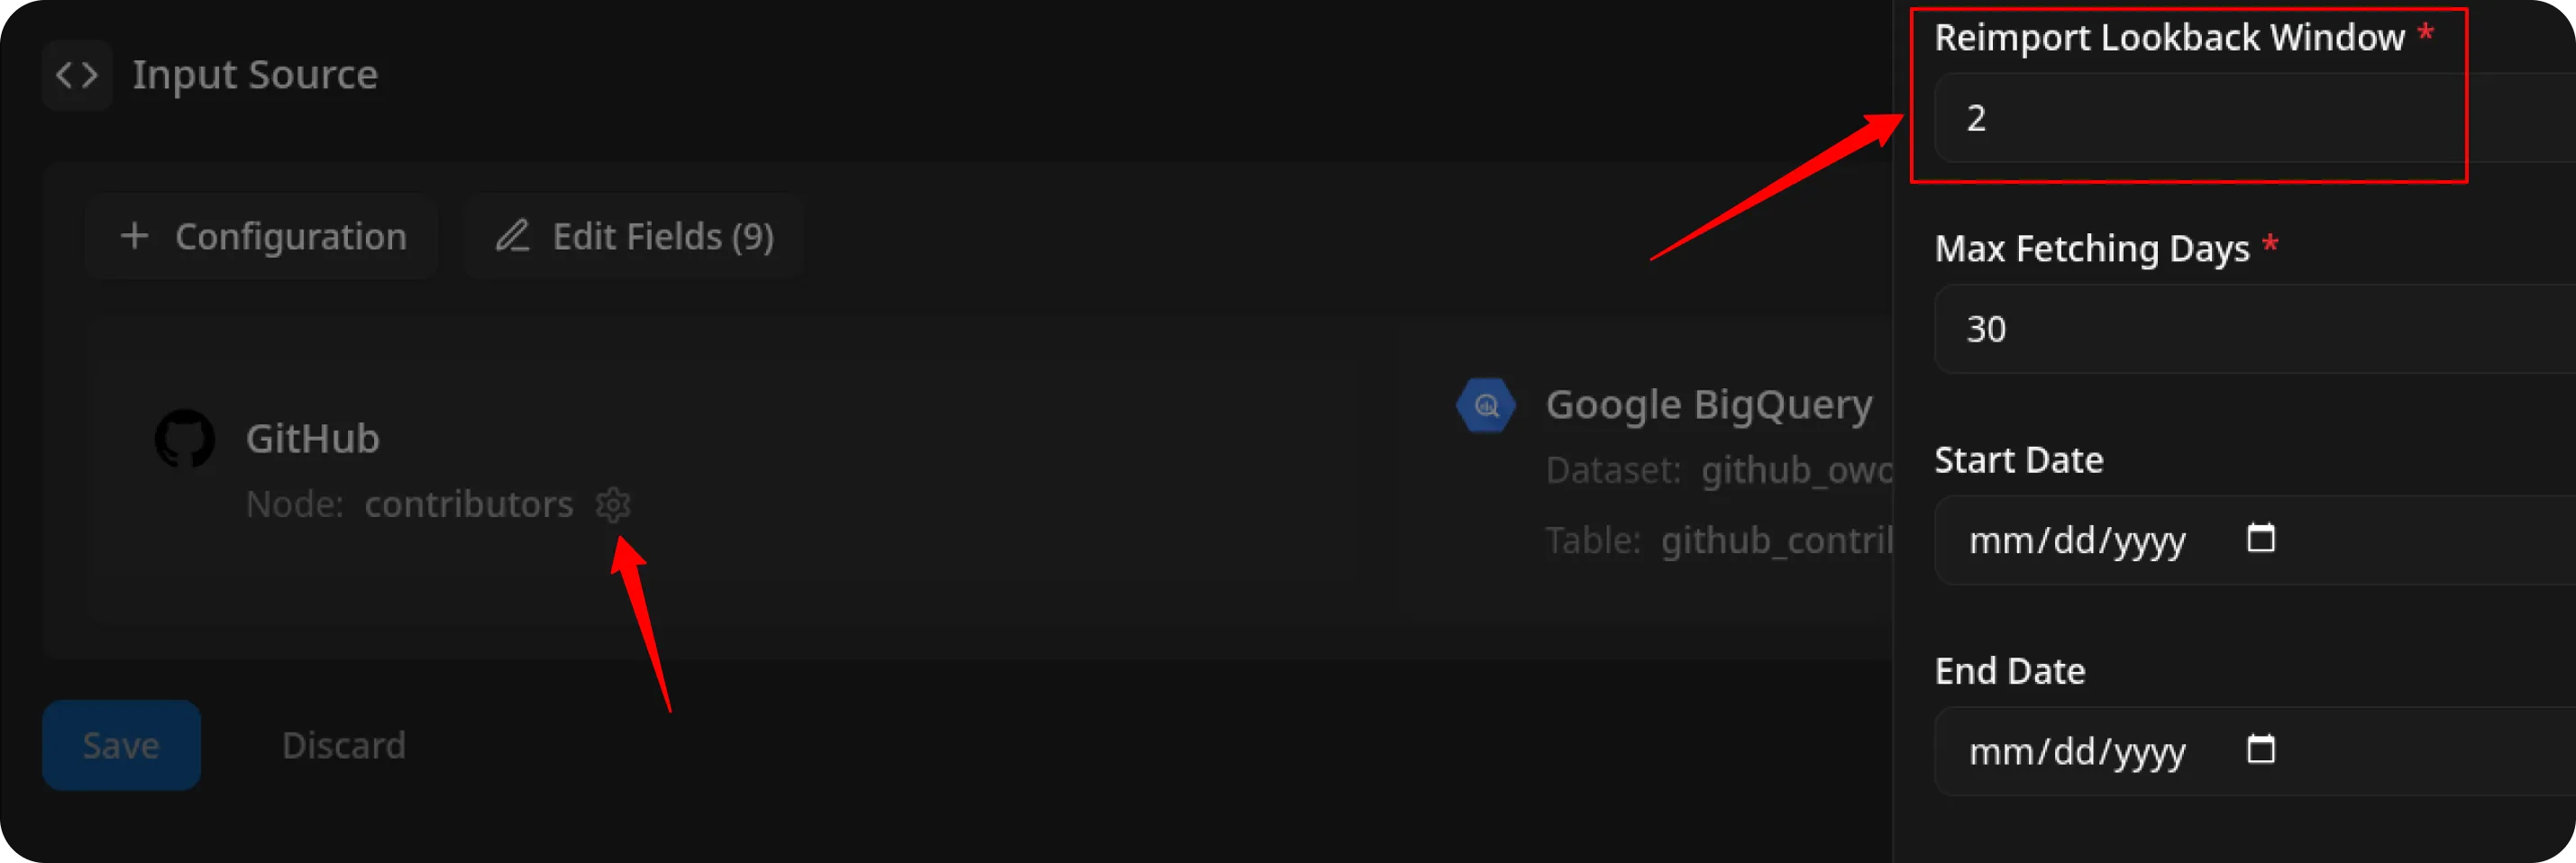
Configure Data Import
Section titled “Configure Data Import”- Choose one of the available endpoints.
- Select the required fields.
- Specify the dataset where the data will be stored (or leave the default).
- Click Finish, then Save and Publish Data Mart.
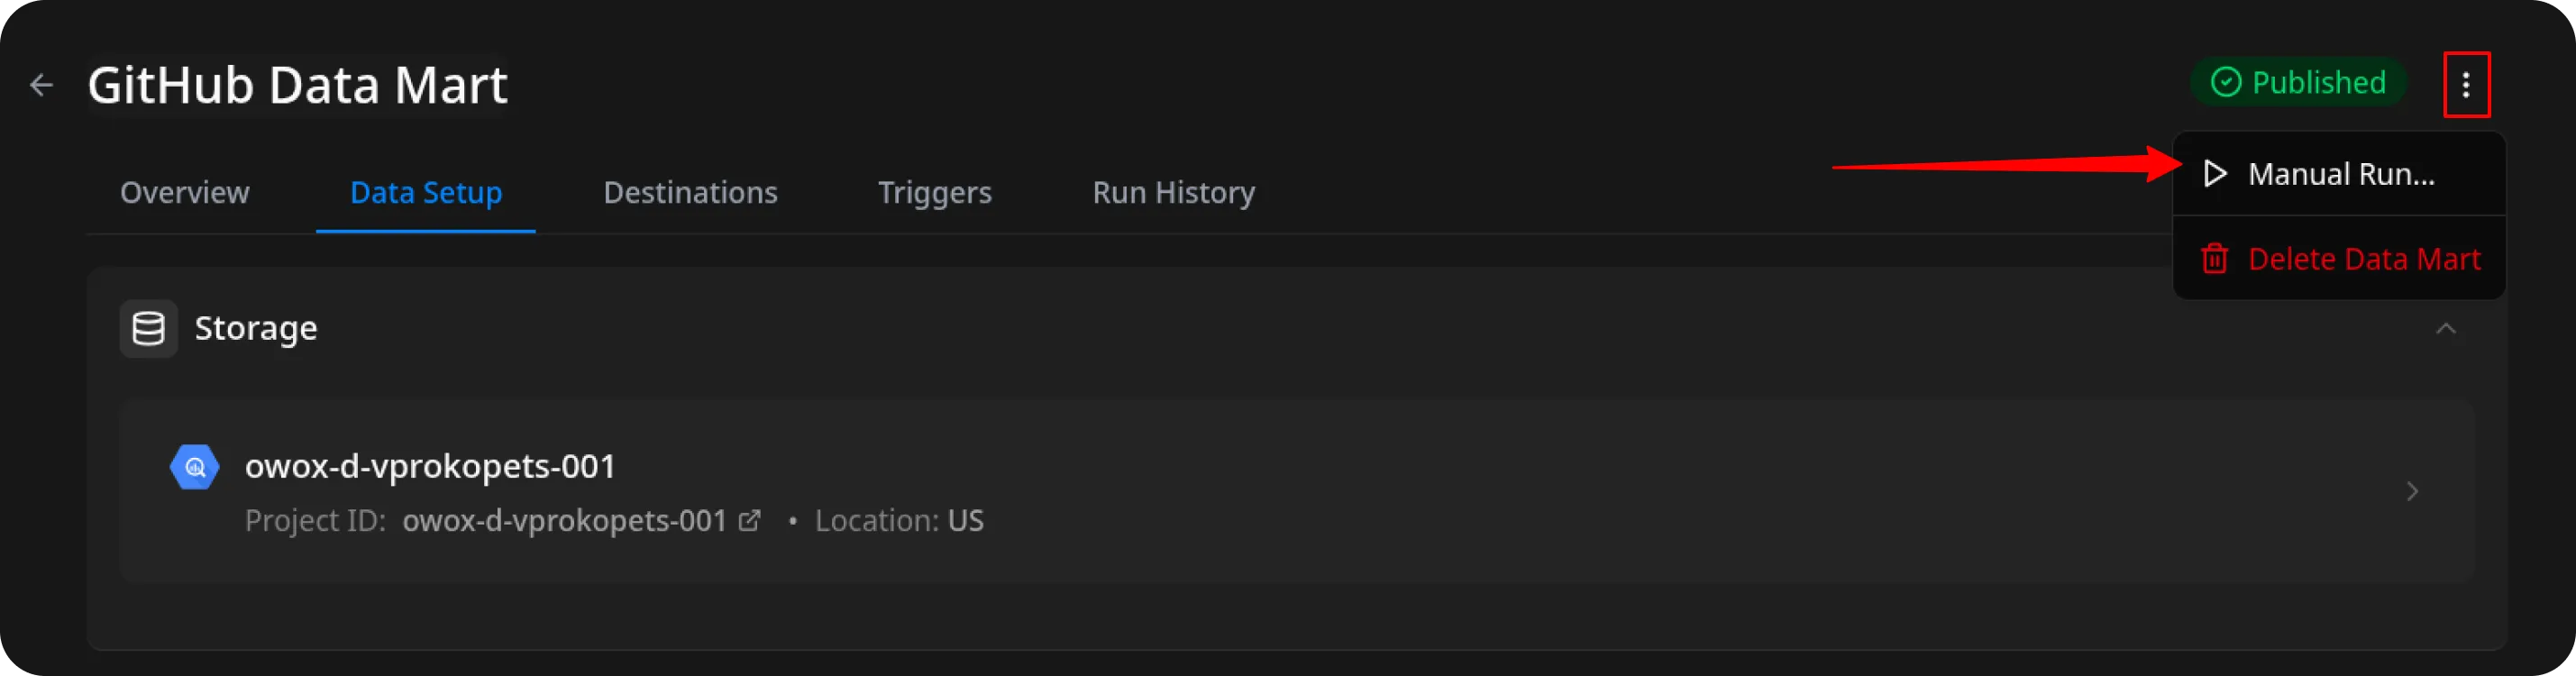
Run the Data Mart
Section titled “Run the Data Mart”You now have two options for importing data from GitHub source:
Option 1: Import Current Day’s Data
Choose Manual run → Incremental load to load data for the current day.
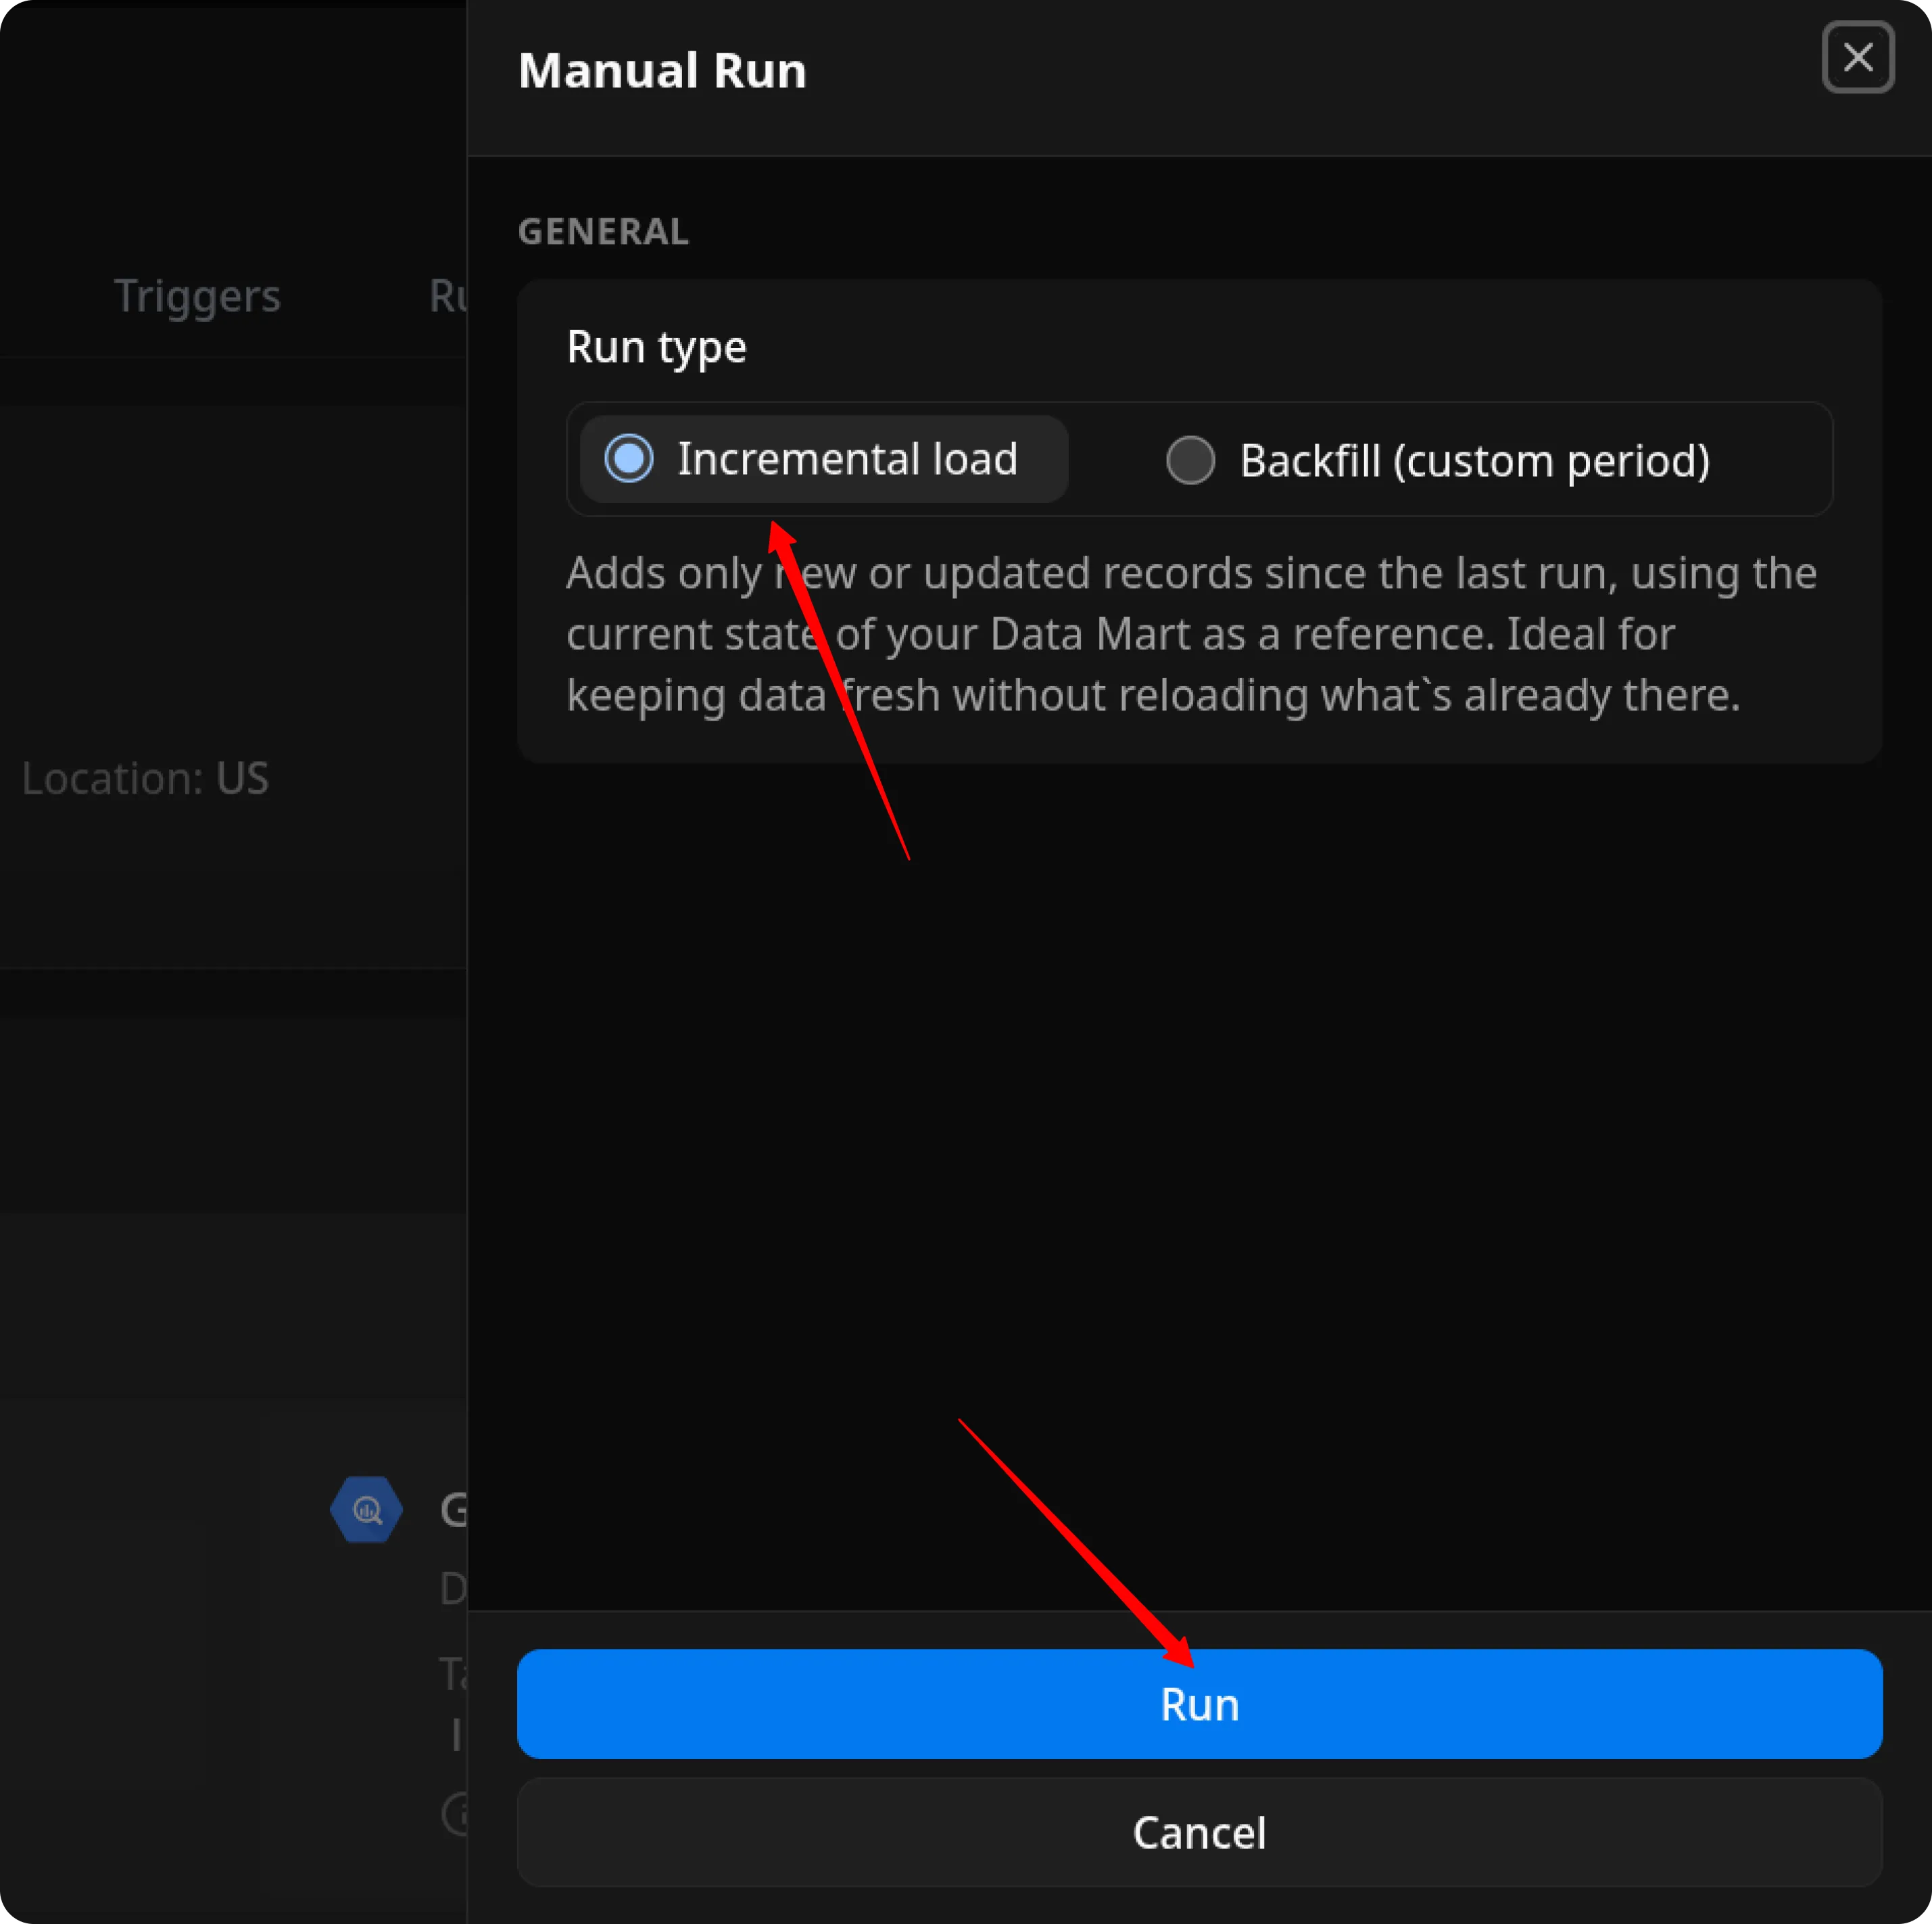
ℹ️ If you click Incremental load again after a successful initial load,
the connector will import: Current day’s data, plus Additional days, based on the value in the Reimport Lookback Window field.
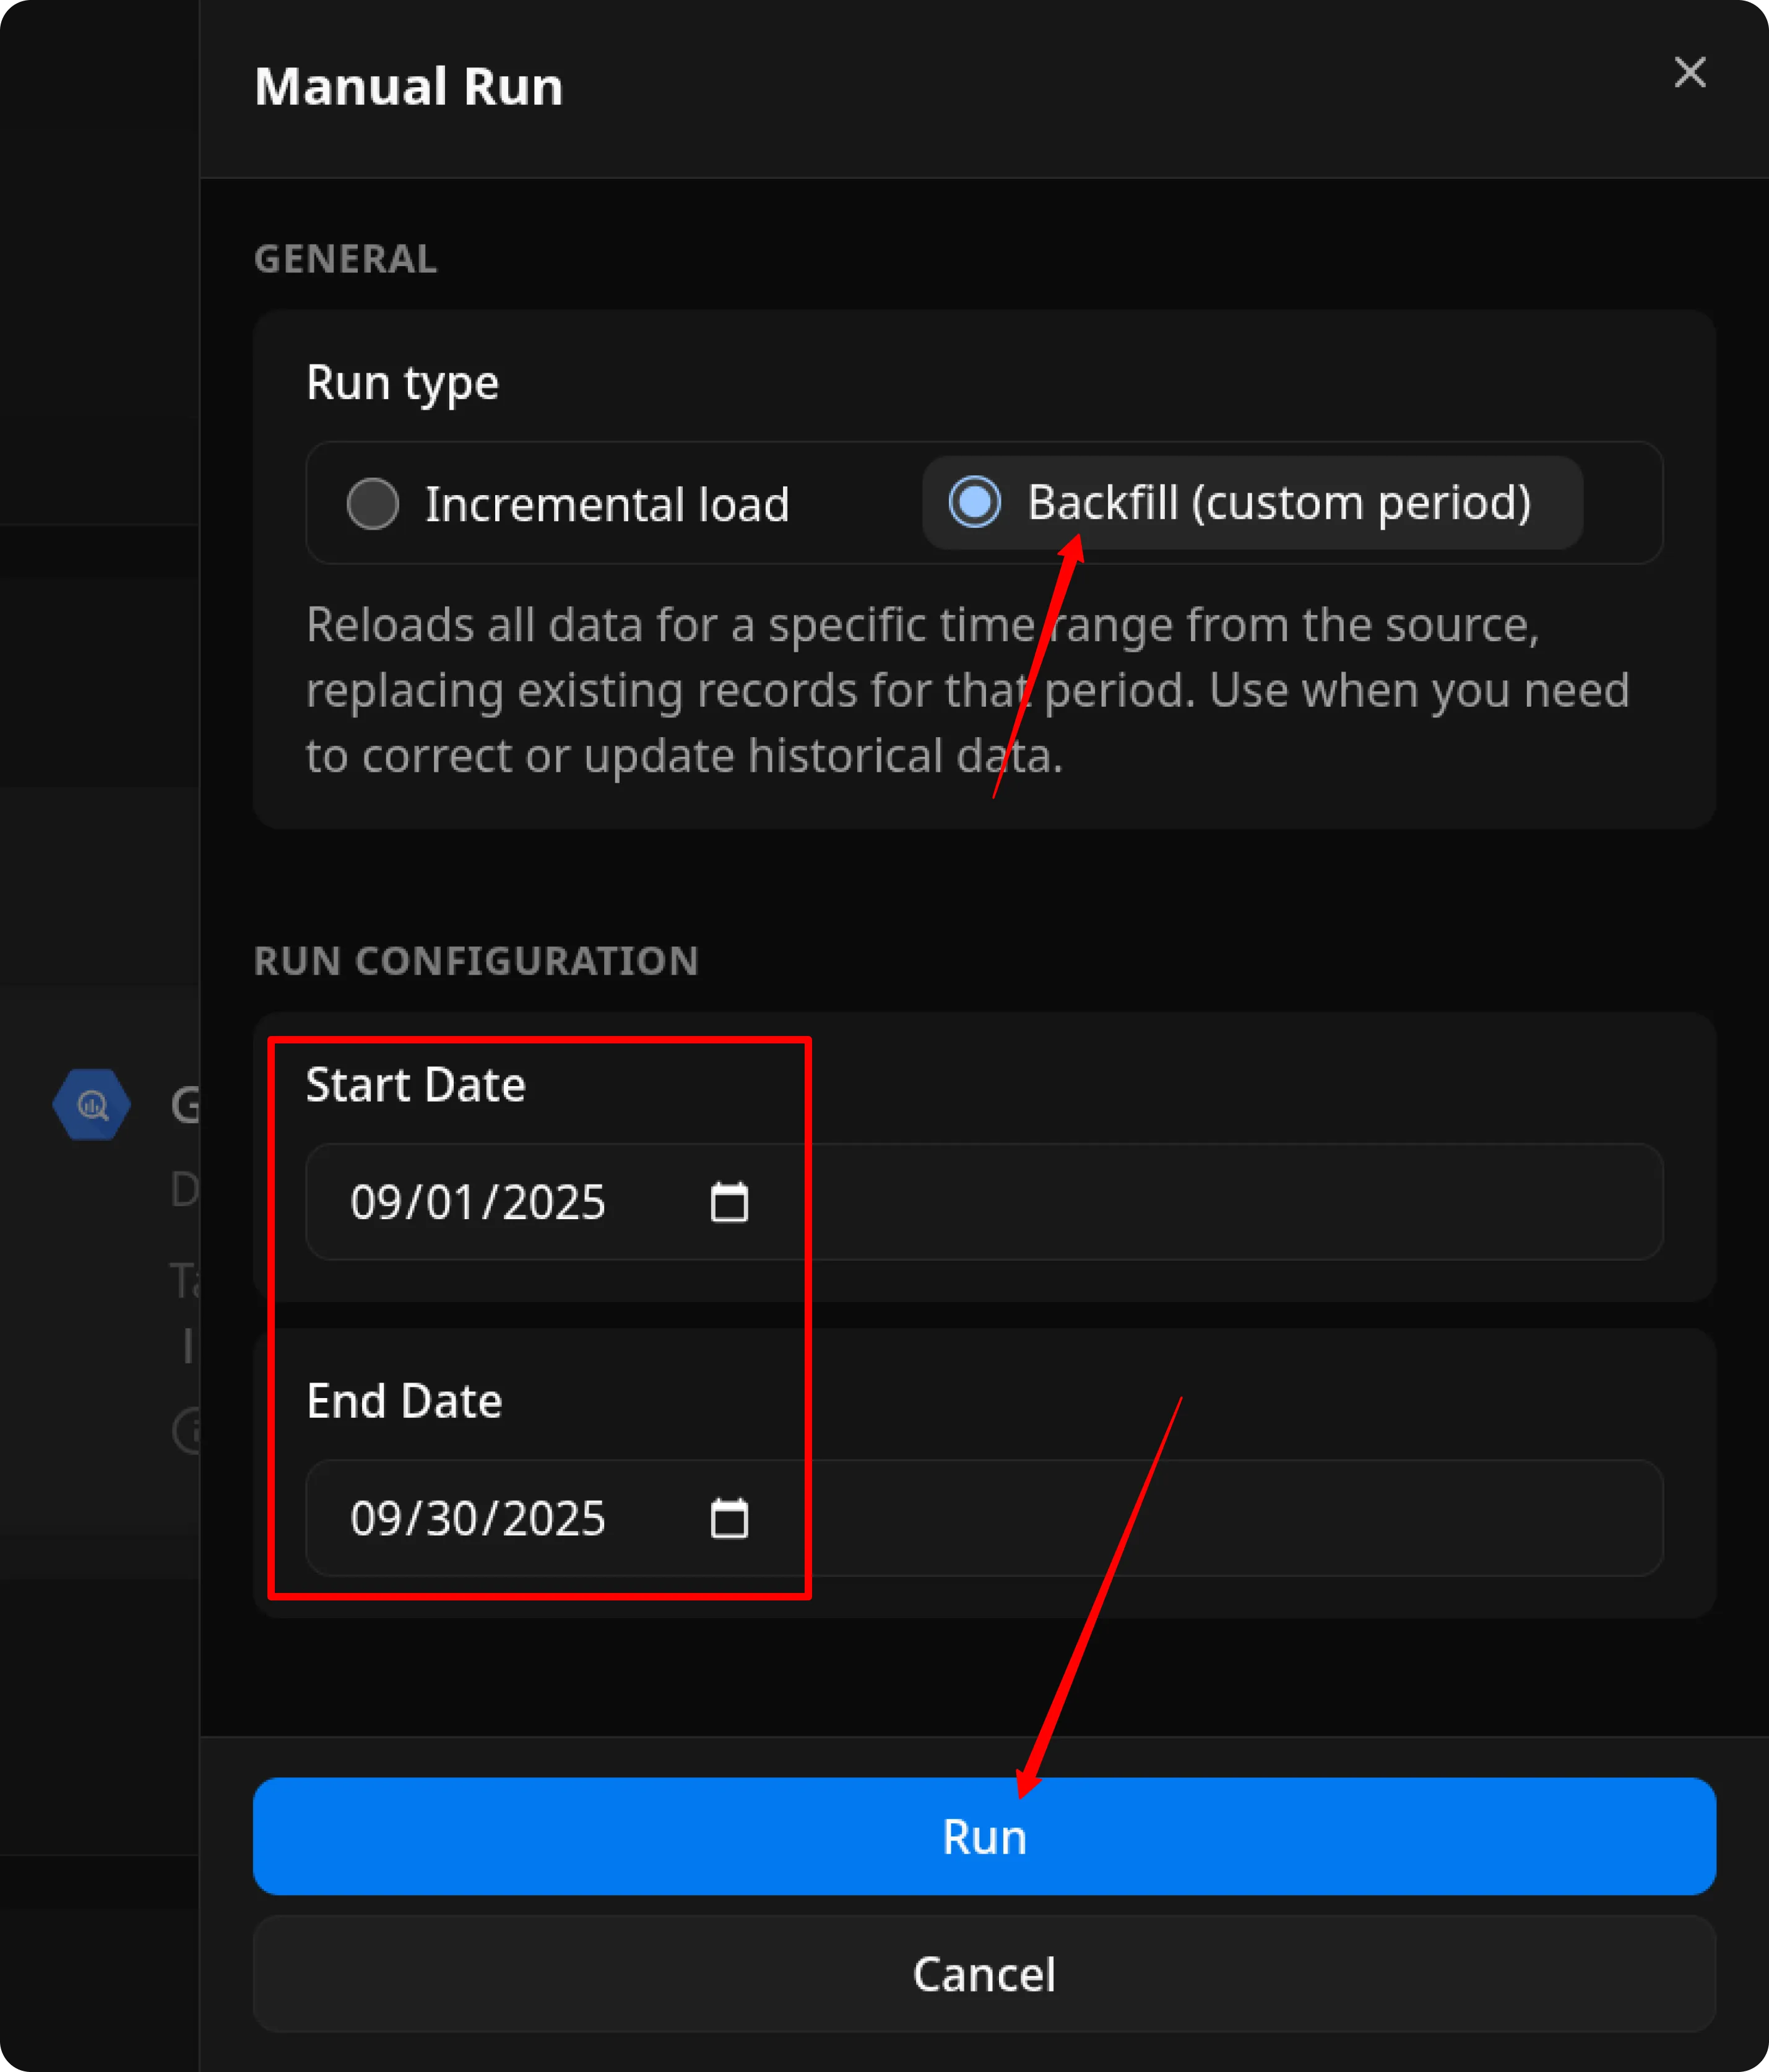
Option 2: Manual Backfill for Specific Date Range
Choose Backfill (custom period) to load historical data.
- Select the Start Date and End Date.
- Click the Run button.
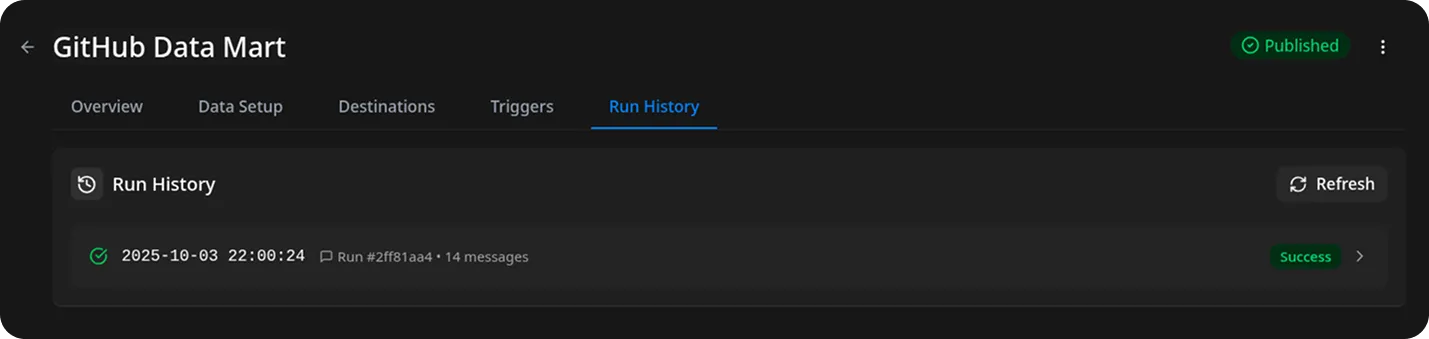
The process is complete when the Run history tab shows the message:
“Success”
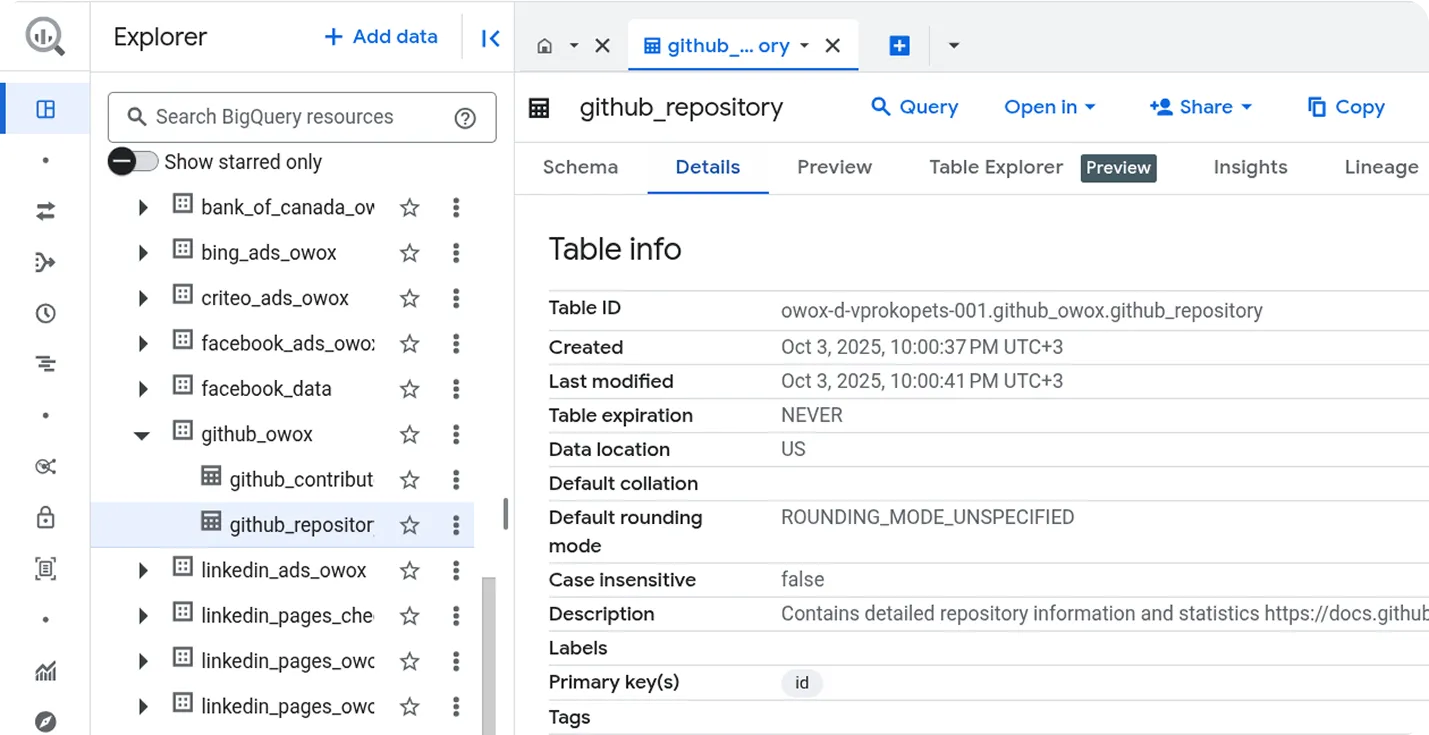
Access Your Data
Section titled “Access Your Data”Once the run is complete, the data will be written to the dataset you specified earlier.
If you encounter any issues:
- Check the Run history for specific error messages
- Please visit Q&A first
- If you want to report a bug, please open an issue
- Join the discussion forum to ask questions or propose improvements