How to Import Data from the Google Ads Source
Before proceeding, please make sure that:
- You have already created a credentials, as described in CREDENTIALS.
- You have run OWOX Data Marts and created at least one storage in the Storages section.
Create the Data Mart
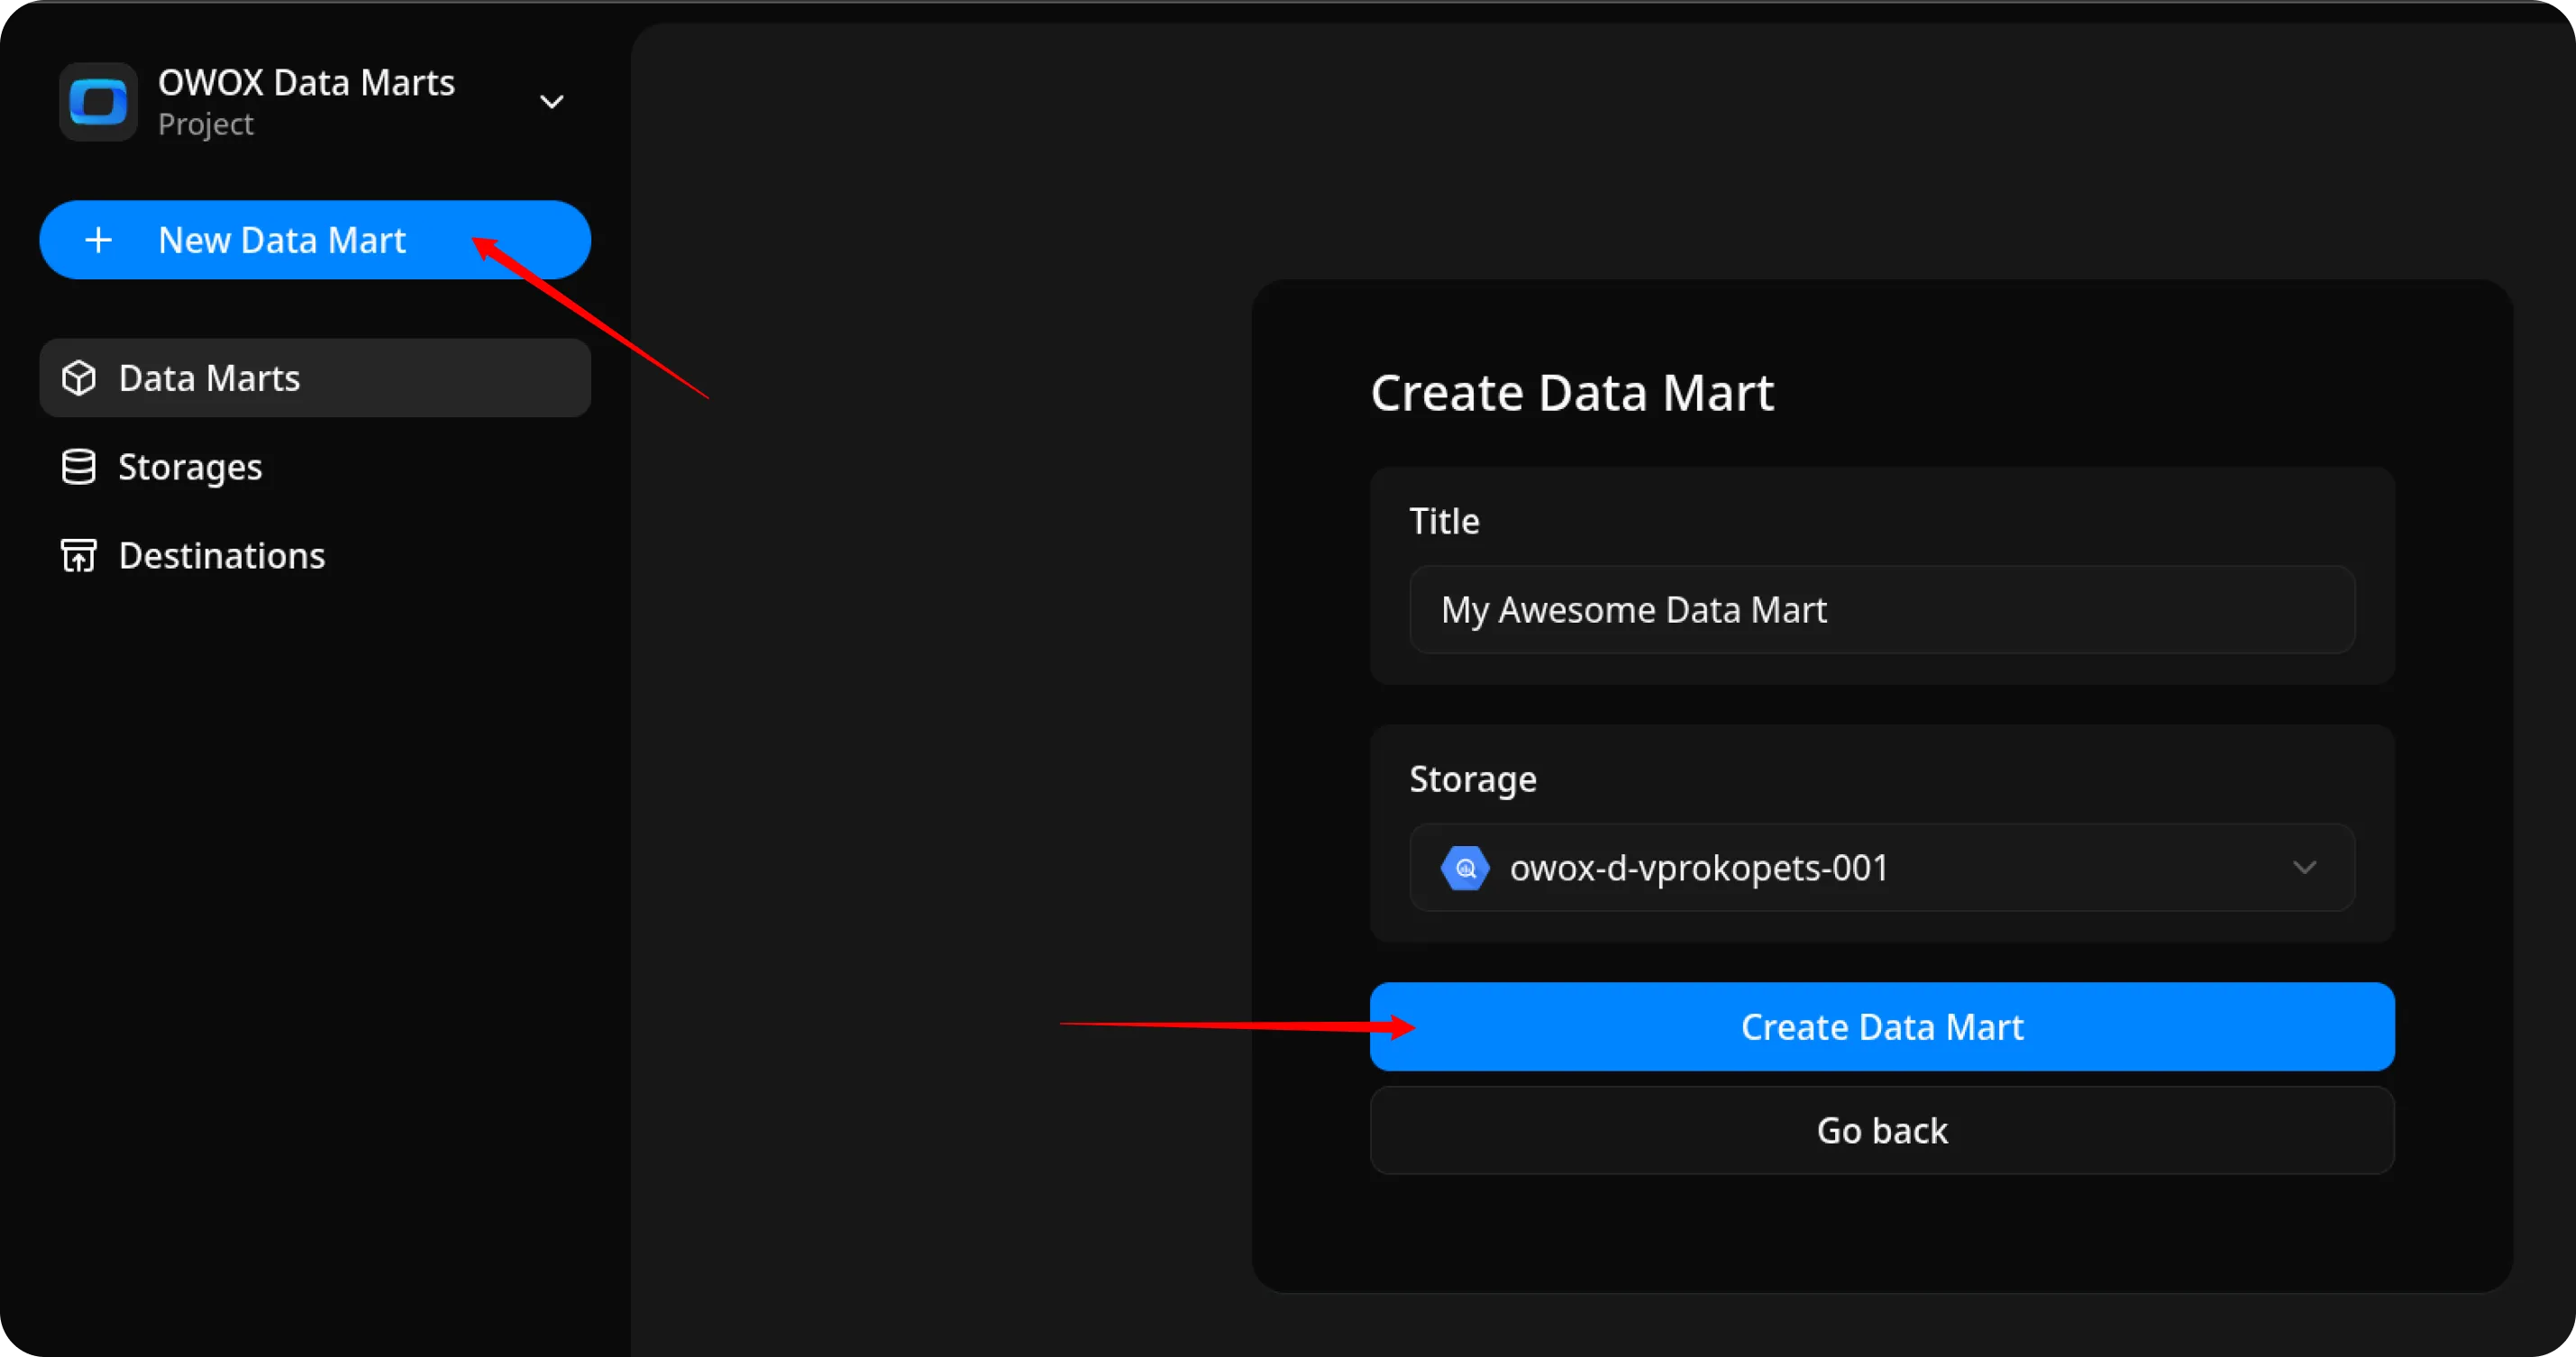
Section titled “Create the Data Mart”- Click New Data Mart.
- Enter a title and select the Storage.
- Click Create Data Mart.
Set Up the Connector
Section titled “Set Up the Connector”-
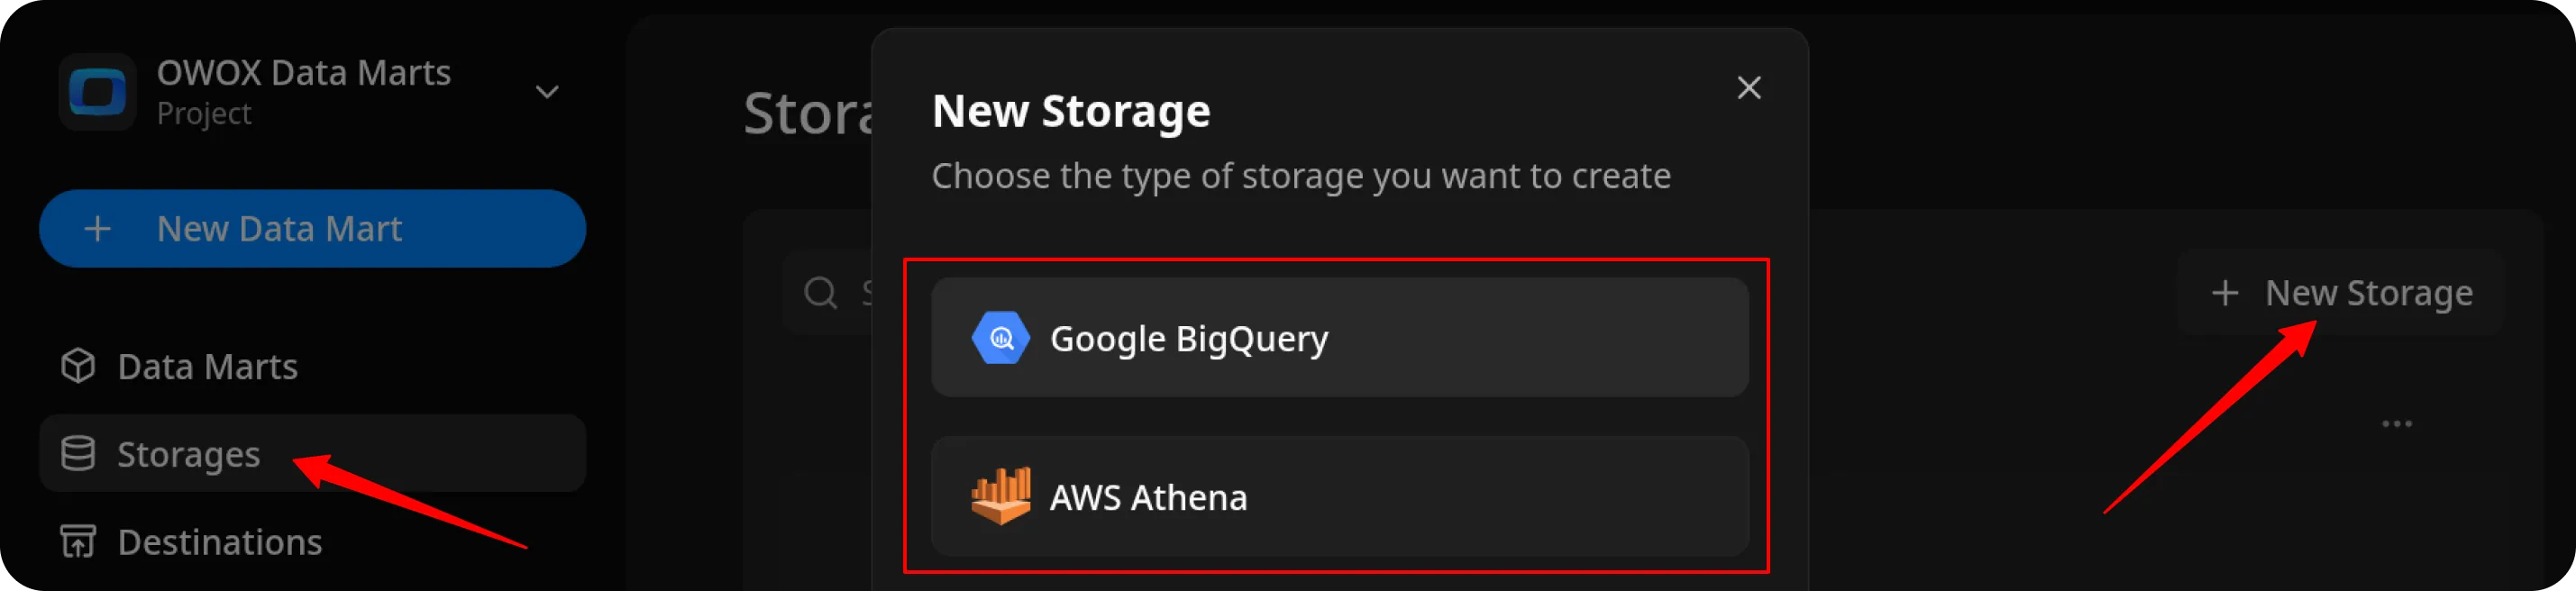
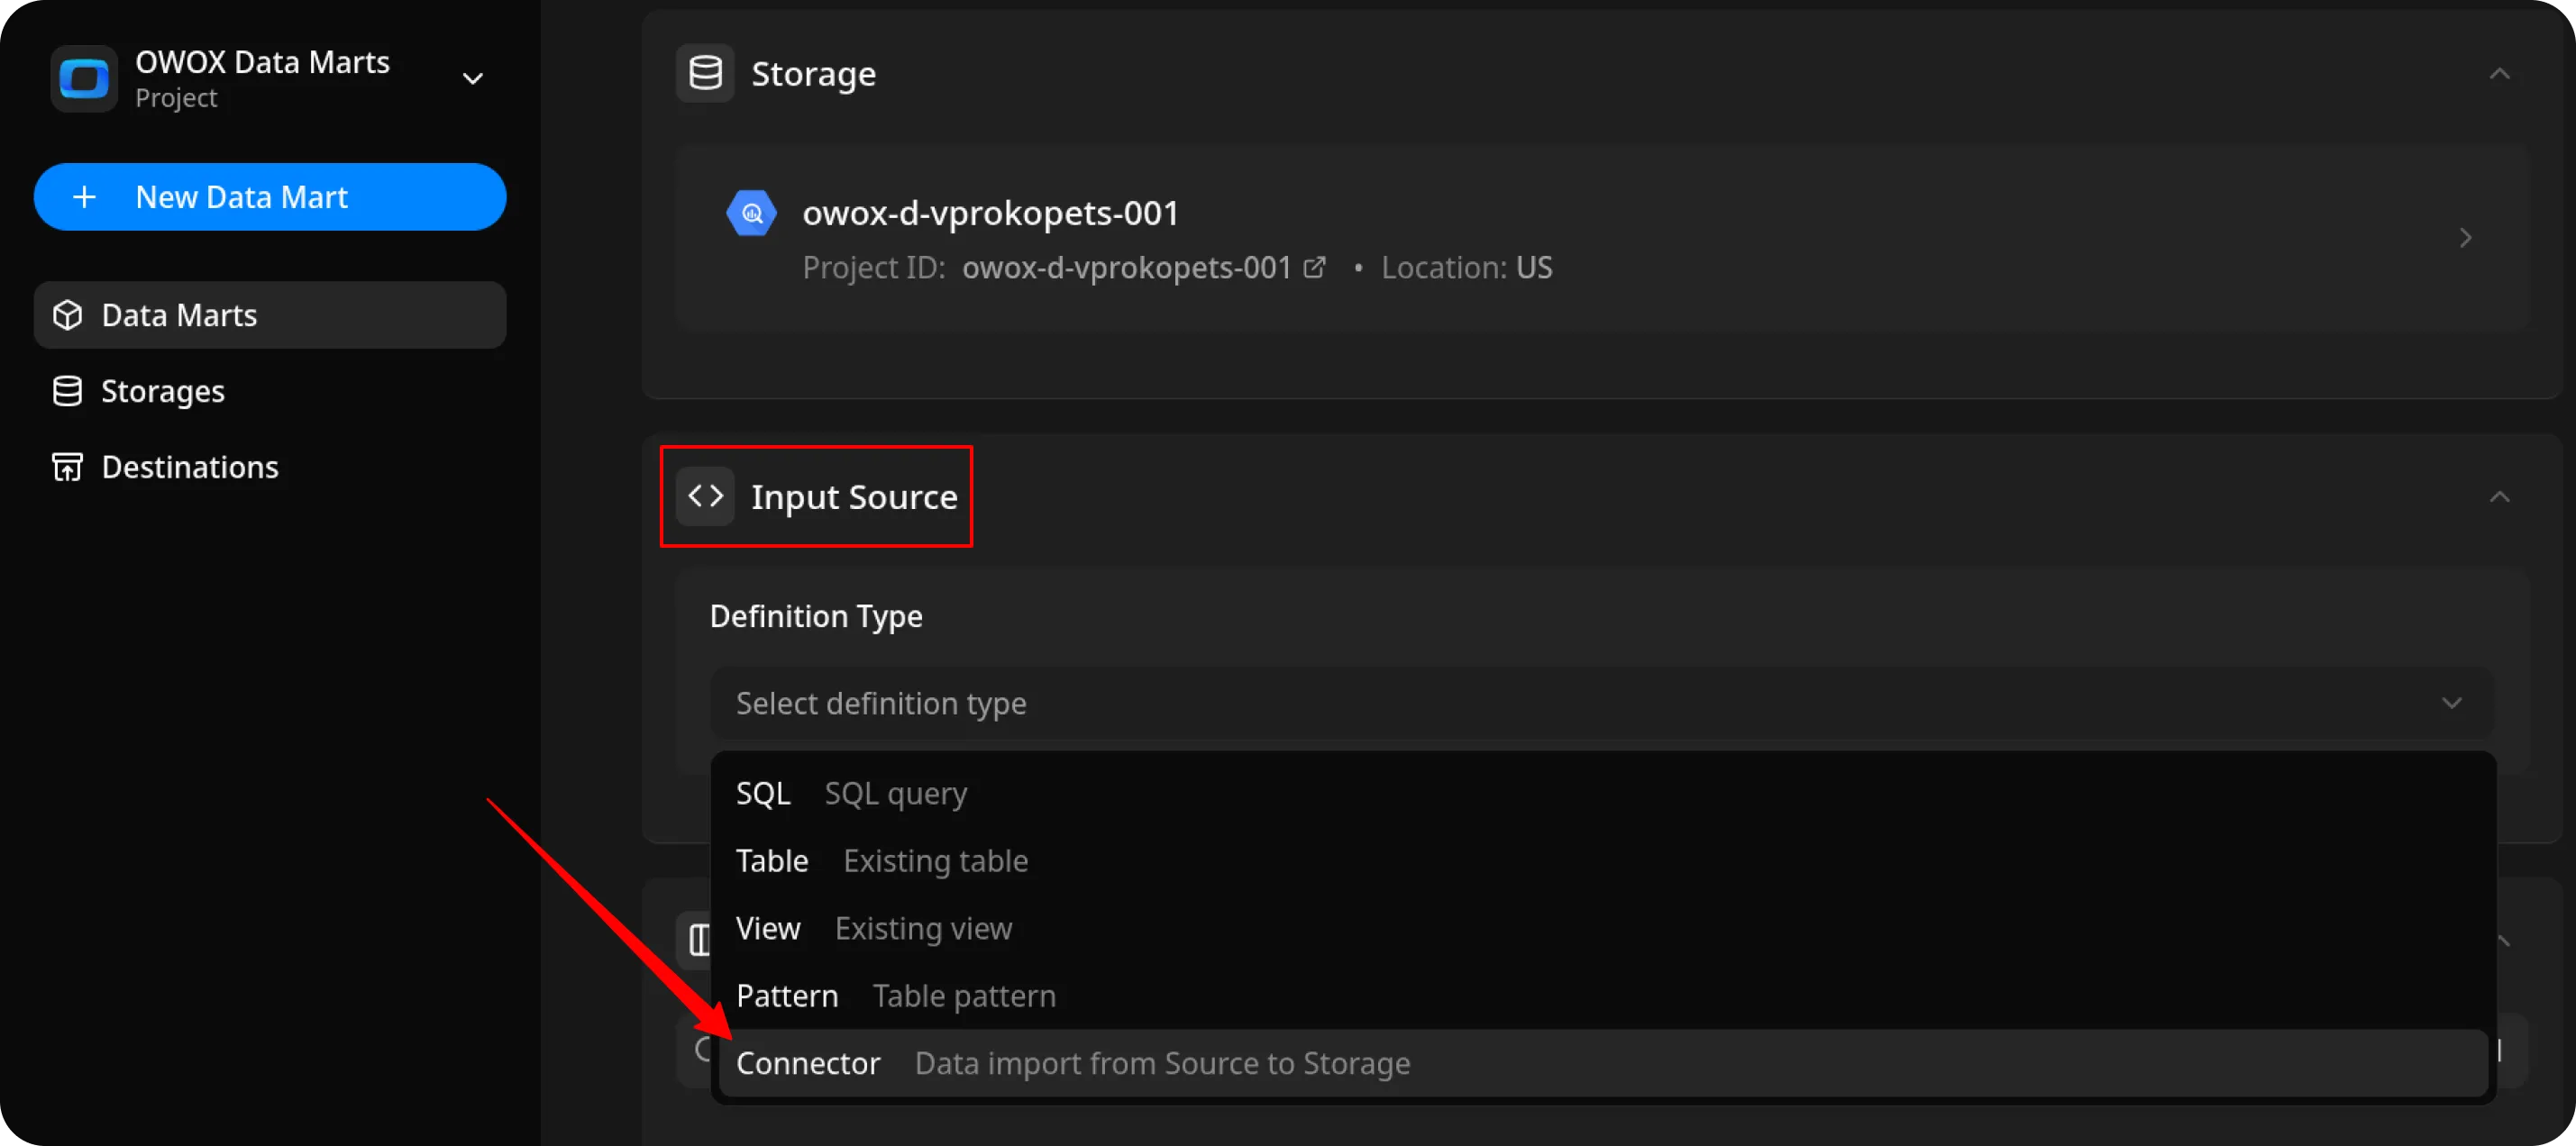
Select Connector as the input source type.
-
Click Set up connector and choose Google Ads.
-
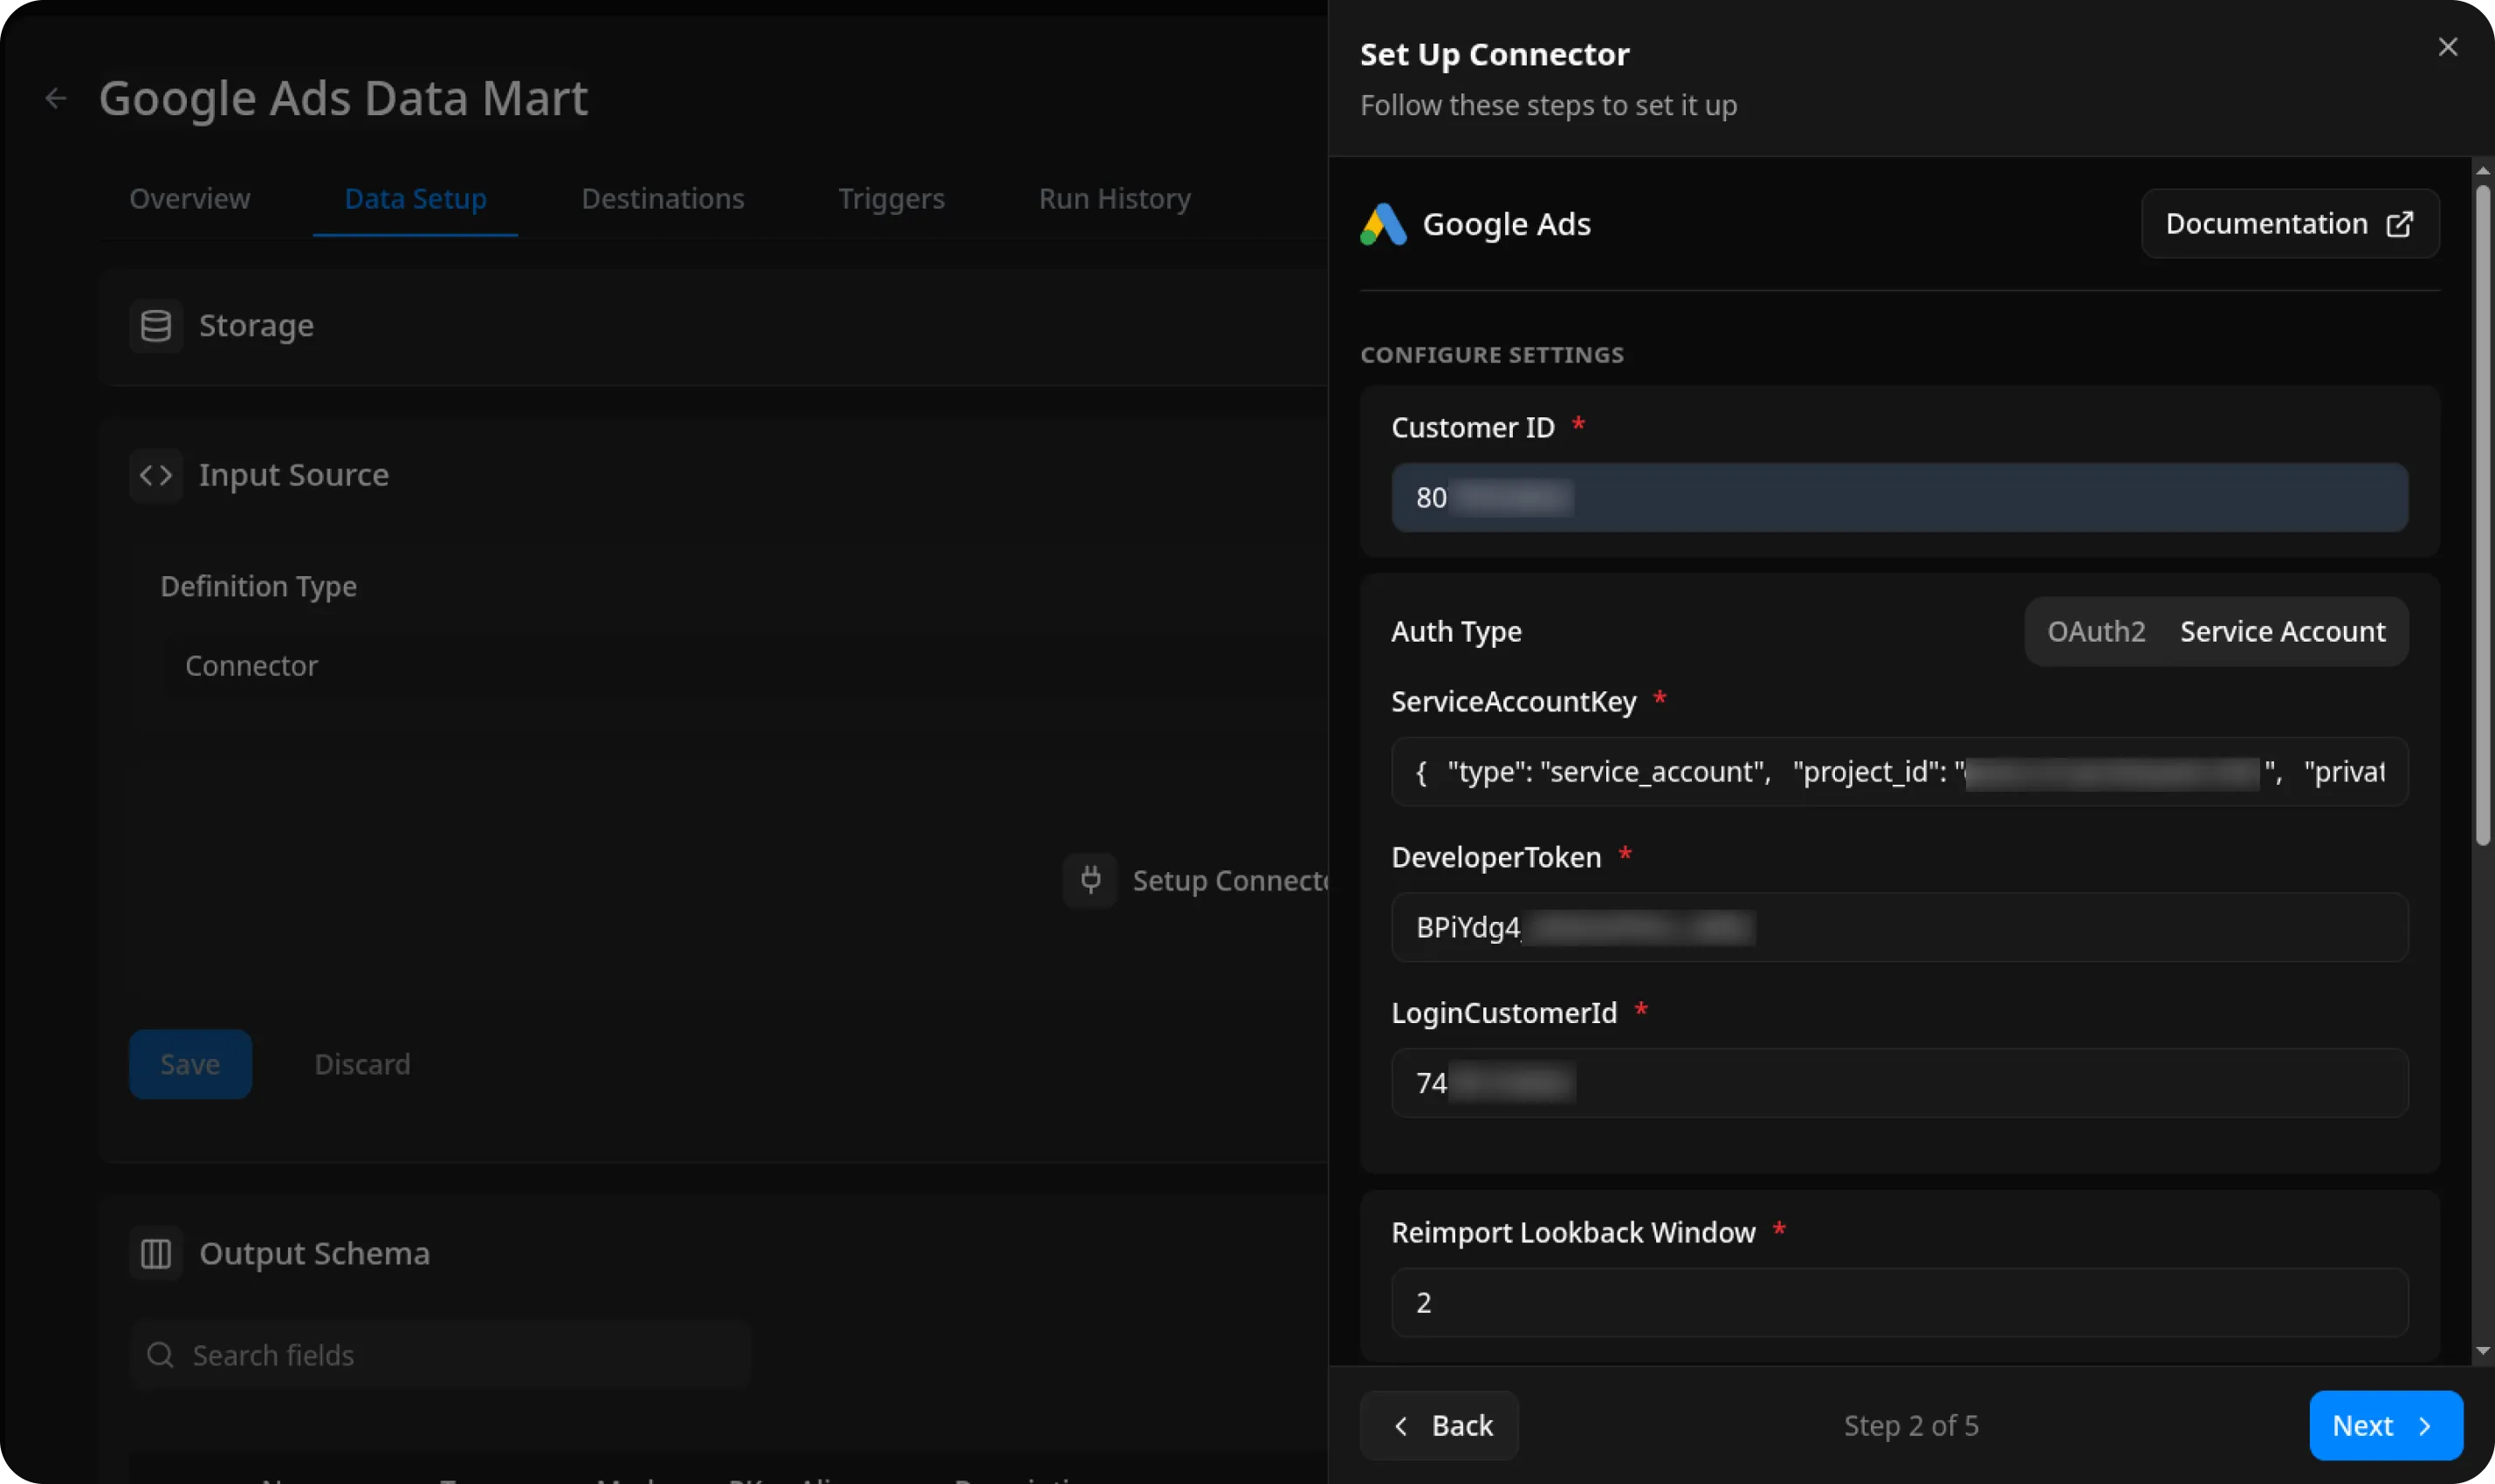
Enter your Customer ID.
⚠️ This is the ID of the account from which you want to retrieve data.
-
Fill in the required fields depending on your chosen authentication type.
(If you need help obtaining any of these values, please refer to the detailed instructions in the CREDENTIALS guide.)
For OAuth2 Authentication (with OAuth button)
Section titled “For OAuth2 Authentication (with OAuth button)”If your OWOX Data Marts instance has OAuth pre-configured by an administrator, you will see a “Sign in with Google” button. This is the recommended approach — it handles token exchange automatically.
- Click Sign in with Google.
- In the popup, select your Google account and grant access.
- The following OAuth scopes are requested:
https://www.googleapis.com/auth/adwords— access to Google Ads datahttps://www.googleapis.com/auth/userinfo.email— to display your connected email
- After successful authorization, you will see “Connected as your-email@example.com”.
- Fill in the remaining fields:
- Customer ID – the ID of the ad account you want to retrieve data from.
- Login Customer ID (optional) – the ID of your Manager (MCC) account, if accessing data through a manager account.
ℹ️ The Developer Token, Client ID, and Client Secret are managed by your instance administrator via environment variables and do not need to be entered manually.
For OAuth2 Authentication (manual credentials)
Section titled “For OAuth2 Authentication (manual credentials)”If OAuth is not pre-configured, you can enter credentials manually:
- Customer ID – enter the ID of the ad account you want to retrieve data from. You can find it in the top-right corner when viewing the specific ad account in Google Ads.
- Login Customer ID – enter the ID of your Manager (MCC) account.
You can find it in the top-right corner when you are logged into your MCC account.
(Format:
12345678without dashes.) - Refresh Token – paste the refresh token you generated using OAuth Playground in the Credentials guide.
- Client ID – enter the Client ID from the OAuth client you created in Google Cloud Console → Google Auth Platform → Clients.
- Client Secret – enter the Client Secret shown when creating your OAuth client, or use the value stored in the downloaded JSON.
- Developer Token – paste the Developer Token from your Google Ads API Center in your MCC account.
For Service Account Authentication
Section titled “For Service Account Authentication”- Customer ID – enter the ID of the ad account you want to retrieve data from. You can find it in the top-right corner when viewing the specific ad account in Google Ads.
- Service Account Key – paste the full JSON key file content you created in Google Cloud Console → IAM & Admin → Service Accounts → Manage Keys.
- Developer Token – paste the Developer Token from your Google Ads API Center in your MCC account.
- Login Customer ID – enter the ID of your Manager (MCC) account, found in the top-right corner of your MCC dashboard.
(Format:
12345678without dashes.)
Leave all other fields as default, then click Next to continue.

Configure Data Import
Section titled “Configure Data Import”- Choose one of the available endpoints.
- Select the required fields.
- Specify the dataset where the data will be stored, or leave it as default.
- Click Finish, then Publish Data Mart.
⚠️ Important Notice:
If you select any stats endpoint (e.g., Campaign Stats, Ad Group Stats, Keyword Stats, etc.), the Customer ID and Login Customer ID must be different.
Stats data cannot be retrieved from an MCC (manager) account — you must specify an ad account’s Customer ID as the data source.
All non-stats endpoints allow data retrieval using an MCC Customer ID.
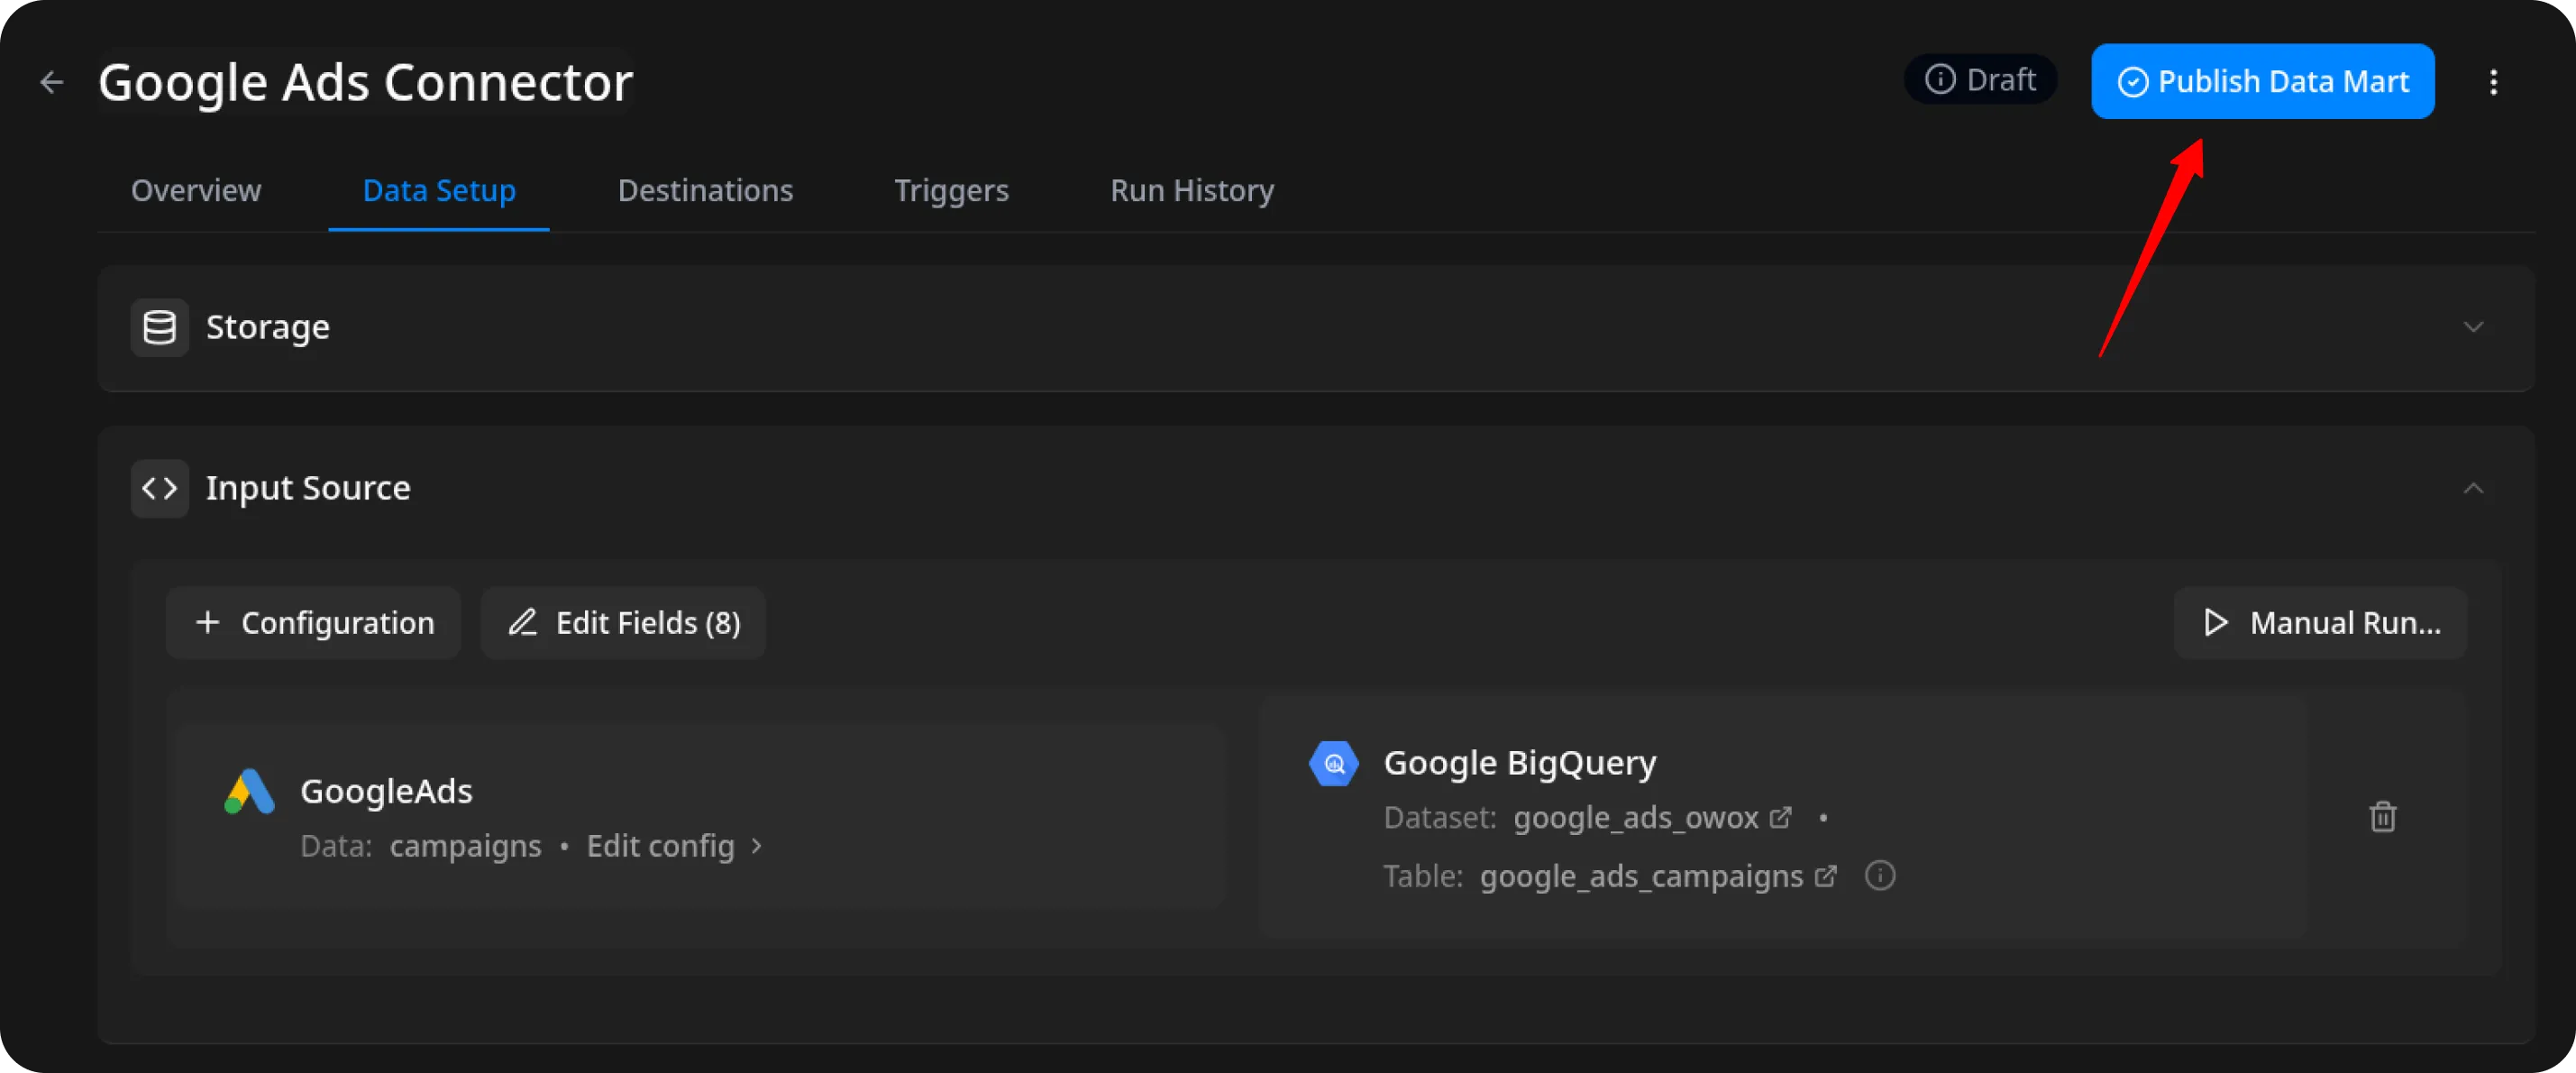
Run the Data Mart
Section titled “Run the Data Mart”Now you have two options for importing data from Google Ads:
Option 1: Import Current Day’s Data
Choose Manual run → Incremental load to load data for the current day.

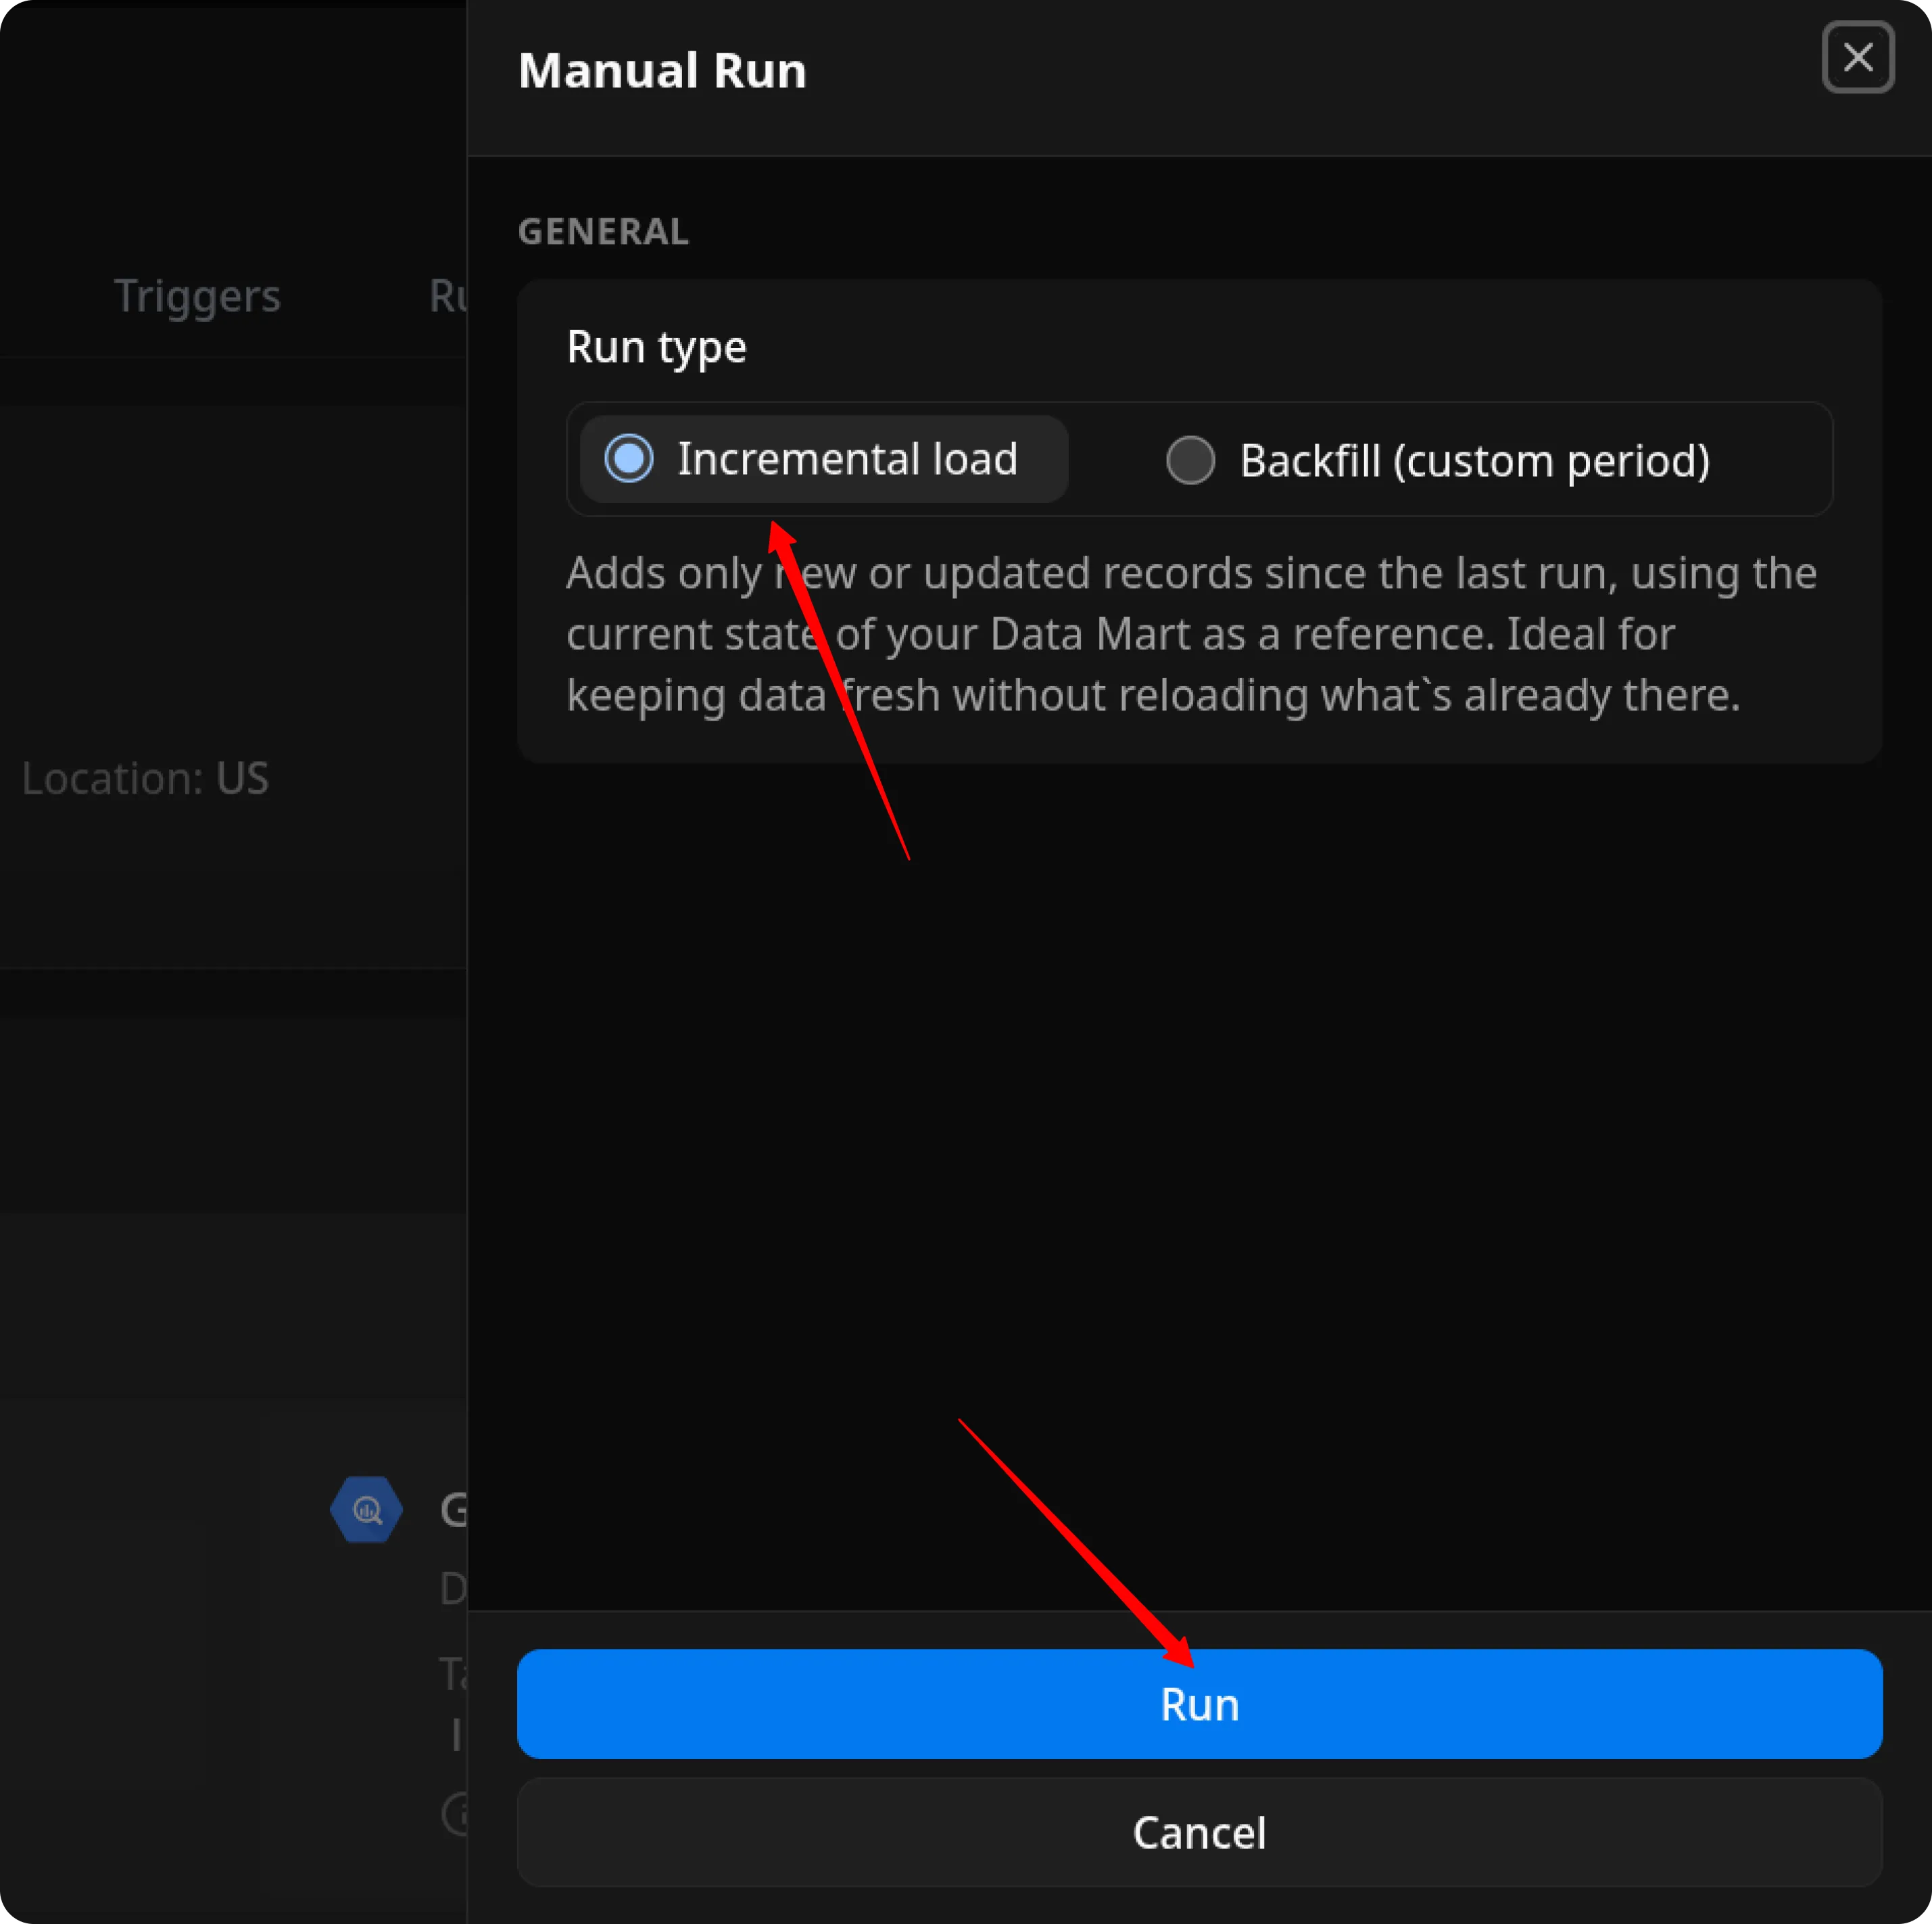
ℹ️ If you click Incremental load again after a successful initial load,
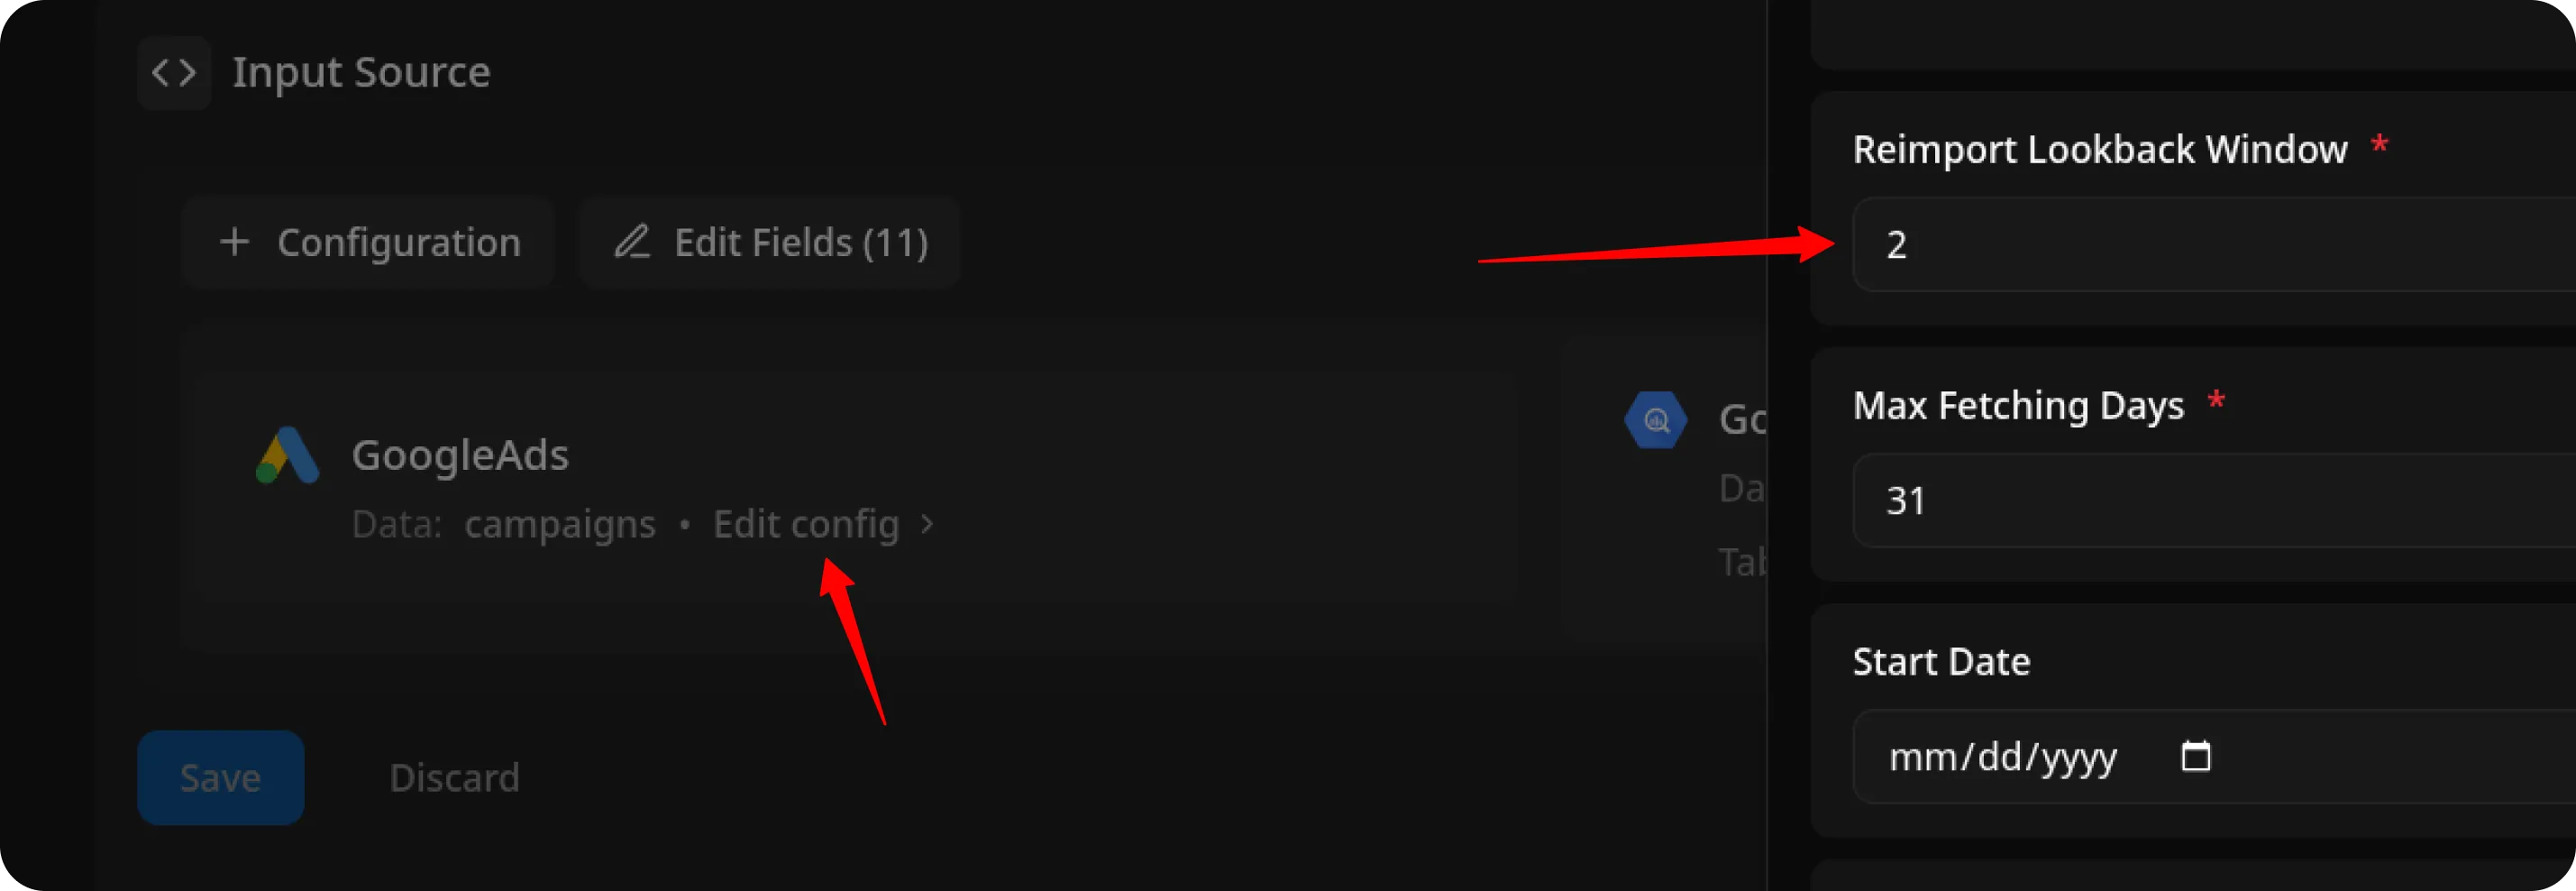
the connector will import: Current day’s data, plus Additional days, based on the value in the Reimport Lookback Window field.
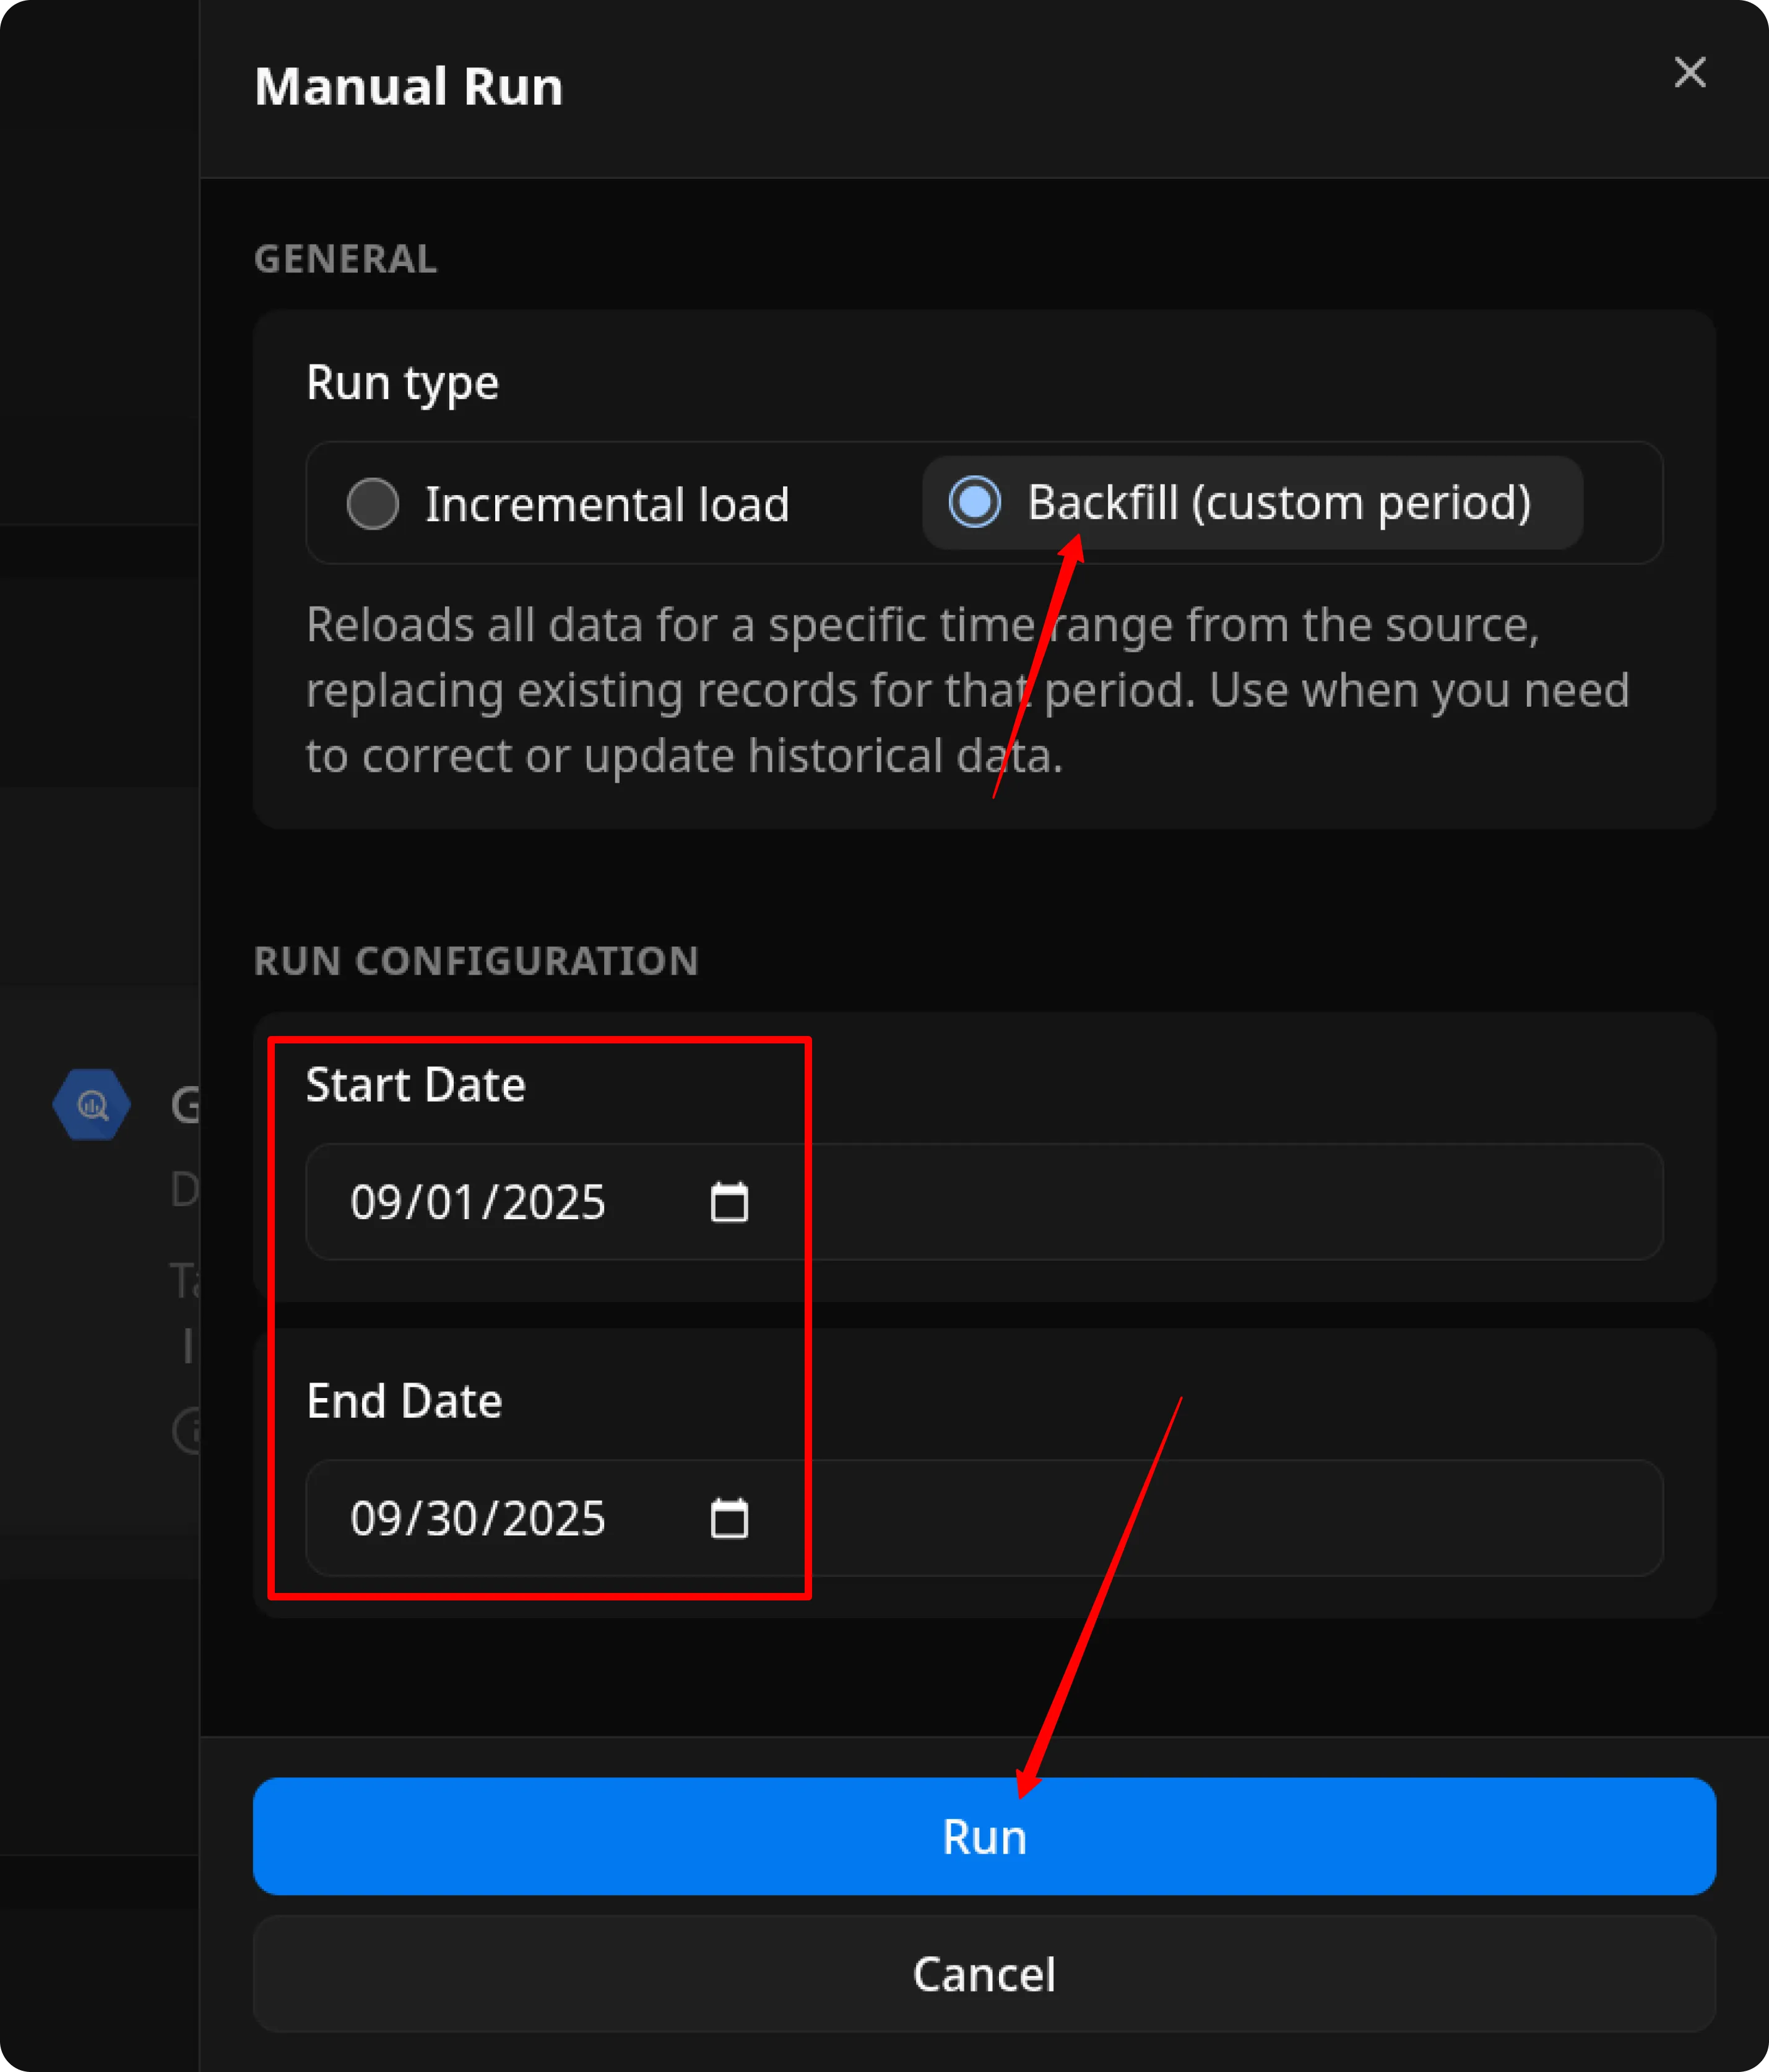
Option 2: Manual Backfill for Specific Date Range
Choose Backfill (custom period) to load historical data for a custom time range.
- Select the Start Date and End Date
- Click the Run button
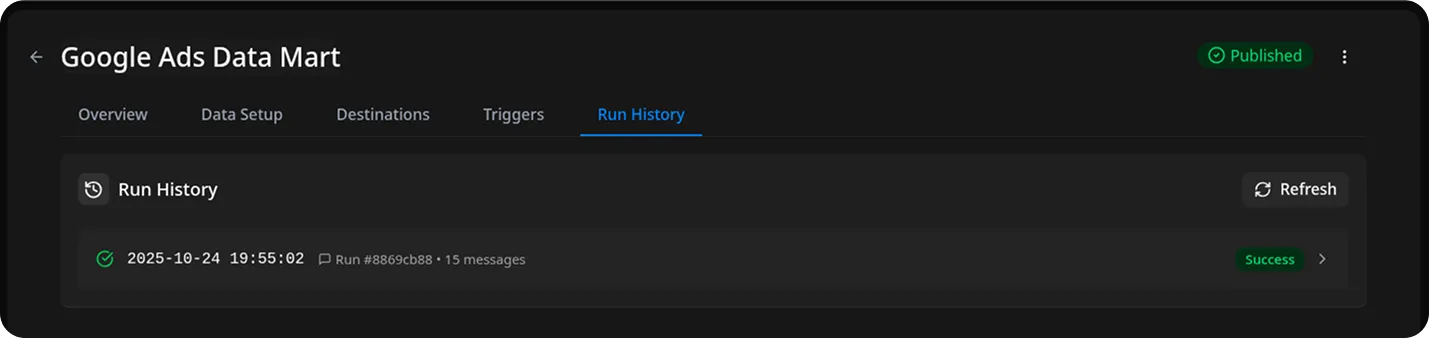
The process is complete when the Run history tab shows the message:
“Success”
Access Your Data
Section titled “Access Your Data”The data will be written to the dataset specified earlier.
If you encounter any issues:
- Check the Run history for specific error messages
- Please visit Q&A first
- If you want to report a bug, please open an issue
- Join the discussion forum to ask questions or propose improvements