Skip to content

How to obtain credentials for the Shopify source

This guide explains how to create a Shopify app and obtain the credentials required to request an Admin API Access Token.

Prerequisites:
You must have a Shopify store and know its address, for example
https://yourstore.myshopify.com/

Open the Dev Dashboard: https://dev.shopify.com/

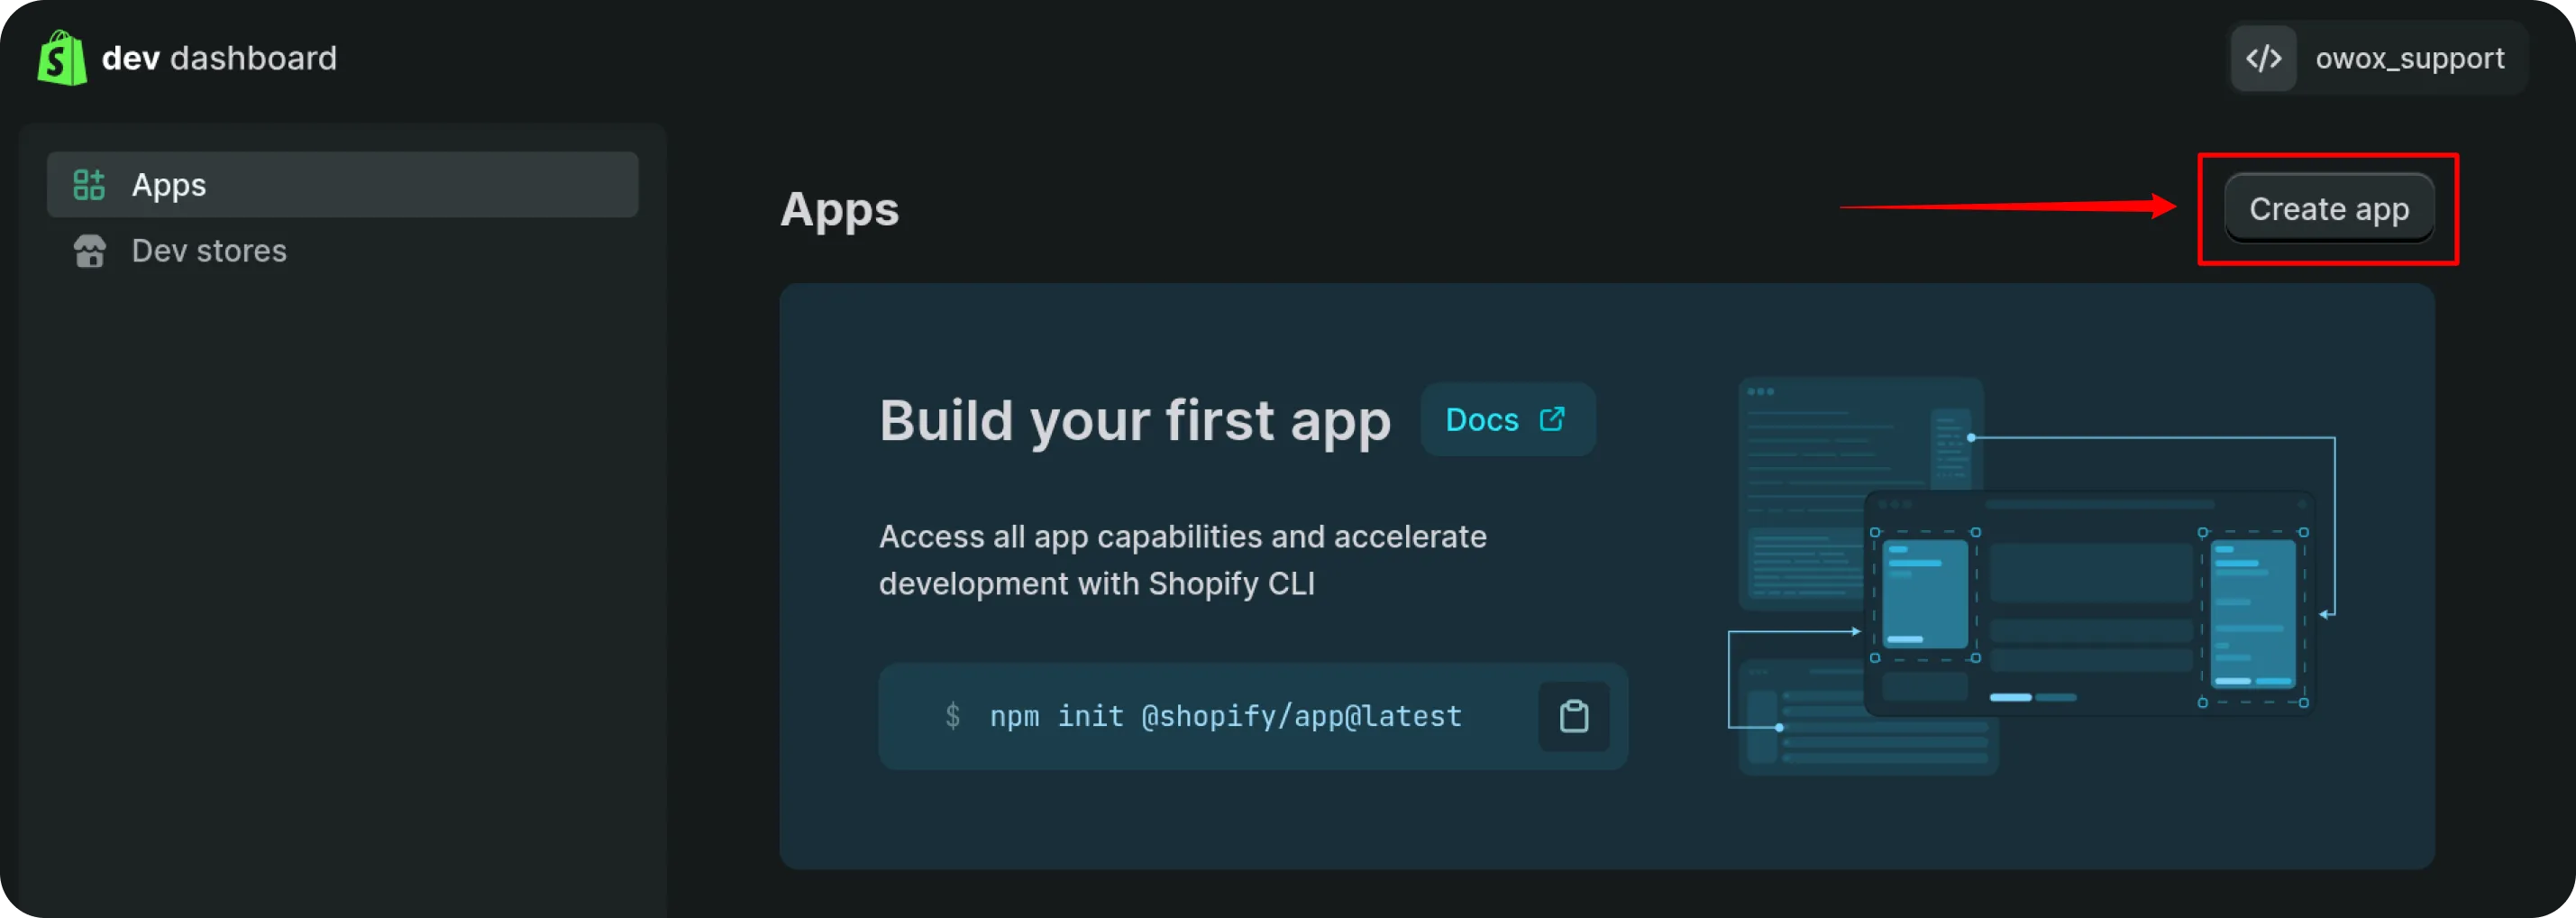
In the left sidebar, select Apps, then click Create app.

Shopify developer dashboard with the Apps section highlighted in the left sidebar. The main area welcomes the user Victoria with the text Welcome back Victoria and displays a button labeled Create store. Below, a store named owox_support with the address owox-support.myshopify.com is listed. The environment has a calm, professional tone with a blue and purple gradient background.

2. Create an App Version and Select Scopes

Section titled “2. Create an App Version and Select Scopes”

Choose Start from Dev Dashboard, enter an app name (e.g., OWOX Data), and click Create. Scroll to the Access section and locate the Scopes field.

Paste the following scopes into the field:

read_assigned_fulfillment_orders,
read_checkouts,
read_content,
read_customers,
read_discounts,
read_inventory,
read_locations,
read_merchant_managed_fulfillment_orders,
read_orders,
read_products

Shopify developer dashboard showing Access section for an app version. The main content area displays a text box filled with required scopes and an empty field for optional scopes. Checkbox labeled Use legacy install flow is visible. Interface uses a dark theme with a calm, professional tone.

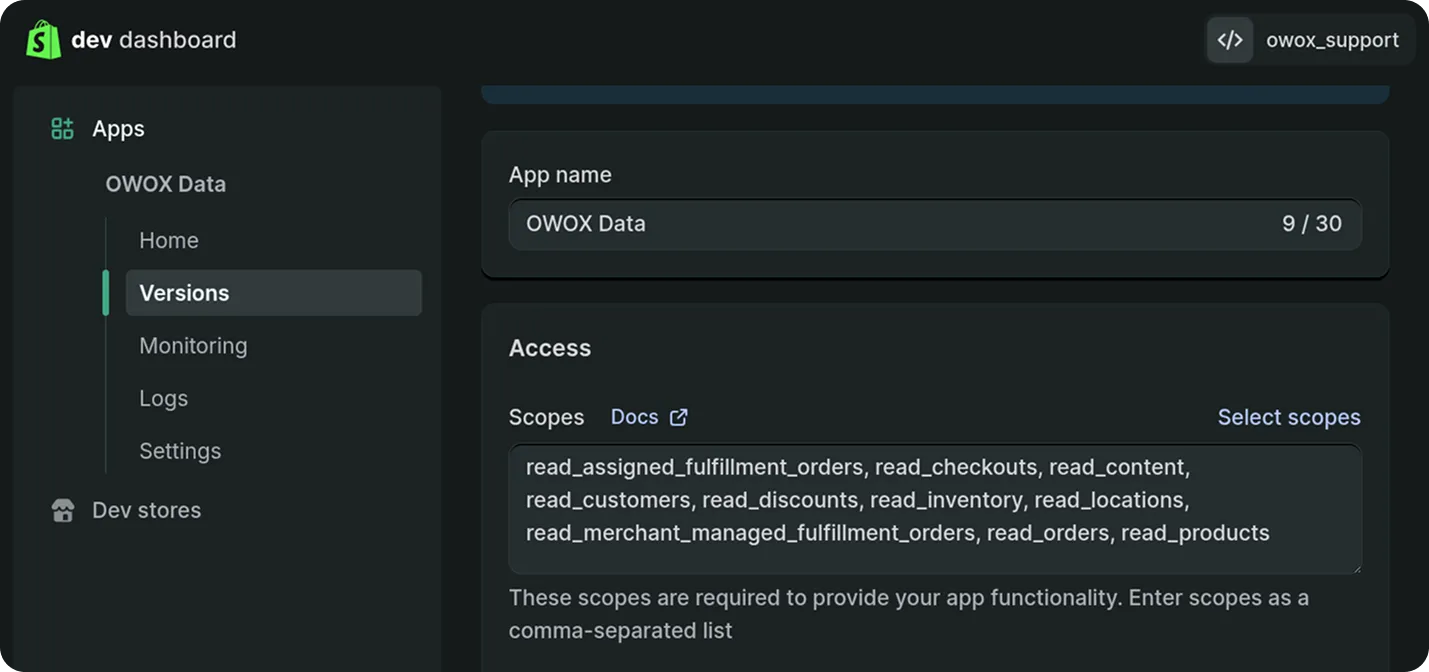
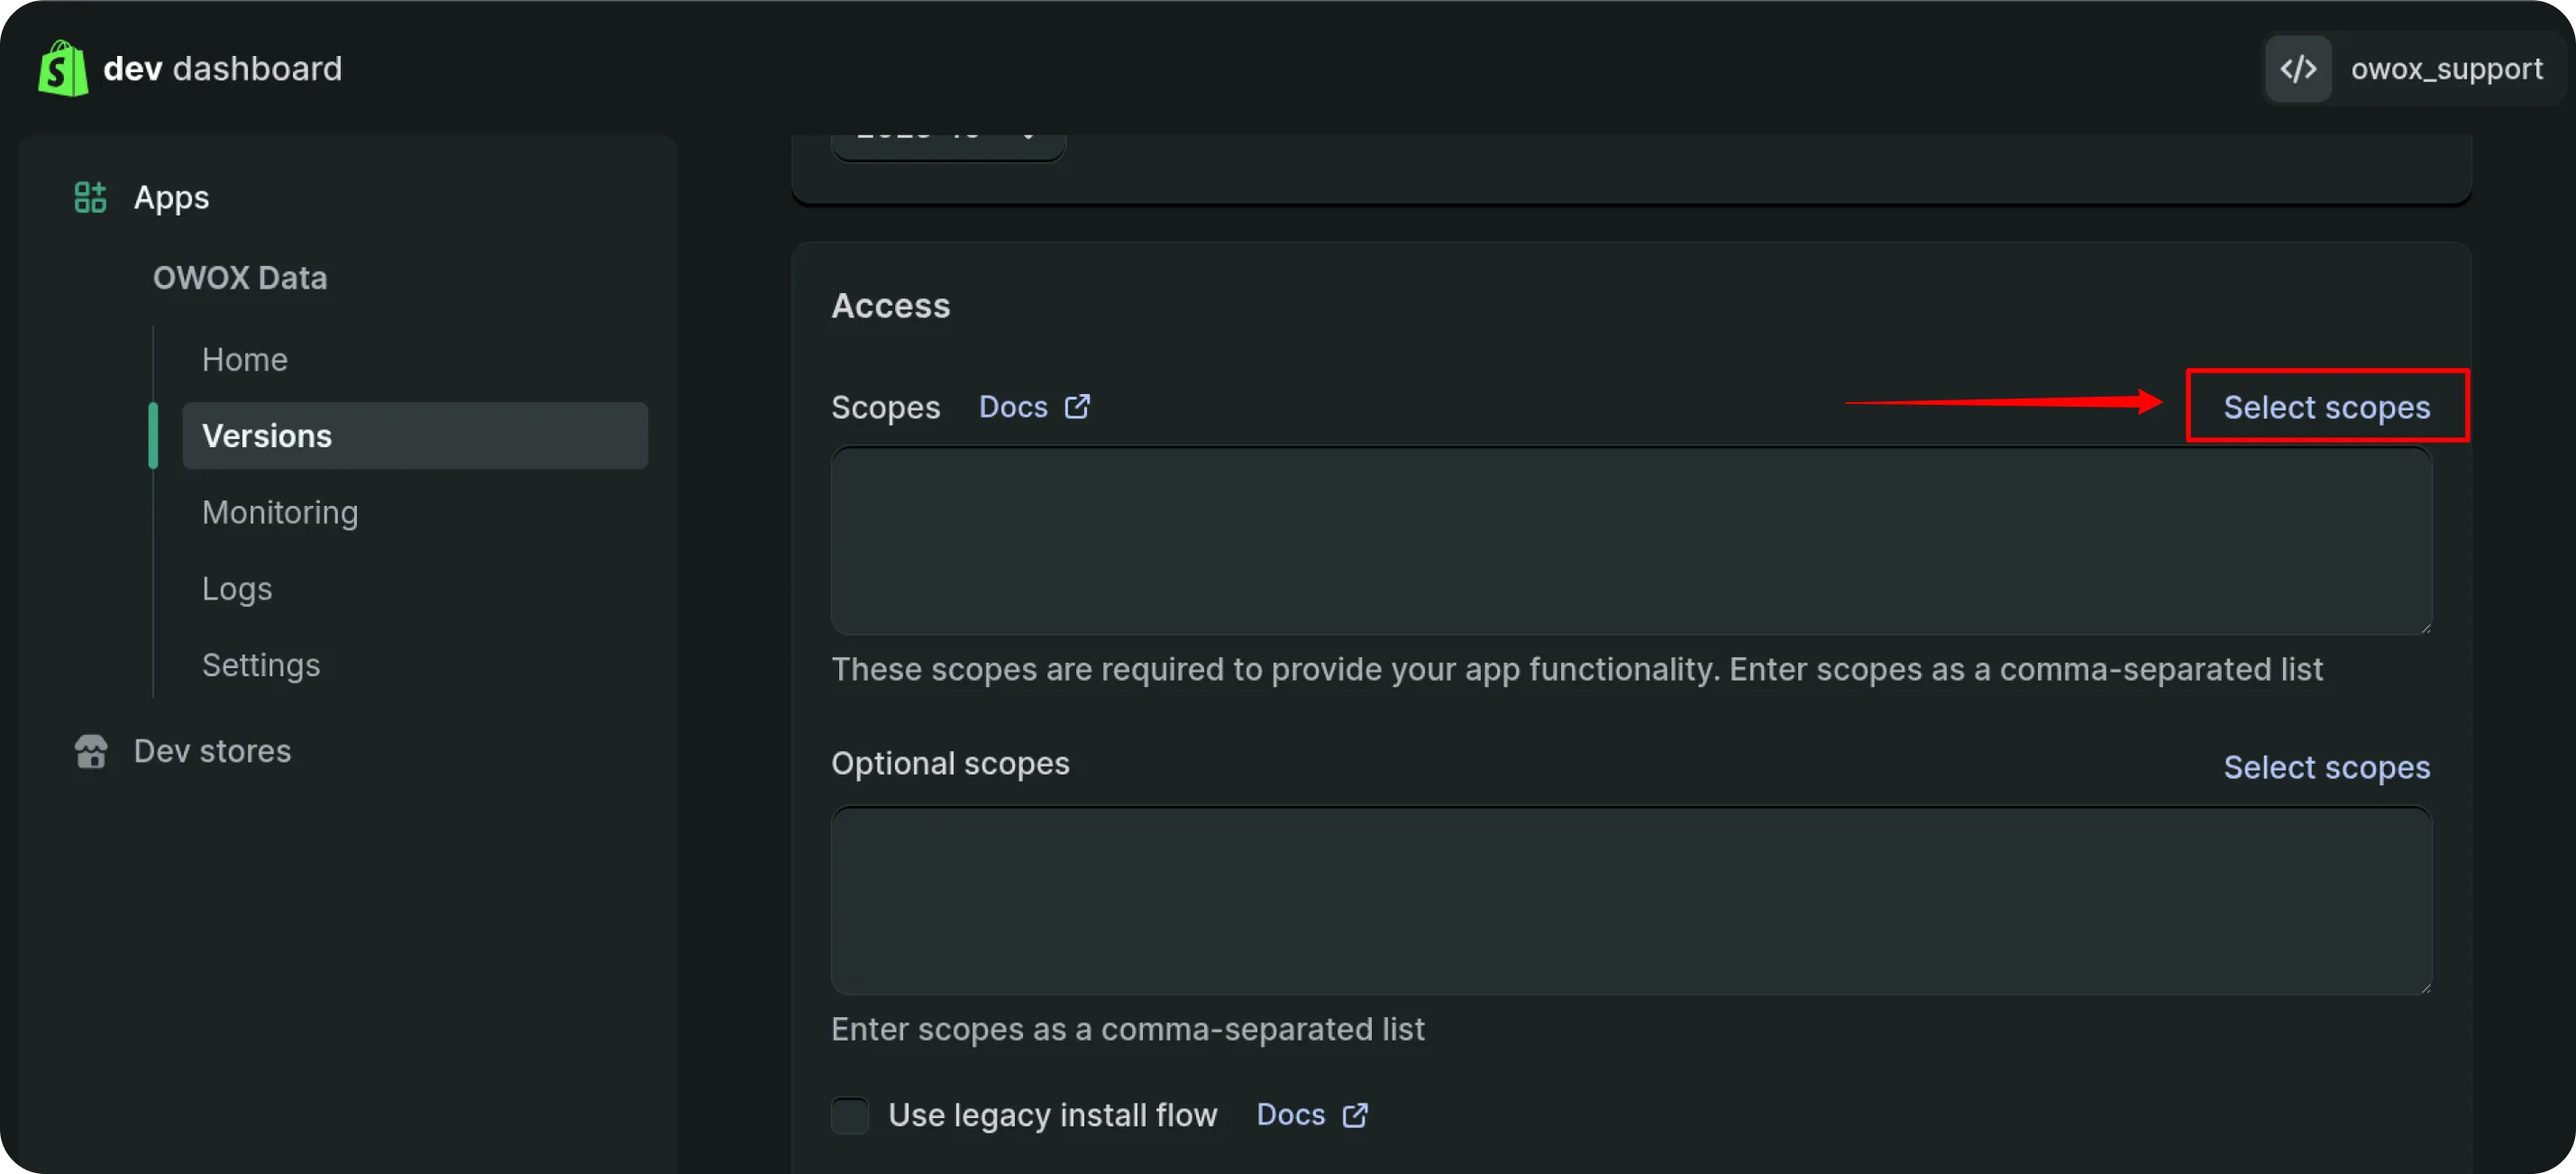
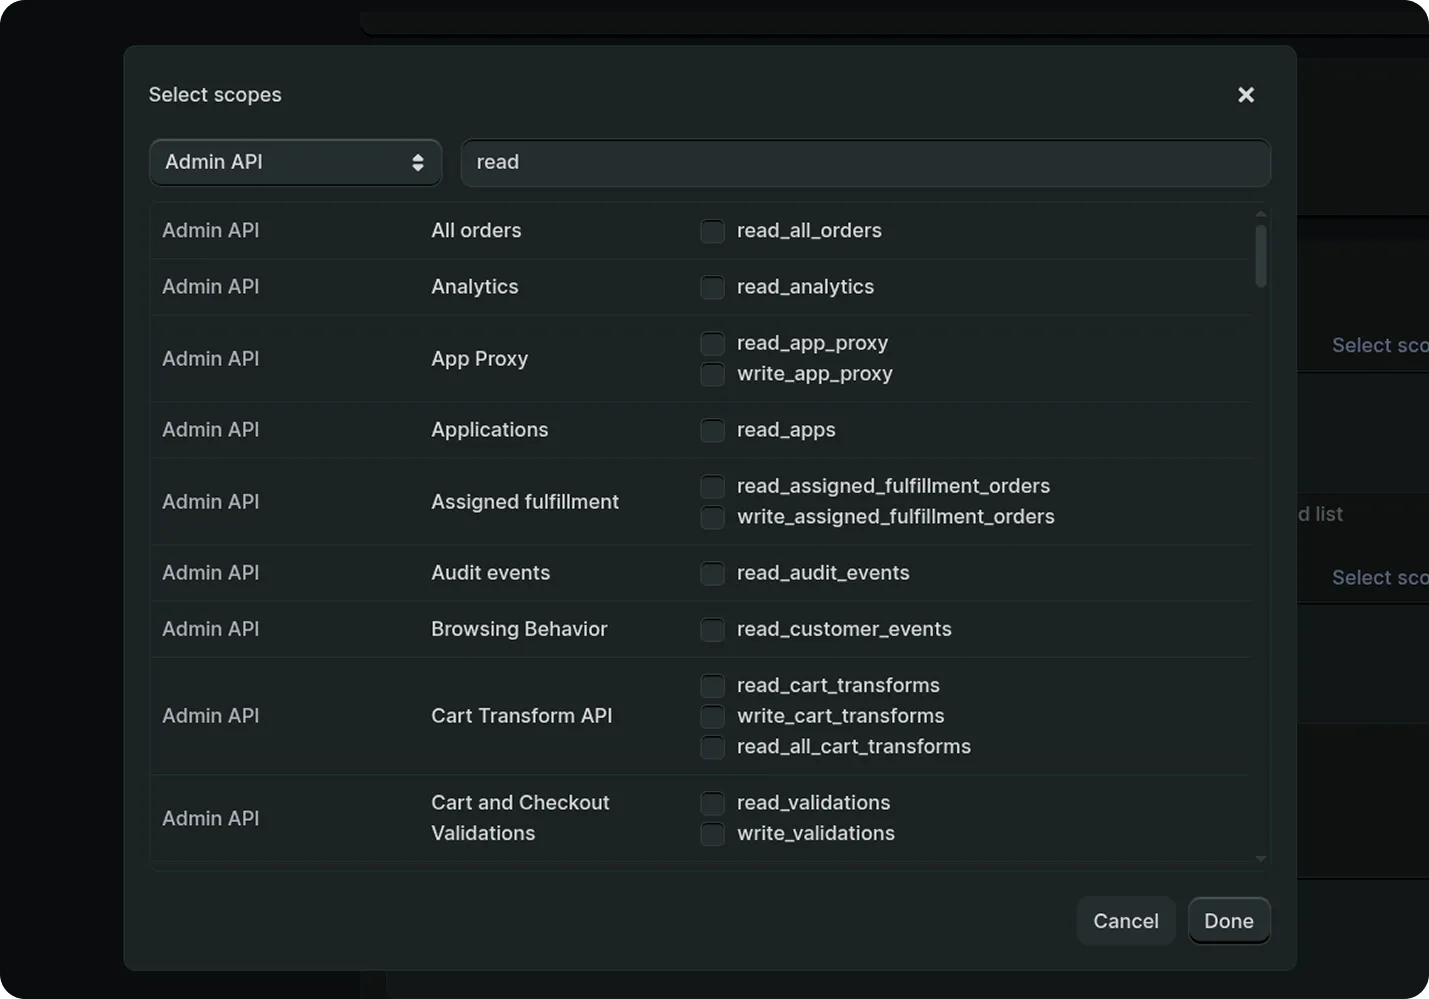
If you need additional scopes, click Select scopes and choose them.

Shopify developer dashboard with Versions section selected in the left sidebar under OWOX Data. The main area displays Access section with fields for required and optional scopes. A red arrow points to the Select scopes button on the right. The interface uses a dark theme with a calm, professional tone.

Select scopes dialog for Admin API in Shopify developer dashboard. Dialog includes a dropdown to choose API, a search box with the word read entered, and a list of available scopes with checkboxes, none selected. The interface uses a dark theme with a calm, professional tone.

Click Release, then confirm in the next dialog.

Shopify developer dashboard on Create a version page for an app. Release button is highlighted in the upper right with a red box and arrow. The page includes sections for starting with Shopify CLI, entering app name OWOX Data, and specifying app URL as https://example.com. The interface uses a dark theme with a calm, professional tone.

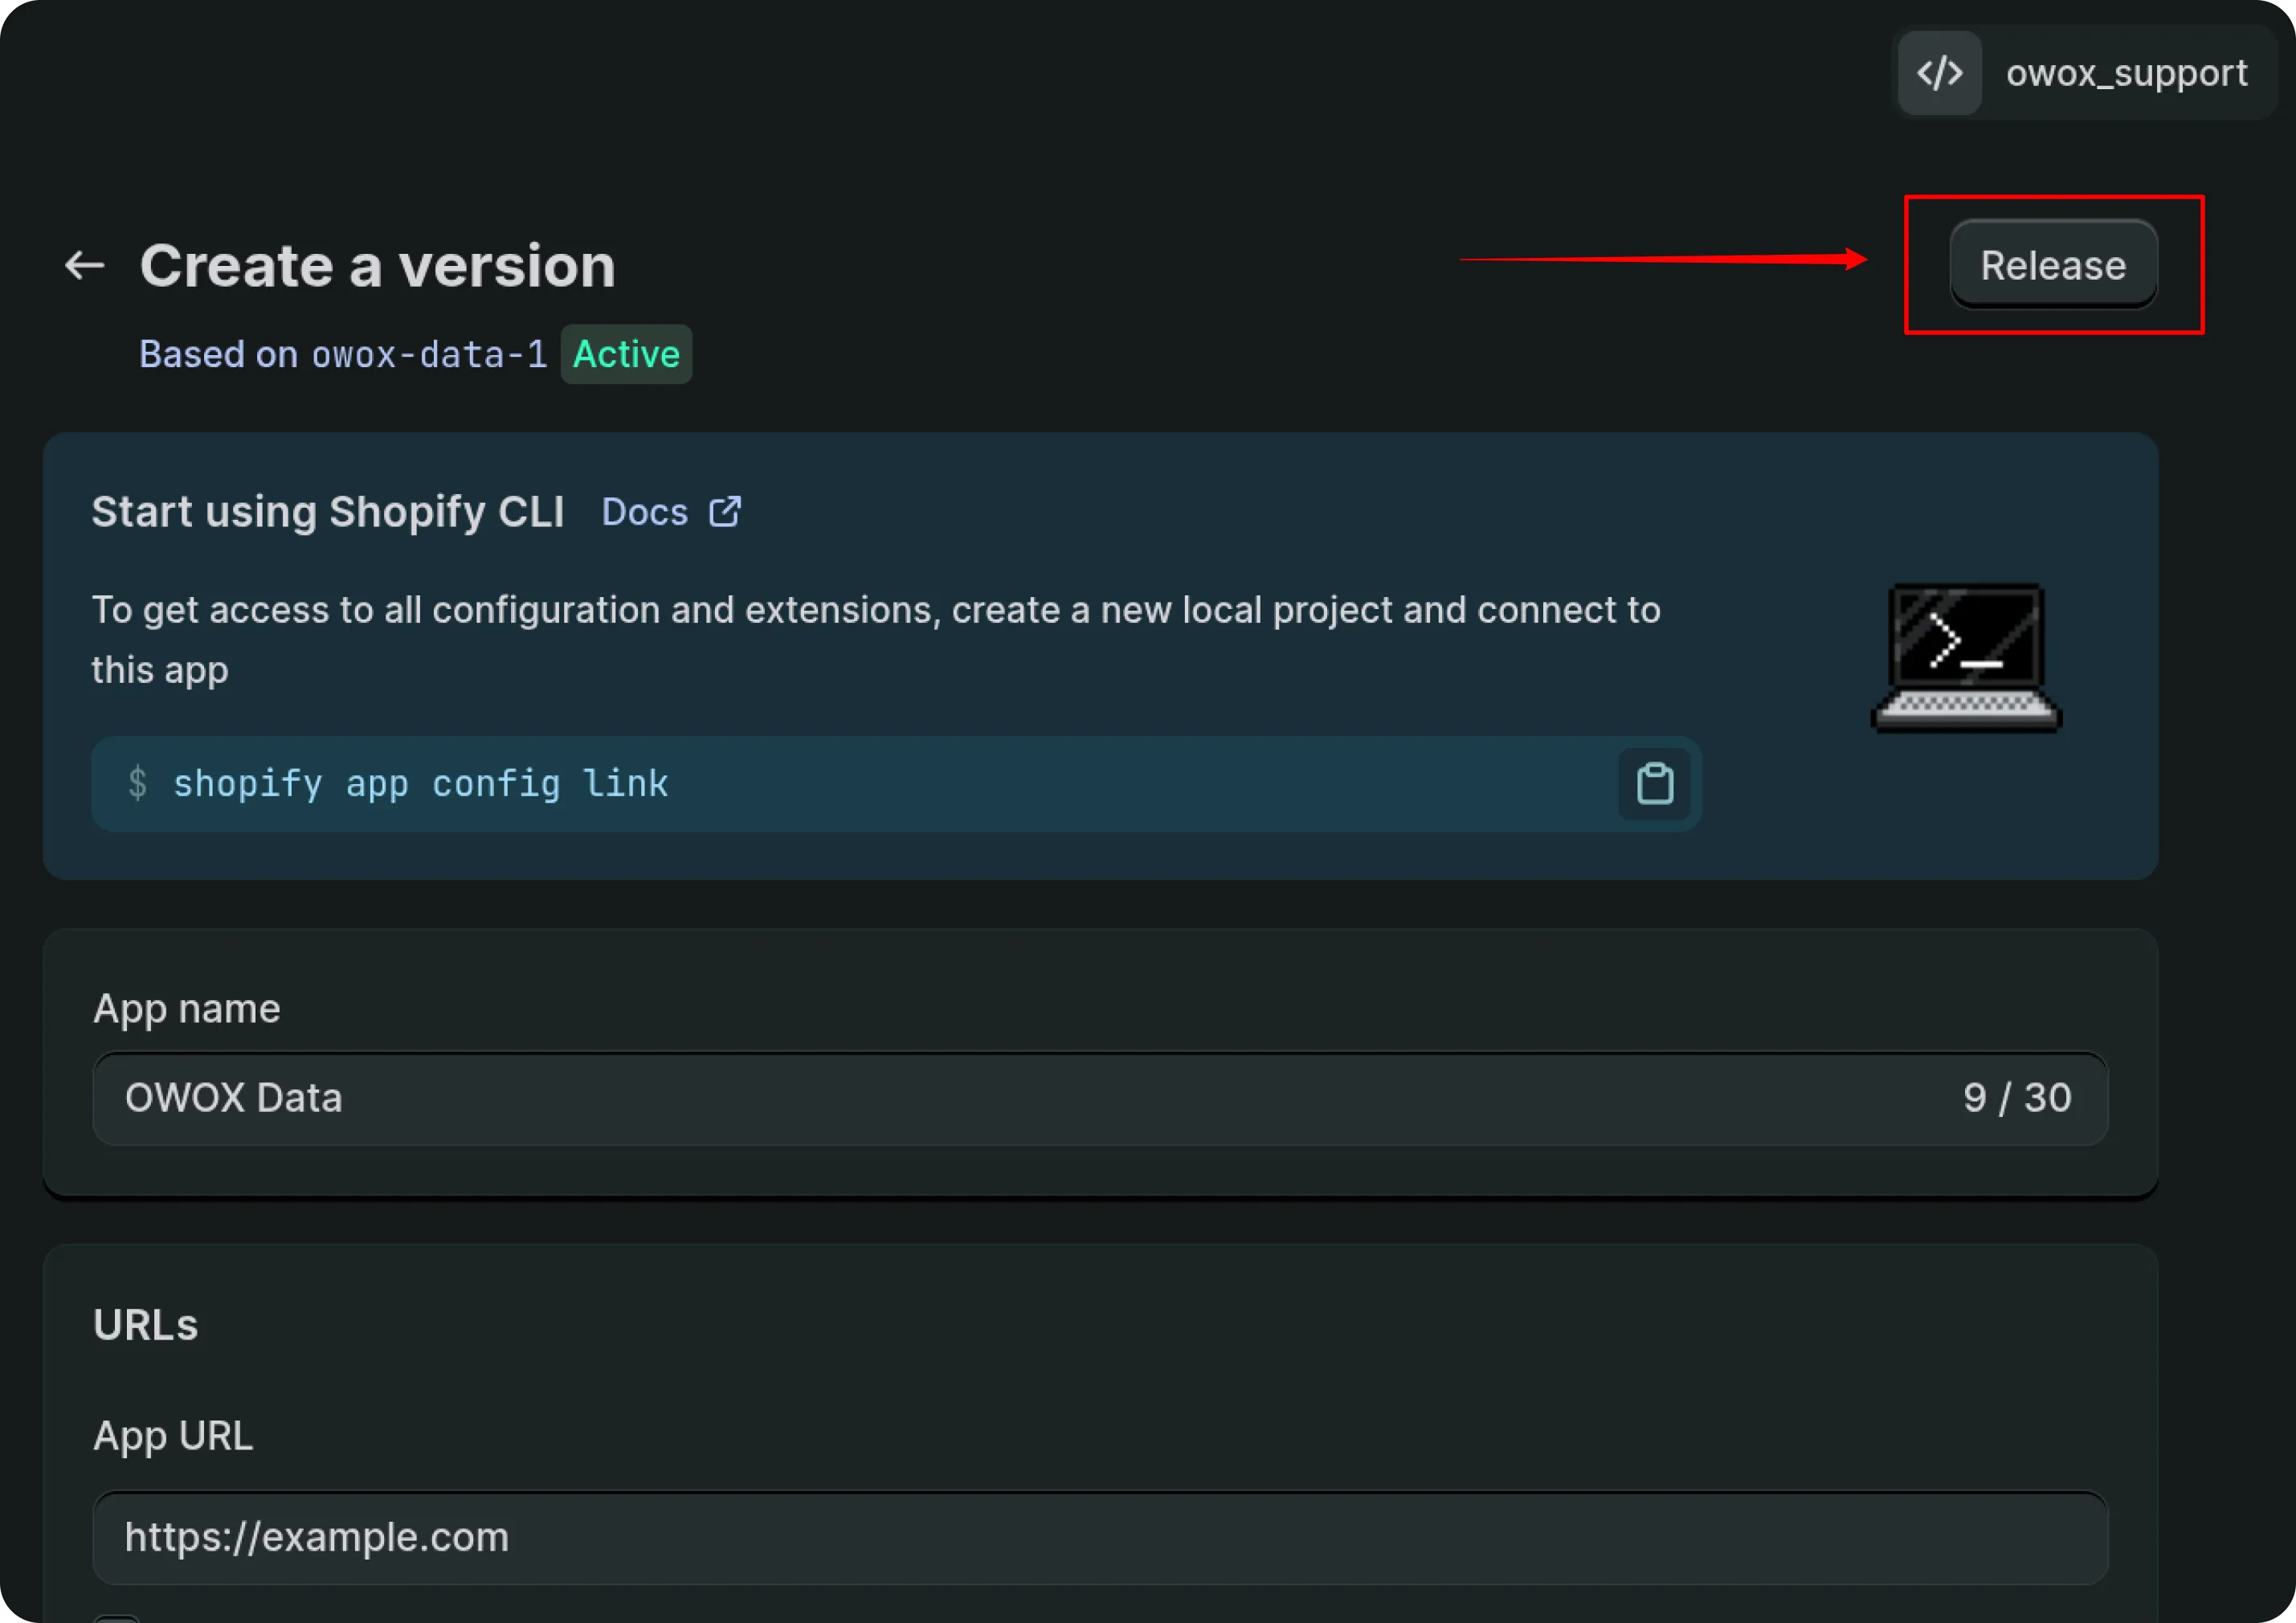
This publishes a version of your app so that it can be installed.
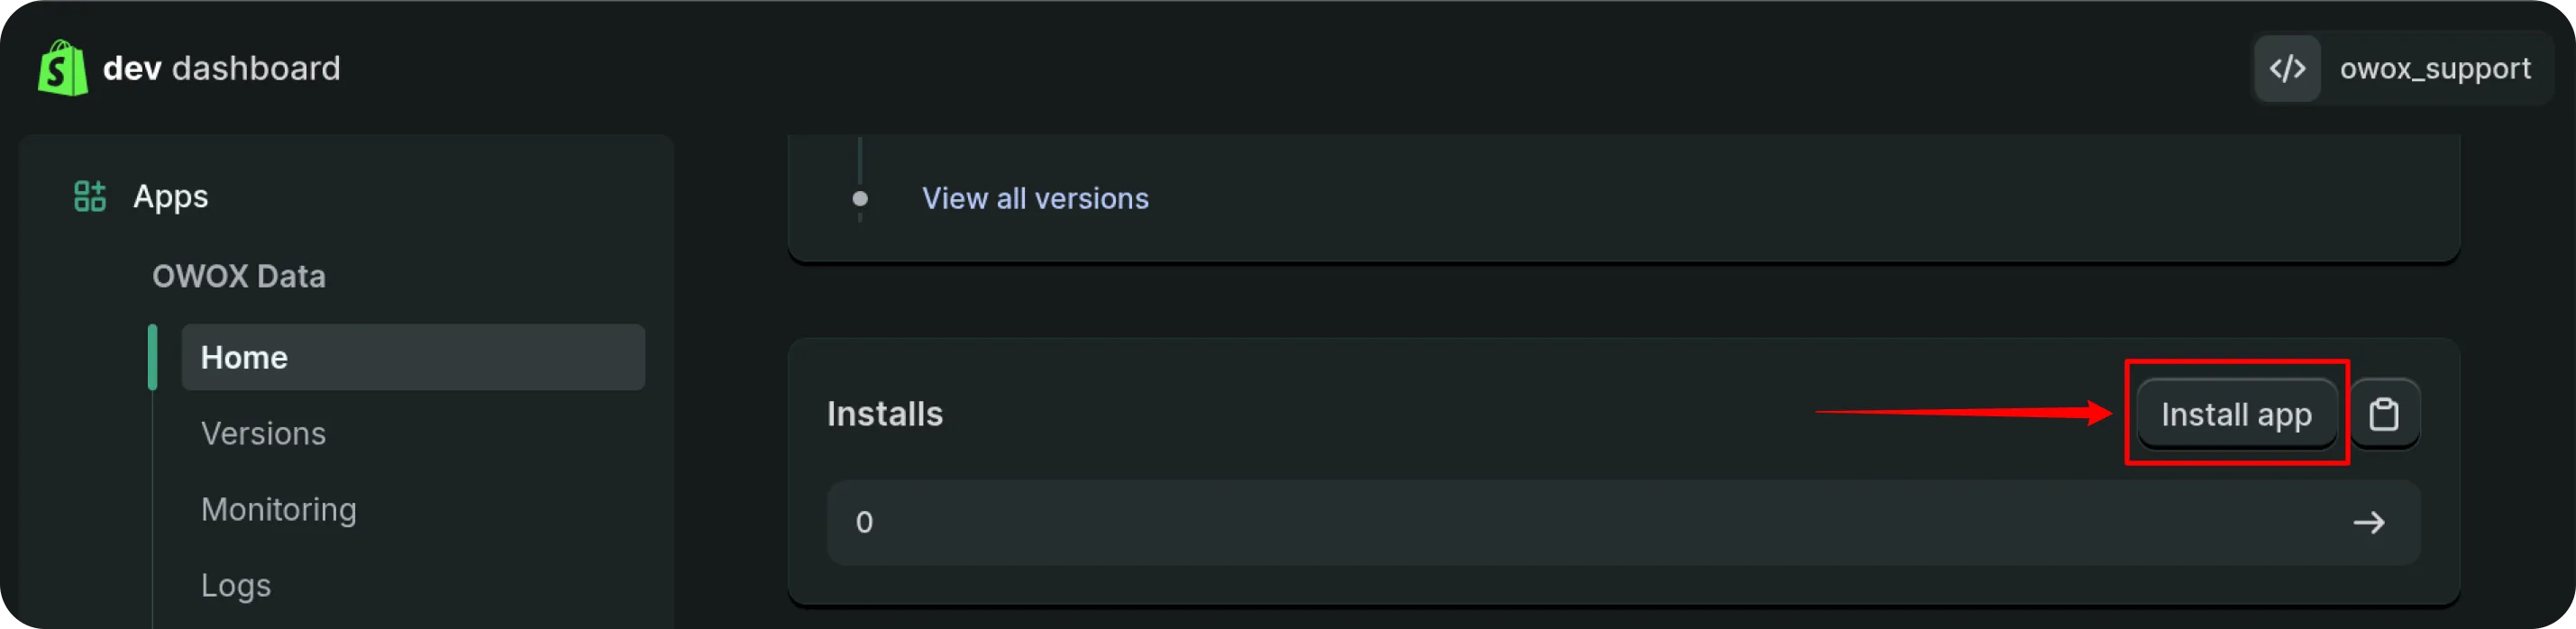
Return to your app’s Home page.

Locate the Install section and click Install app.

Shopify developer dashboard Home page with Installs section in the main area. A red arrow points to the Install app button, which is outlined in red. The interface uses a dark theme with a calm, professional tone.

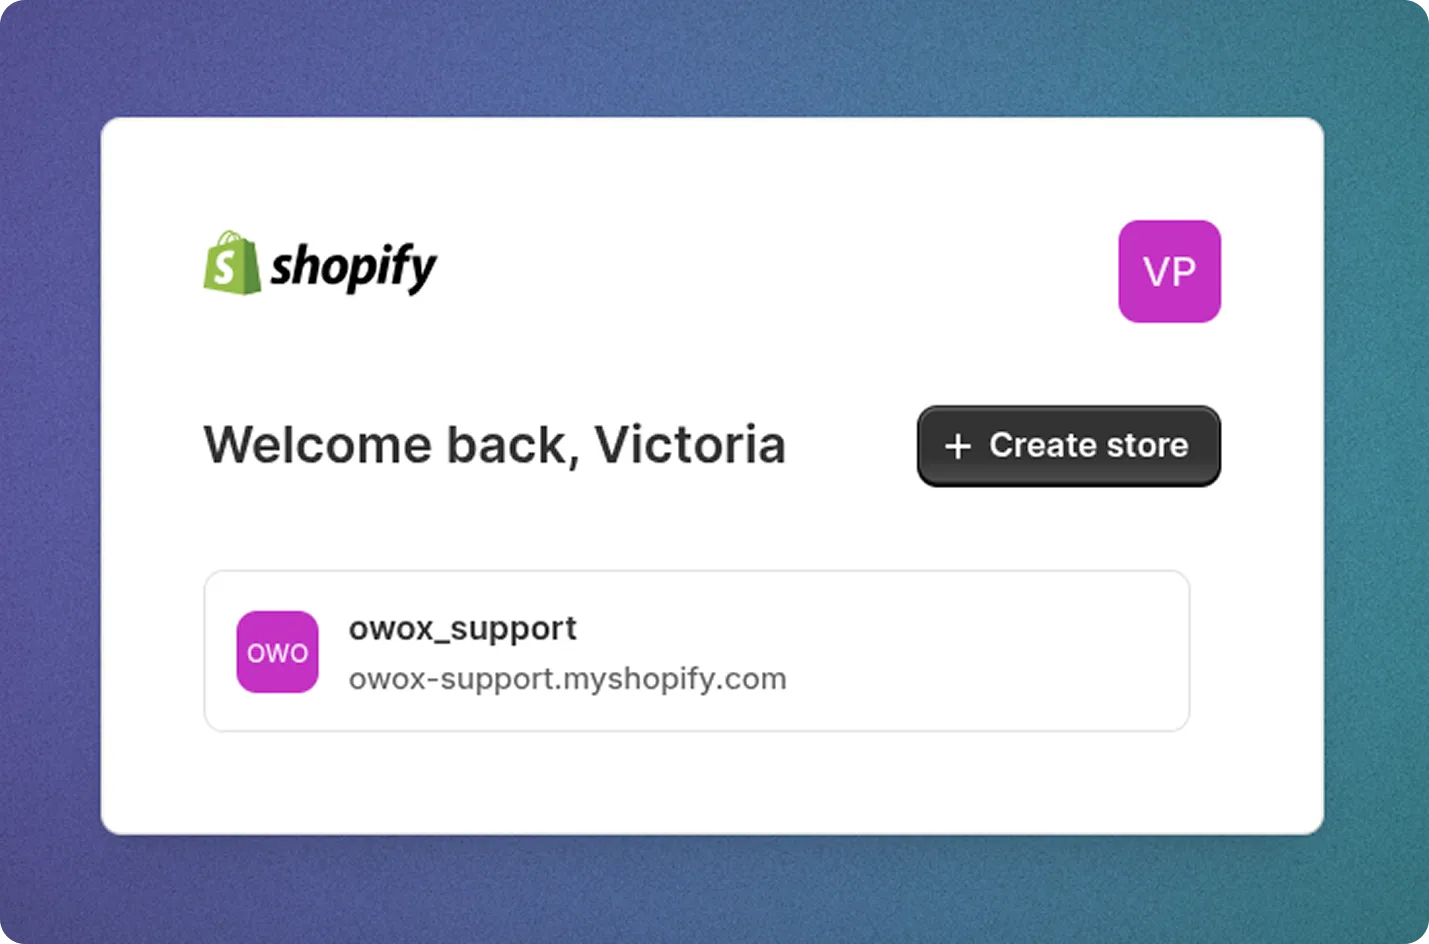
Choose your Shopify store when prompted.

Shopify interface prompting to select a store. Store owox_support is listed with address owox-support.myshopify.com. User avatar with initials VP is visible in the upper right. The environment has a calm, professional tone with a blue and purple gradient background.

In the store admin panel, review the permissions and click Install.

Shopify Install app dialog. Warning banner at the top reads This app hasn't been reviewed. Shopify reviews apps to ensure your security is protected. Be sure you trust this app developer before installing. App OWOX Data by owox_support is listed. The app needs access to view personal data for customers and store owner, and view store data for customers, products, orders, and discounts. At the bottom, Cancel and Install buttons are shown, with Install highlighted. The interface is clean and neutral.

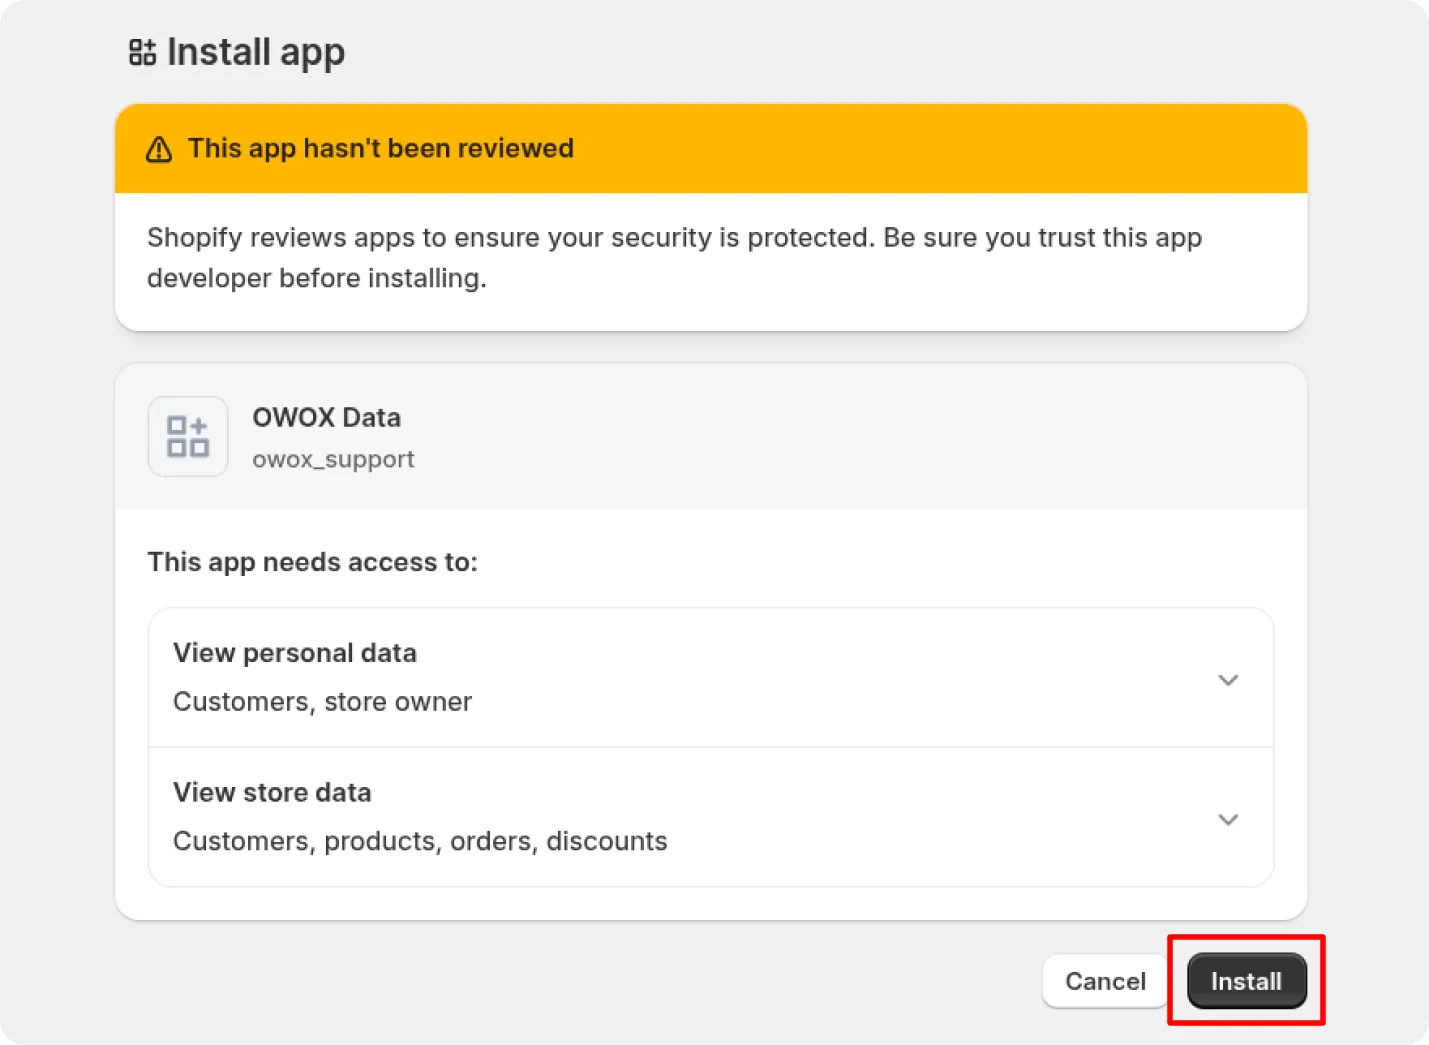
After installation, the app appears in your store’s Apps section.
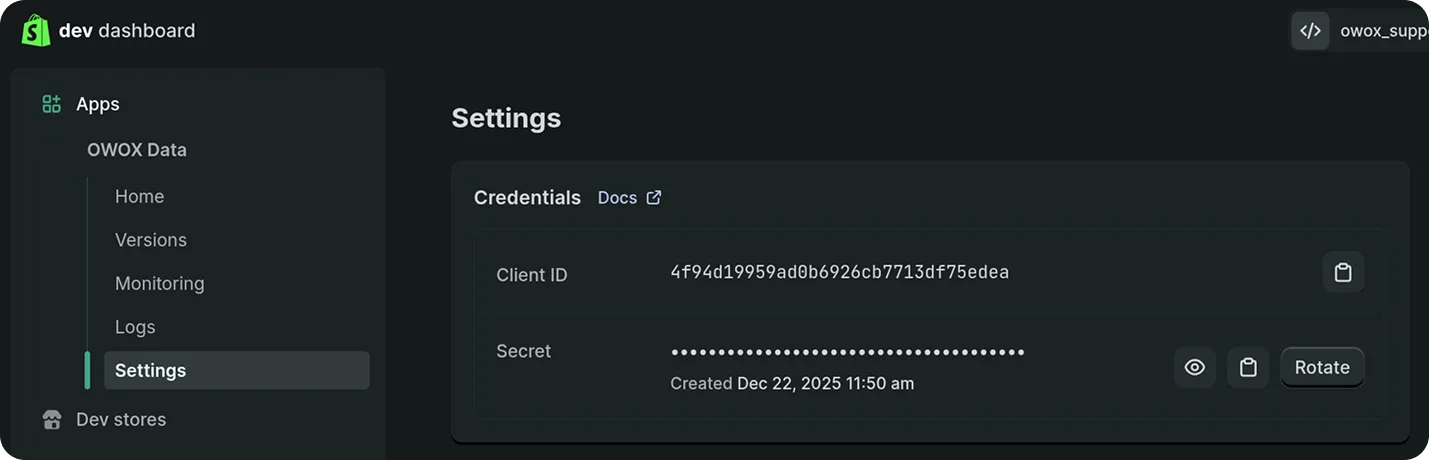
Return to the Dev Dashboard, open your app, and navigate to Settings.

You will see:

  • Client ID
  • Secret

Save both — they will be required to generate the Admin API Access Token.

Shopify developer dashboard displaying the OWOX Data app settings page. The left sidebar lists navigation options. The main section shows Credentials with a Client ID value and a masked Secret. There are buttons to copy, view, or rotate the secret. The interface has a dark theme and a calm, professional tone.

To get the Admin API Access Token, you need to make a request to the Shopify Admin API. The request should include the Client ID and Secret in the Authorization header. Use the template below and replace your_client_id and your_secret with your actual Client ID and Secret.

ValueWhere to findStep
your_client_idDev Dashboard under Settings5
your_secretDev Dashboard under Settings5
yourstore.myshopify.comAdmin panel of your storePrerequisites

Go to ReqBin or use Postman.
Send a POST request to:

https://yourstore.myshopify.com/admin/oauth/access_token

With the following headers:

Content-Type: application/x-www-form-urlencoded

And the following body:

client_id=your_client_id&
secret=your_secret&
grant_type=client_credentials&
scope=read_assigned_fulfillment_orders,read_checkouts,read_content,read_customers,read_discounts,read_inventory,read_locations,read_merchant_managed_fulfillment_orders,read_orders,read_products

The response will include the Access Token, which you will need to make requests to the Shopify Admin API.

ReqBin interface for sending a POST request to obtain a Shopify Admin API access token. The URL field contains https://owox-support.myshopify.com/admin/oauth/access_token. The Body tab is selected with Form (url-encoded) chosen. The request body includes client_id, client_secret, grant_type, and scope parameters, each separated by an ampersand. Red handwritten annotations instruct the user to paste the URL of their store, ensure ampersands follow every parameter, and paste their own Client ID and Secret. The wider environment is a typical API testing tool interface with a neutral, instructional tone. Text in the image: Please, paste URL of your store. Please ensure that ampersands comes after every parameter. Paste your own Client ID and Secret.

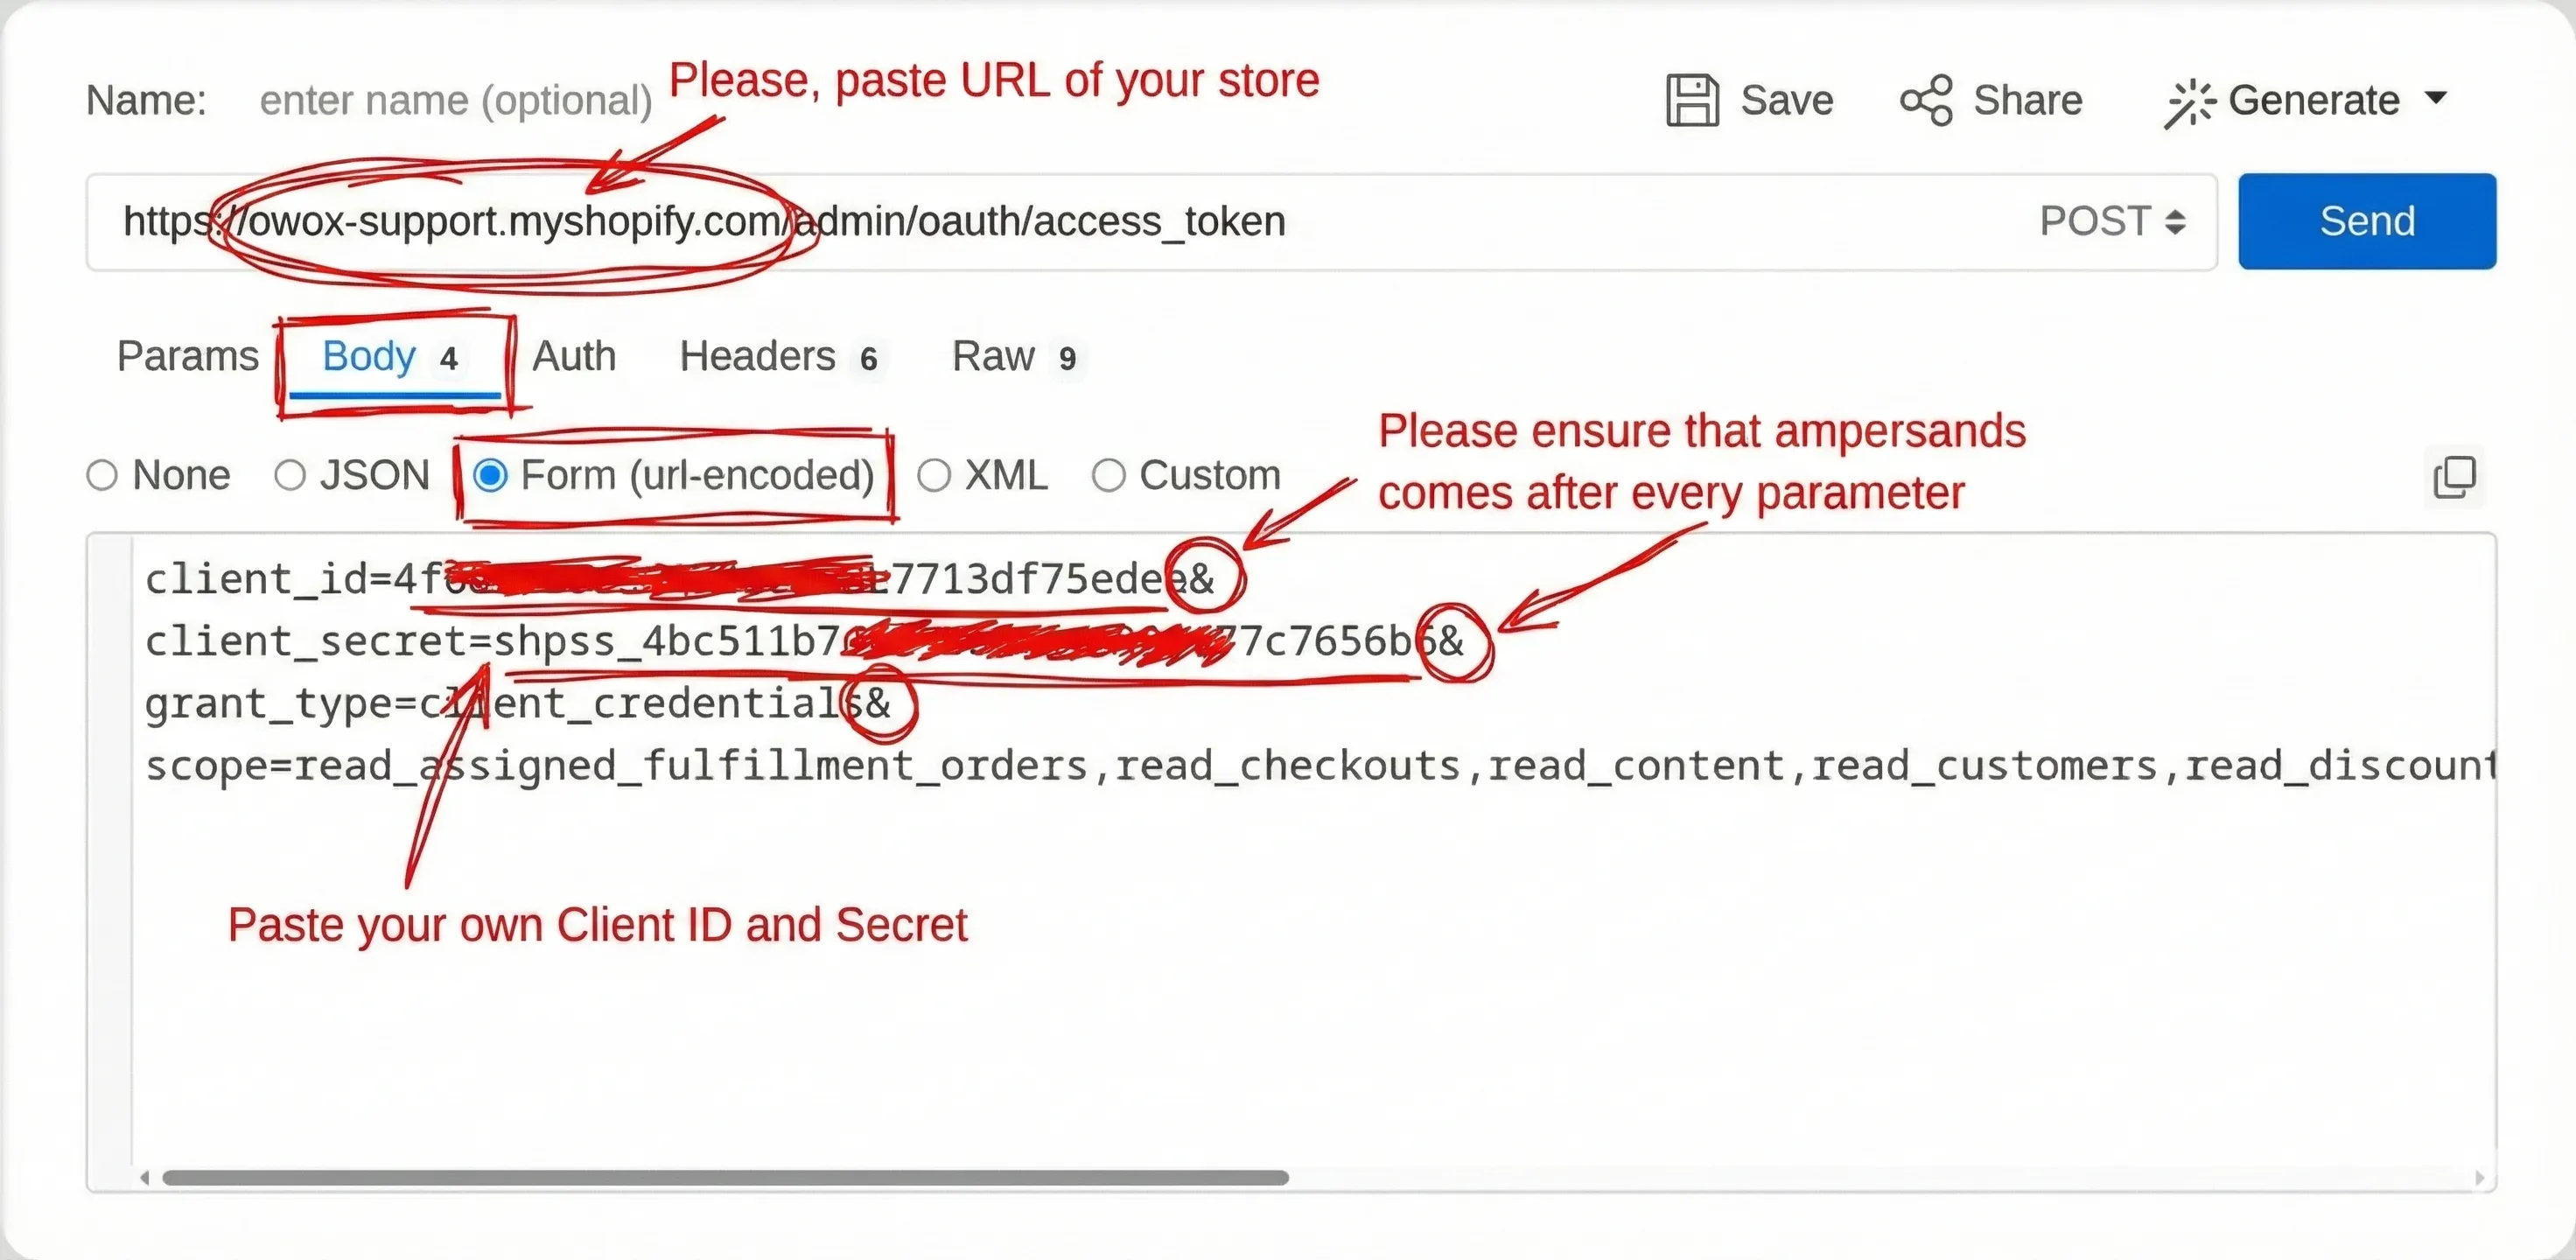
Click the Send button.

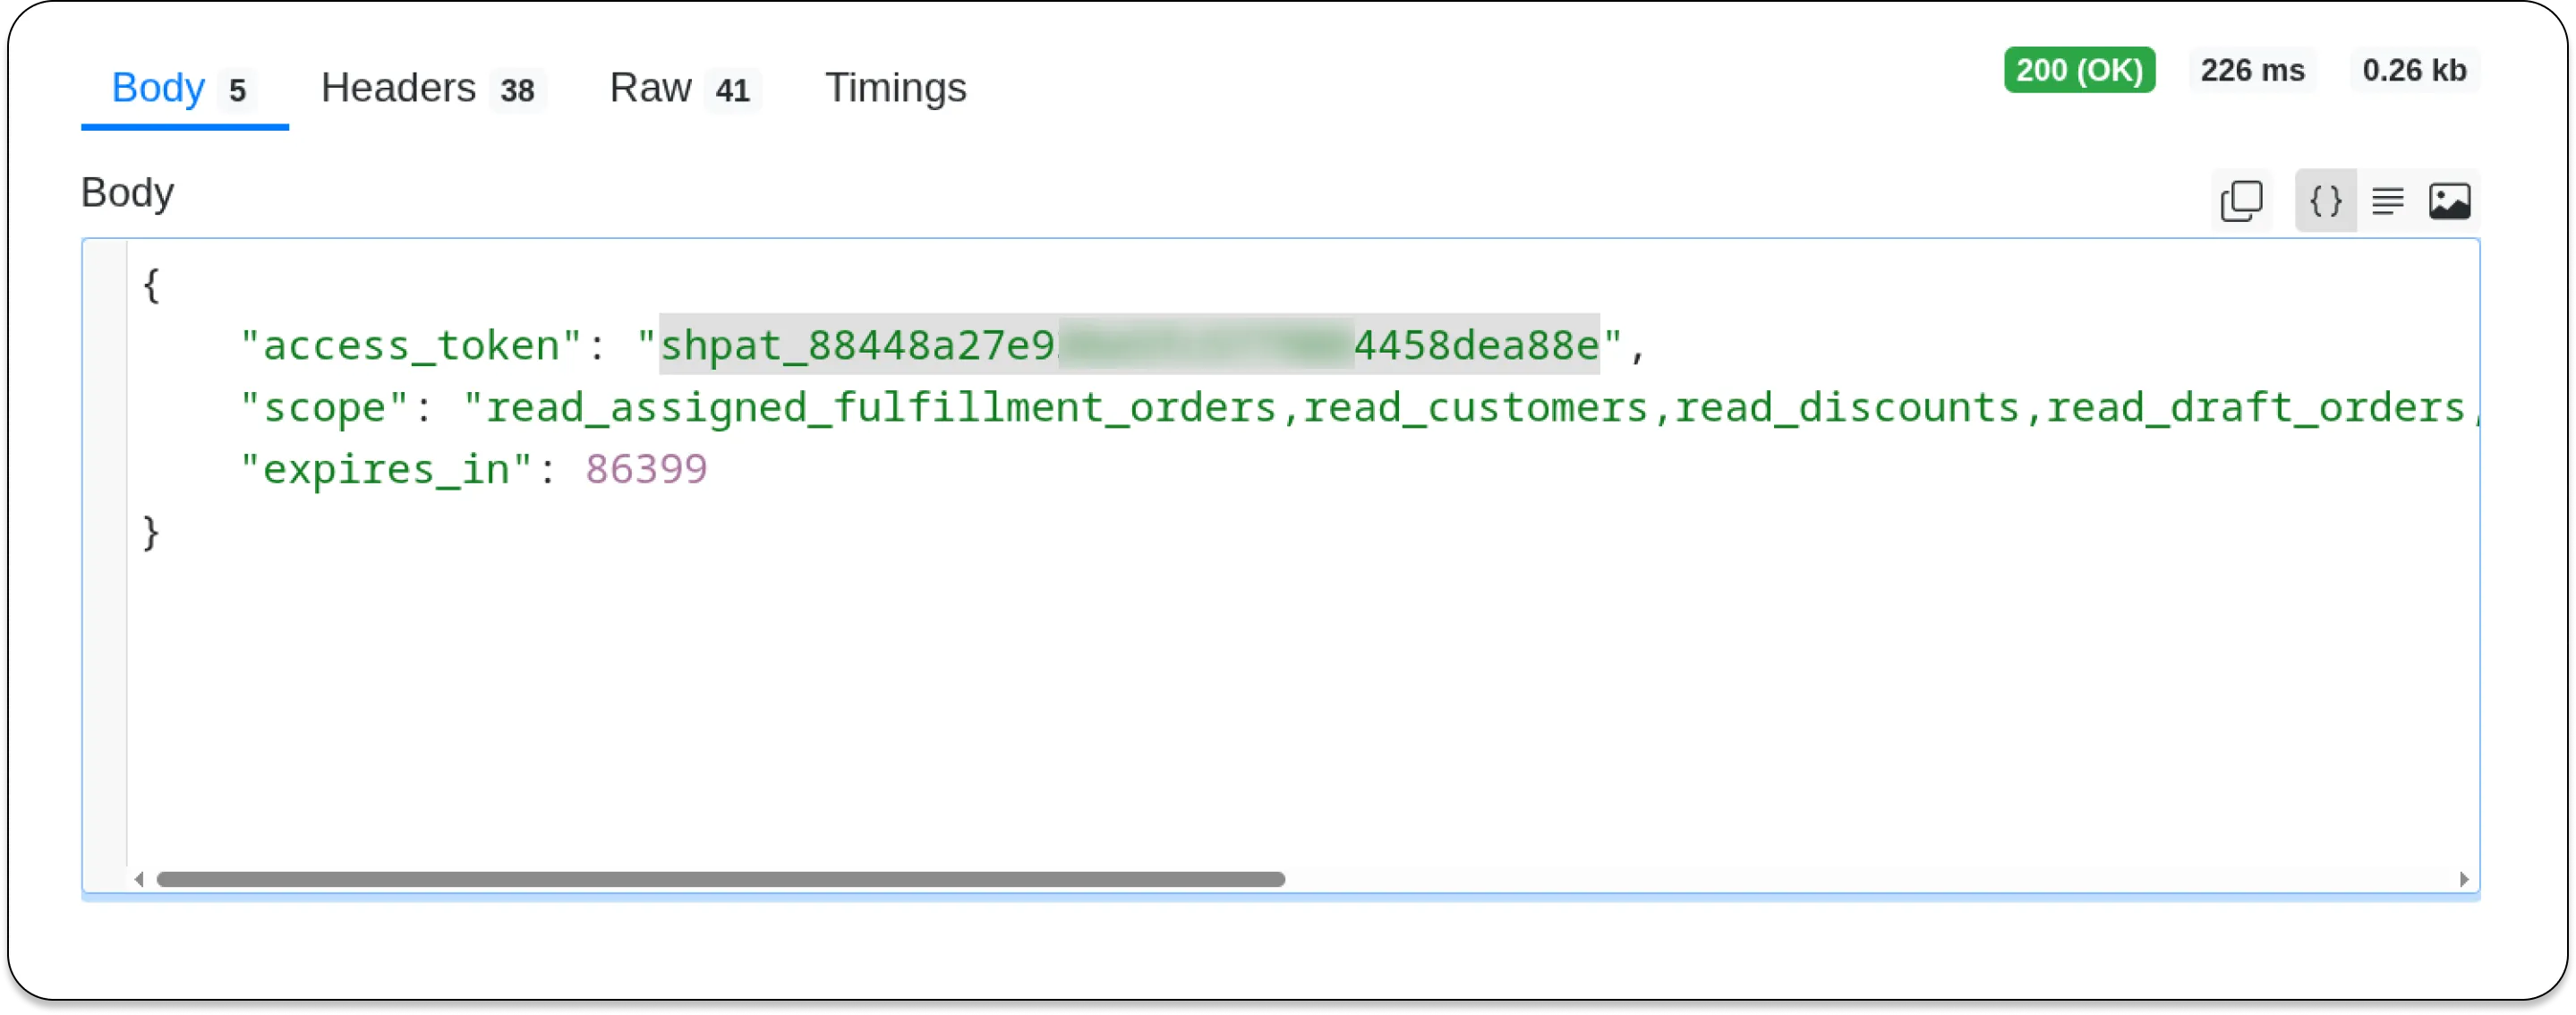
You should receive a response containing your Admin API Access Token. For example, shpat_1234567890.... Save it for later use.

ReqBin response panel showing a successful JSON response with an access_token field containing the token value shpat_... and scope field listing the granted permissions. The HTTP status is 200 OK. The interface has a clean, developer-focused look.

Next step: please follow GETTING_STARTED instructions to create the Data Mart.