How to Import Data from the Shopify Source
Before proceeding, please make sure that:
- You have already created an Admin API Access Token, as described in CREDENTIALS.
- You have run OWOX Data Marts and created at least one storage in the Storages section.
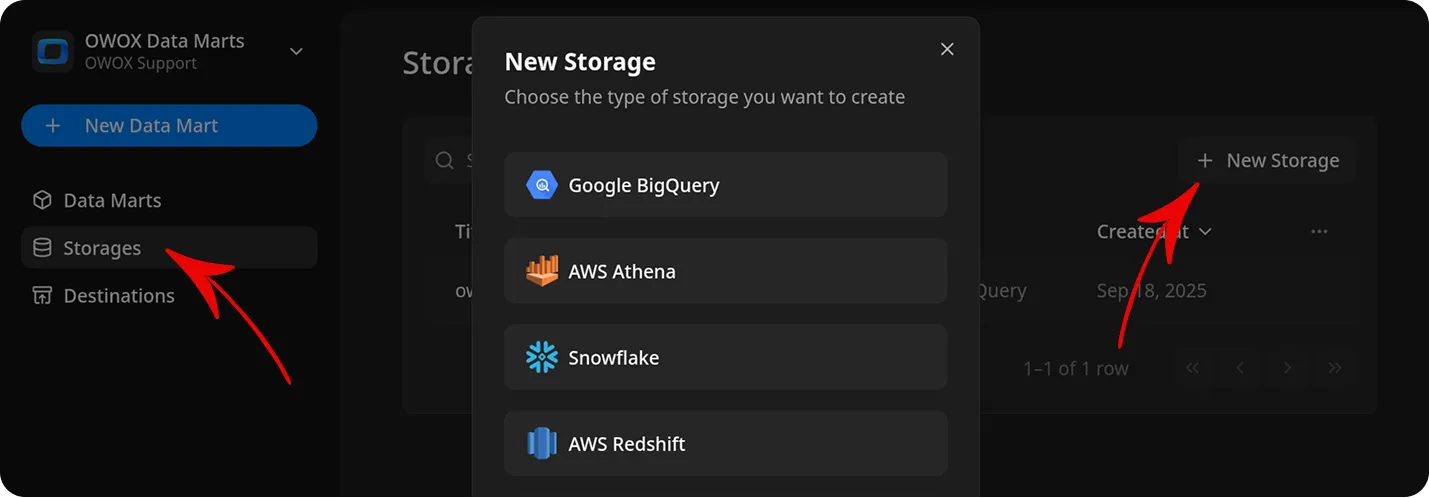
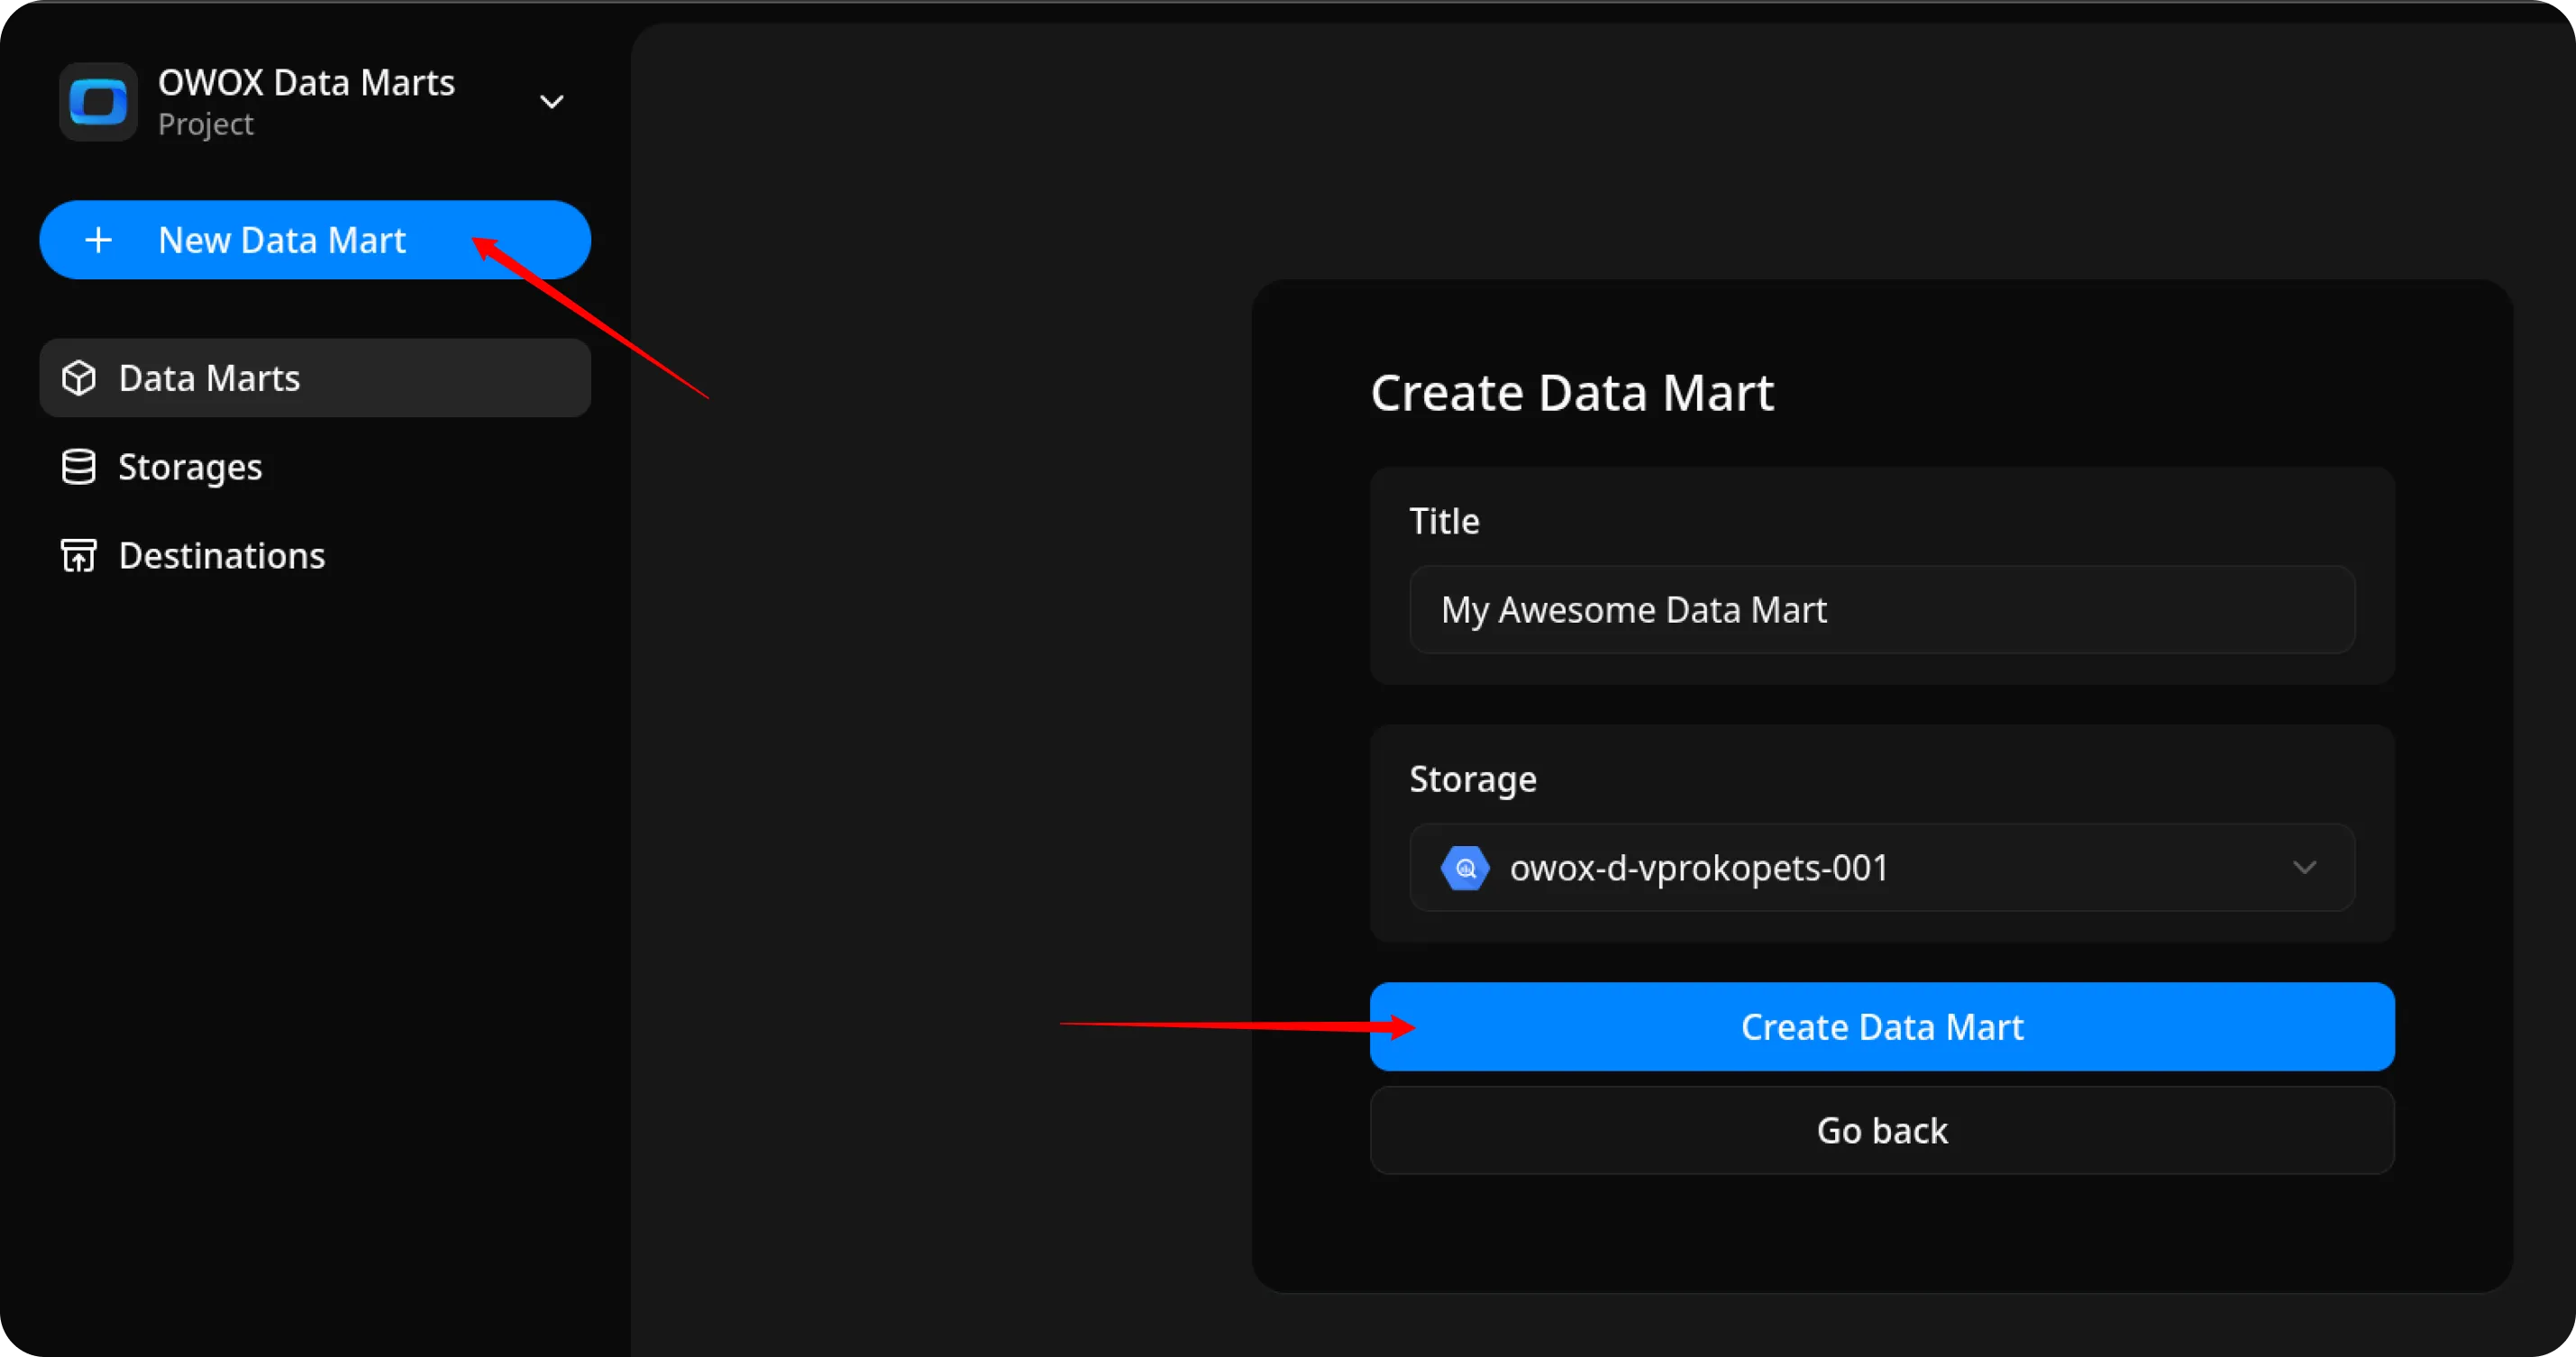
Create the Data Mart
Section titled “Create the Data Mart”- Click New Data Mart.
- Enter a title and select the Storage.
- Click Create Data Mart.
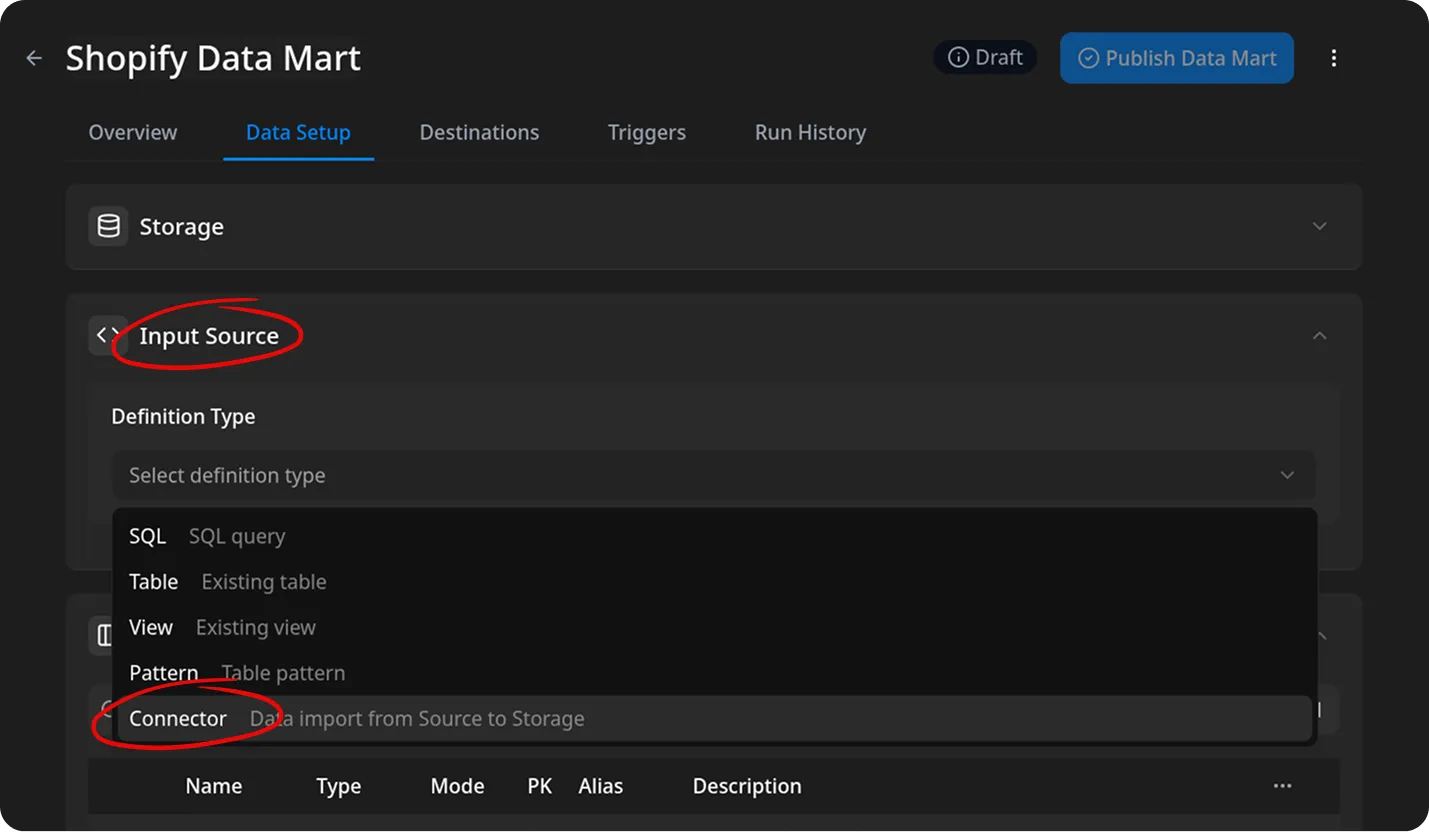
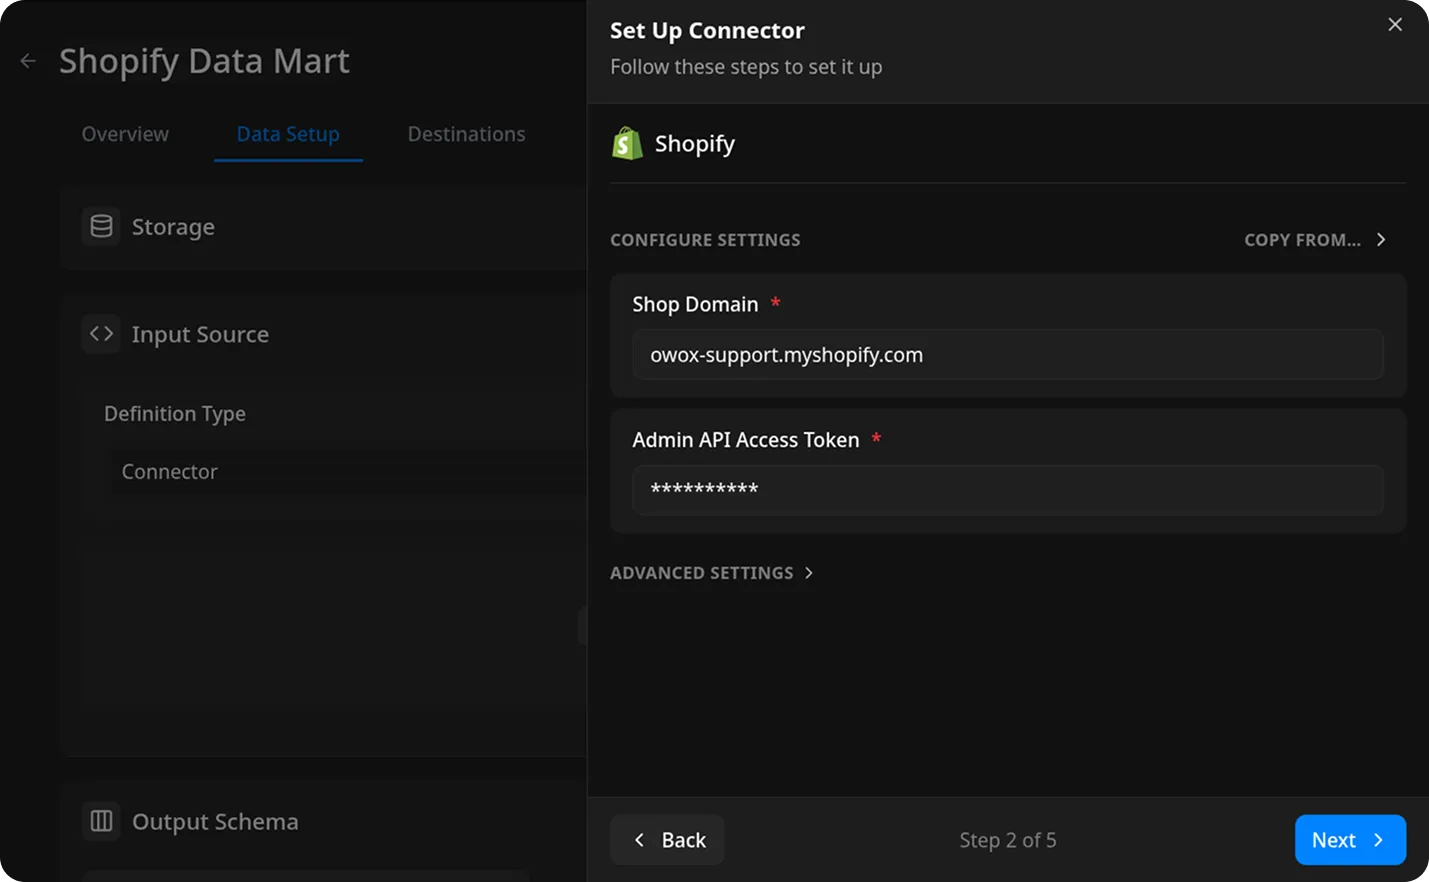
Set Up the Connector
Section titled “Set Up the Connector”- Select Connector as the input source type.
- Сhoose Shopify.
- Fill in the required fields:
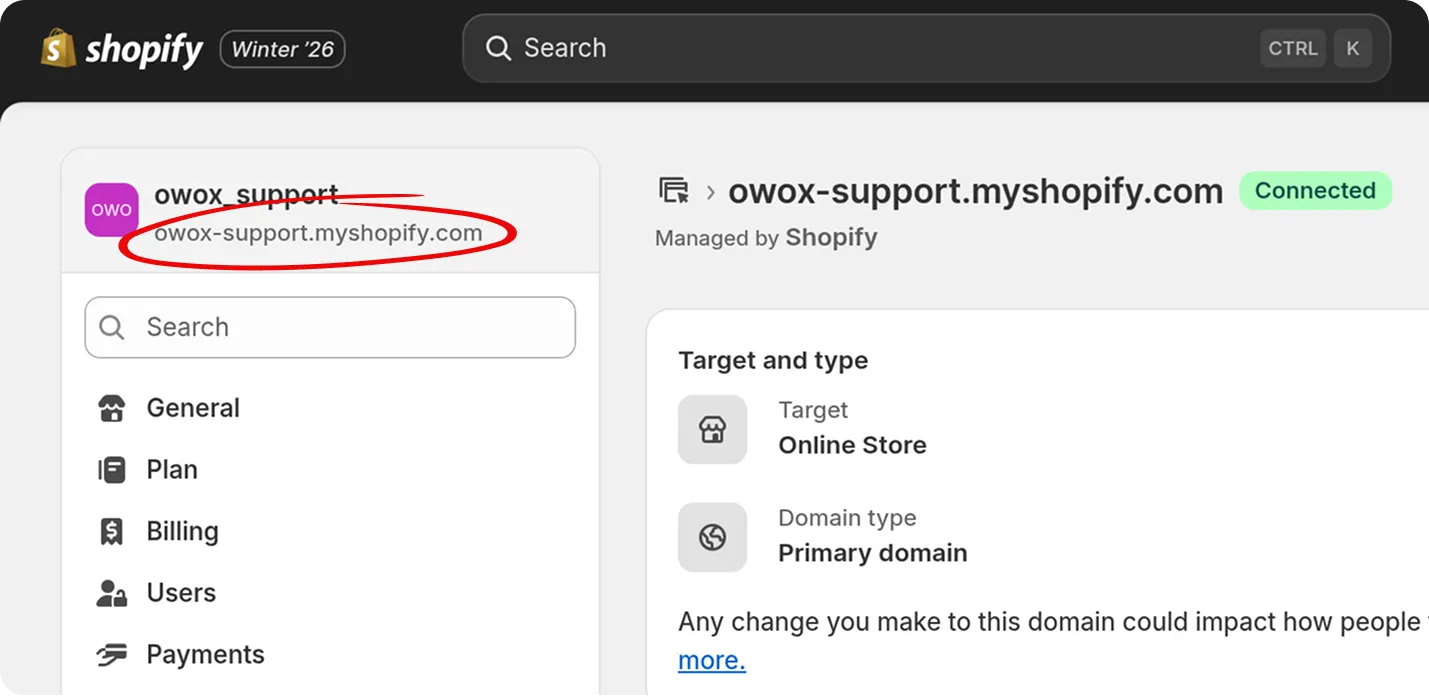
- Admin API Access Token – paste the token you generated during the CREDENTIALS step.
- Shop Domain – you can find it in Shopify Admin page. For example,
owox-support.myshopify.com. - Leave the other fields as default and proceed to the next step.
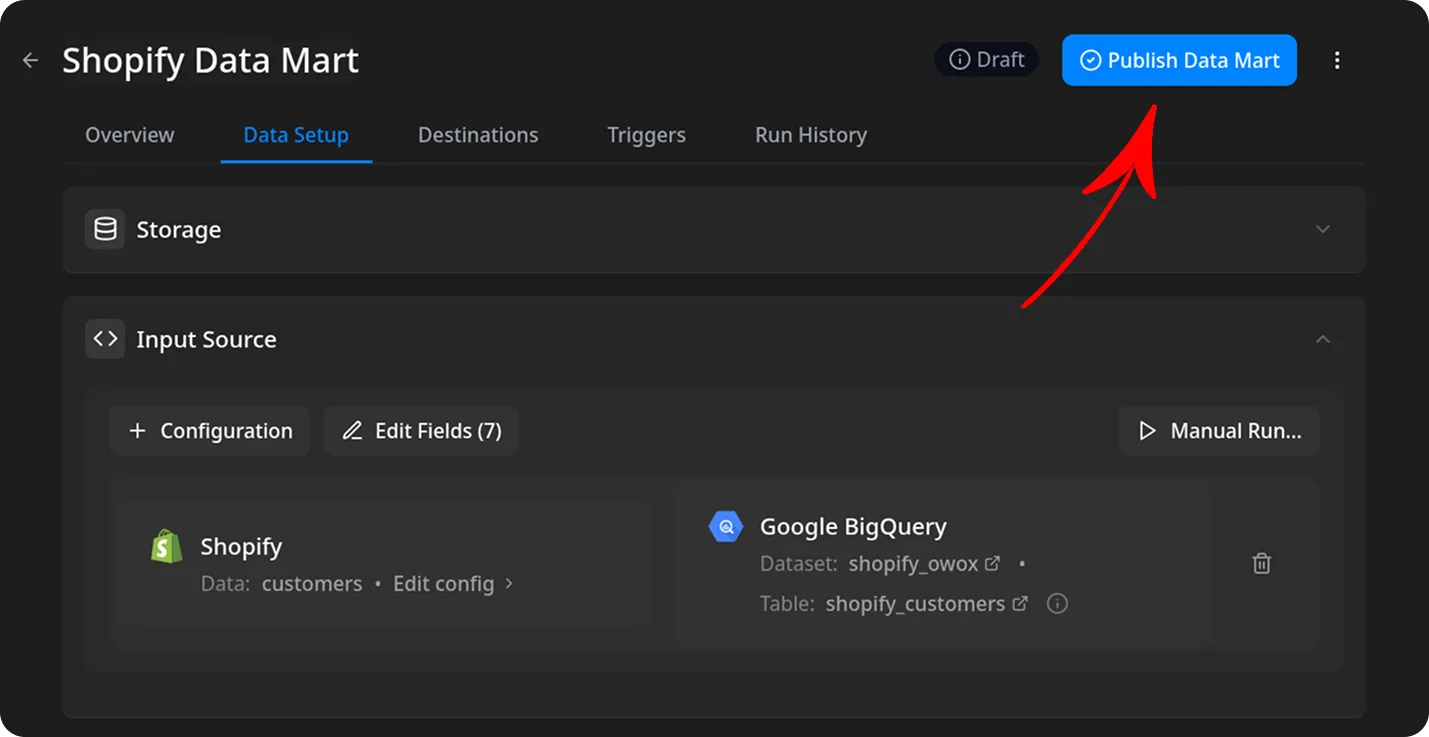
Configure Data Import
Section titled “Configure Data Import”- Choose one of the available endpoints.
- Select the required fields.
- Specify the dataset where the data will be stored, or leave it as default.
- Click Finish, then Publish Data Mart.
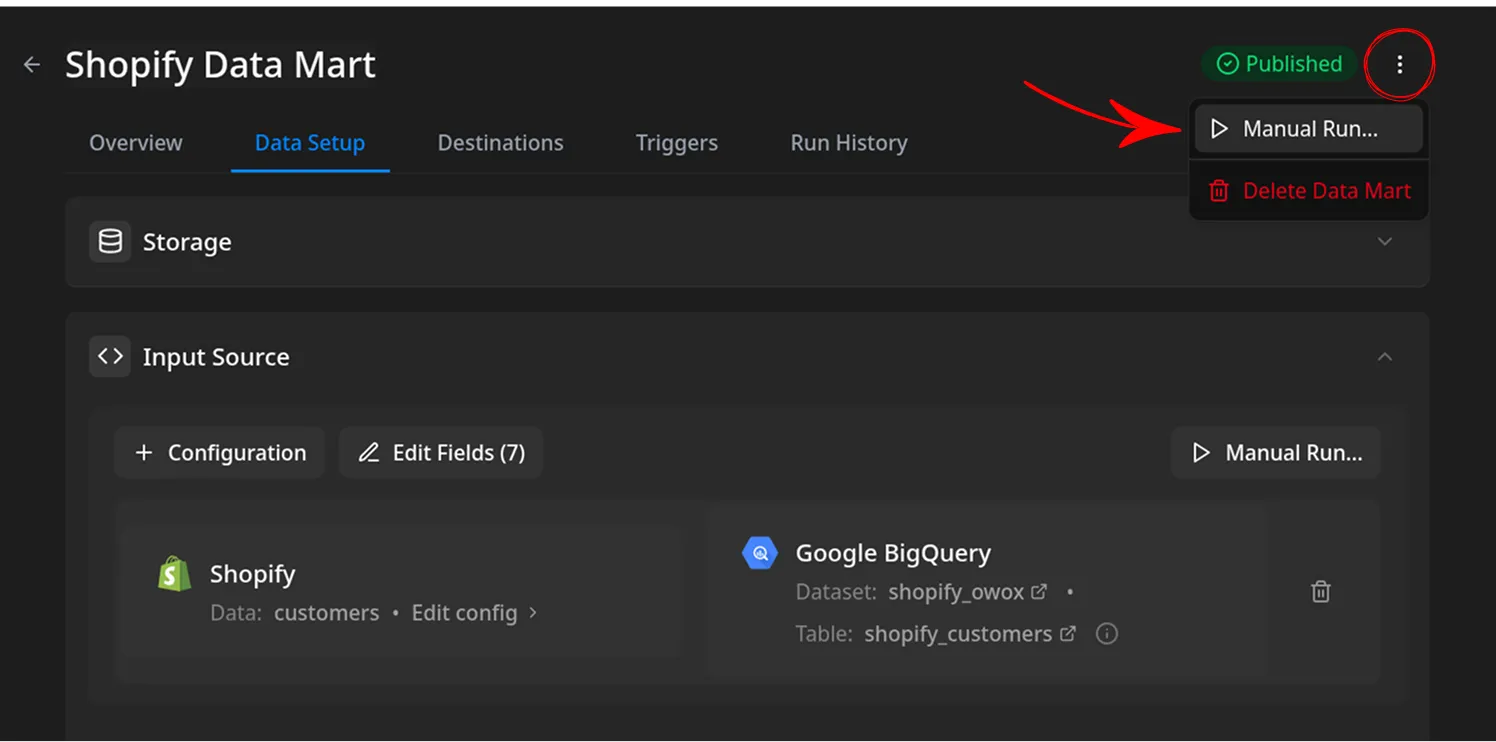
Run the Data Mart
Section titled “Run the Data Mart”Now you have two options for importing data from Shopify:
Option 1: Import Current Day’s Data
Choose Manual run → Incremental load to load data for the current day.
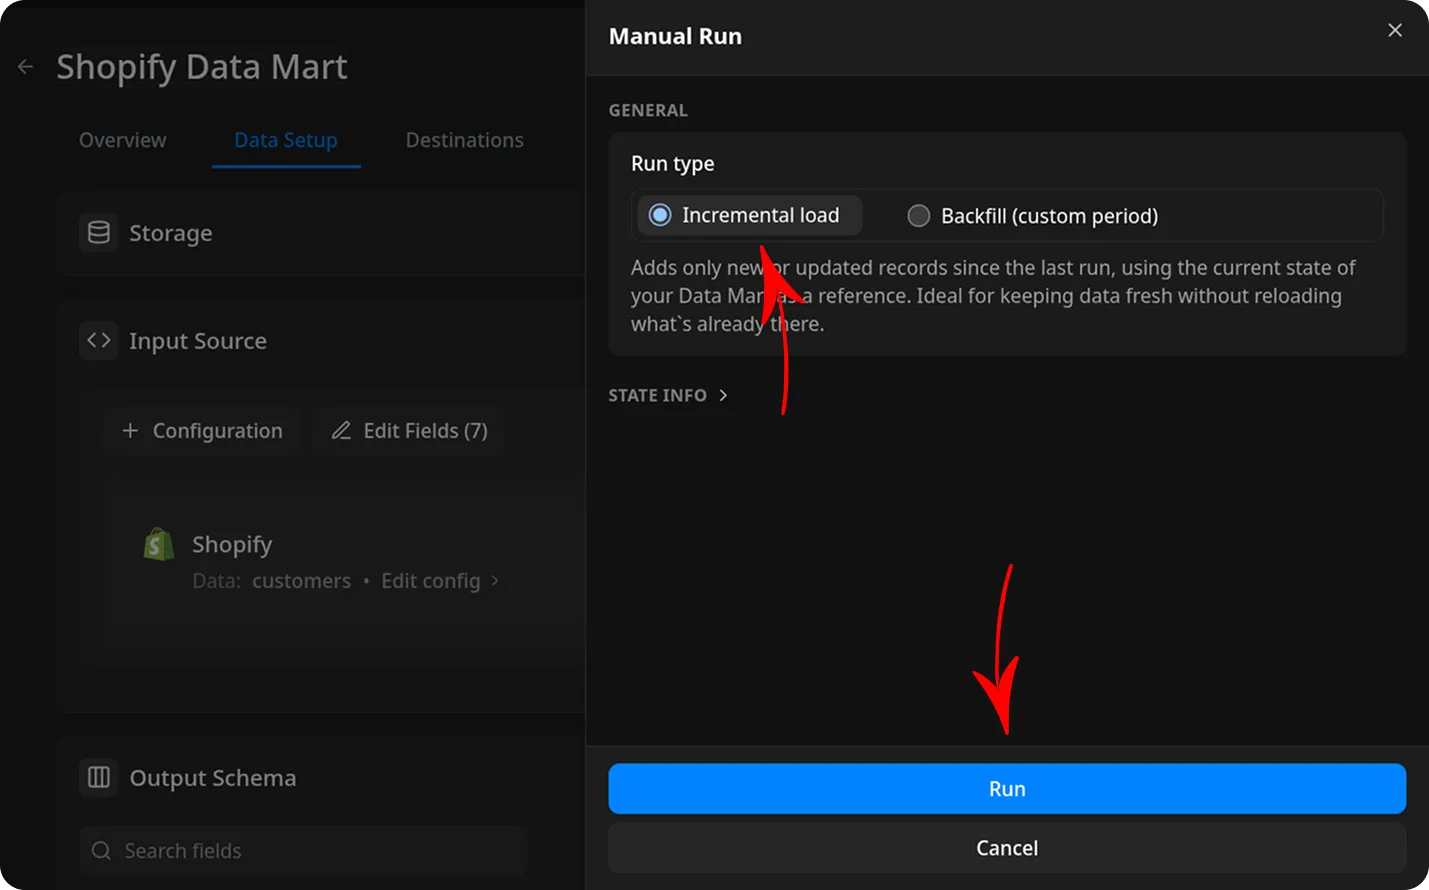
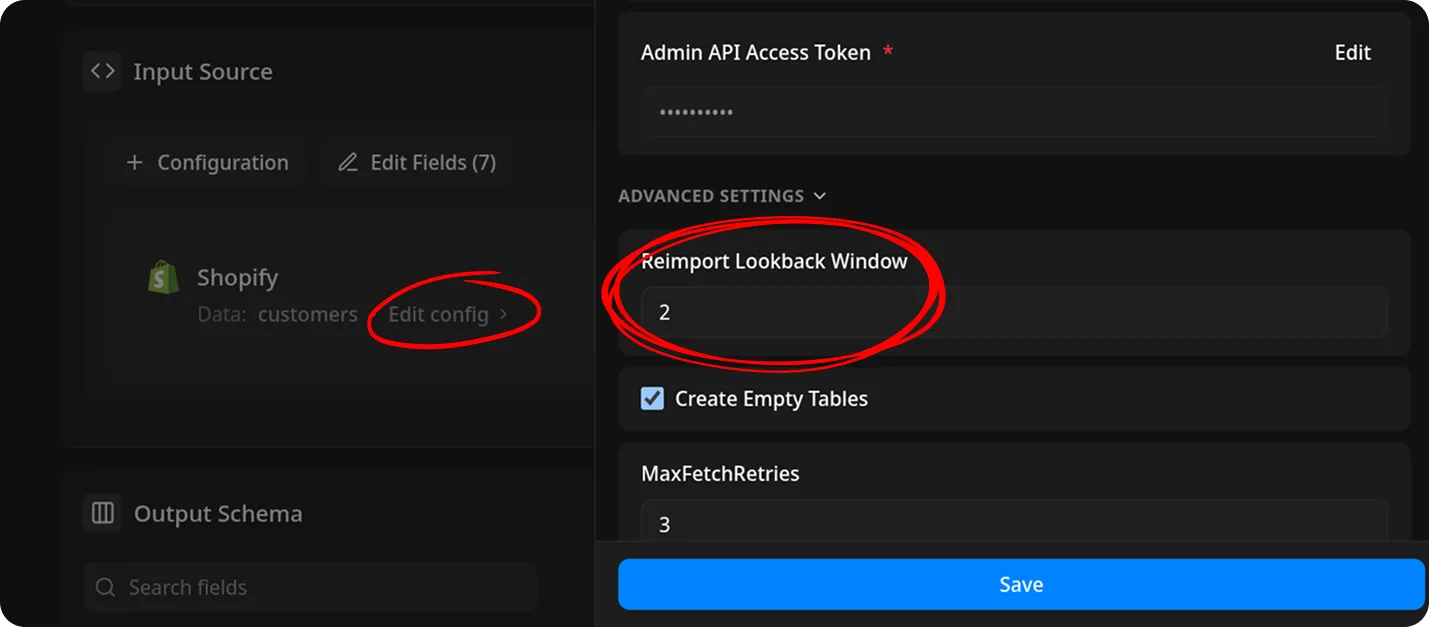
ℹ️ If you click Incremental load again after a successful initial load,
the connector will import: Current day’s data, plus Additional days, based on the value in the Reimport Lookback Window field.
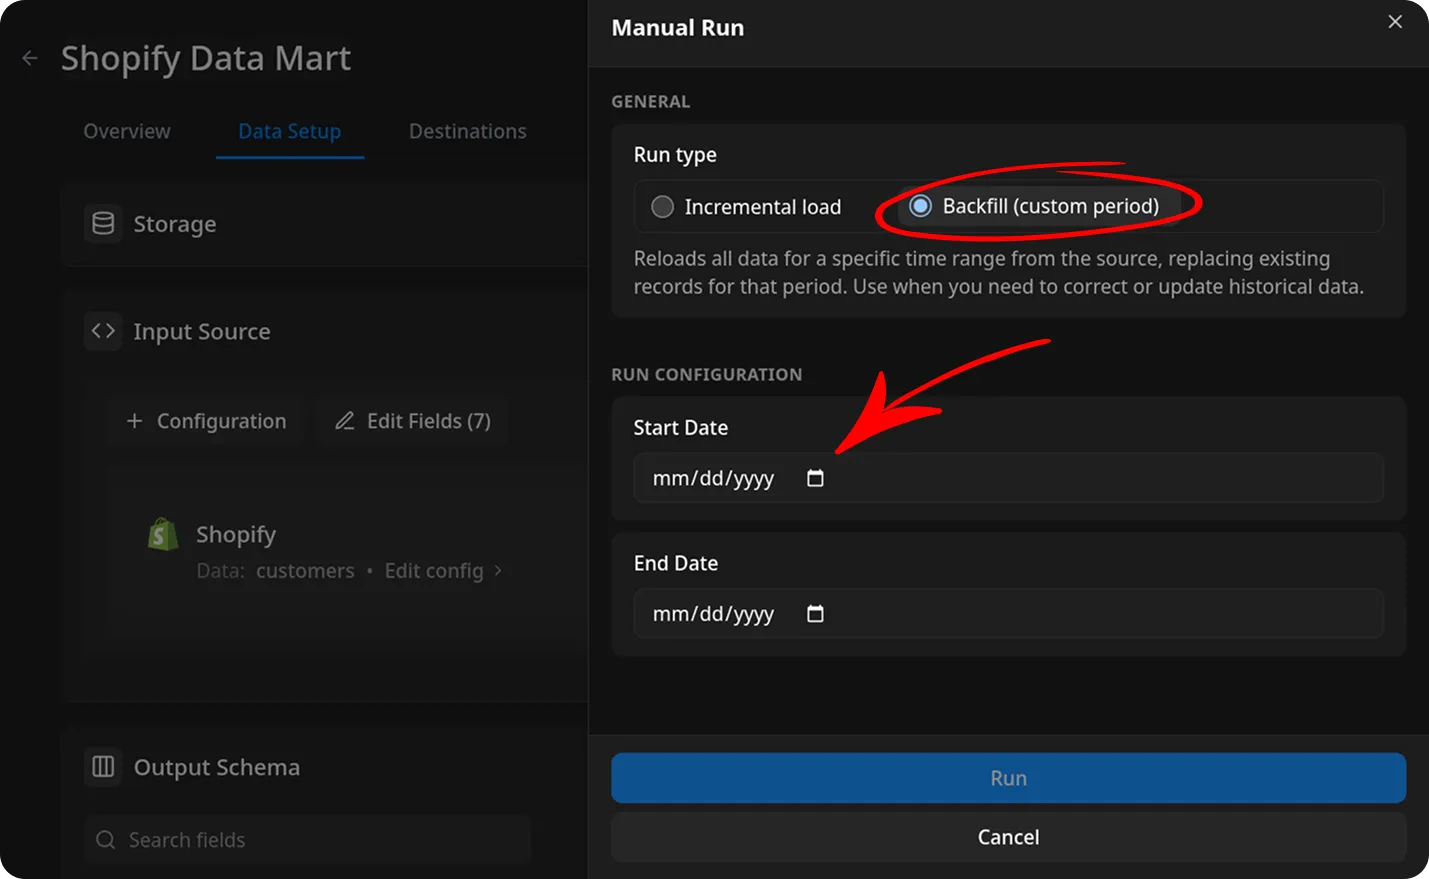
Option 2: Manual Backfill for Specific Date Range
Choose Backfill (custom period) to load historical data for a custom time range.
- Select the Start Date and End Date
- Click the Run button
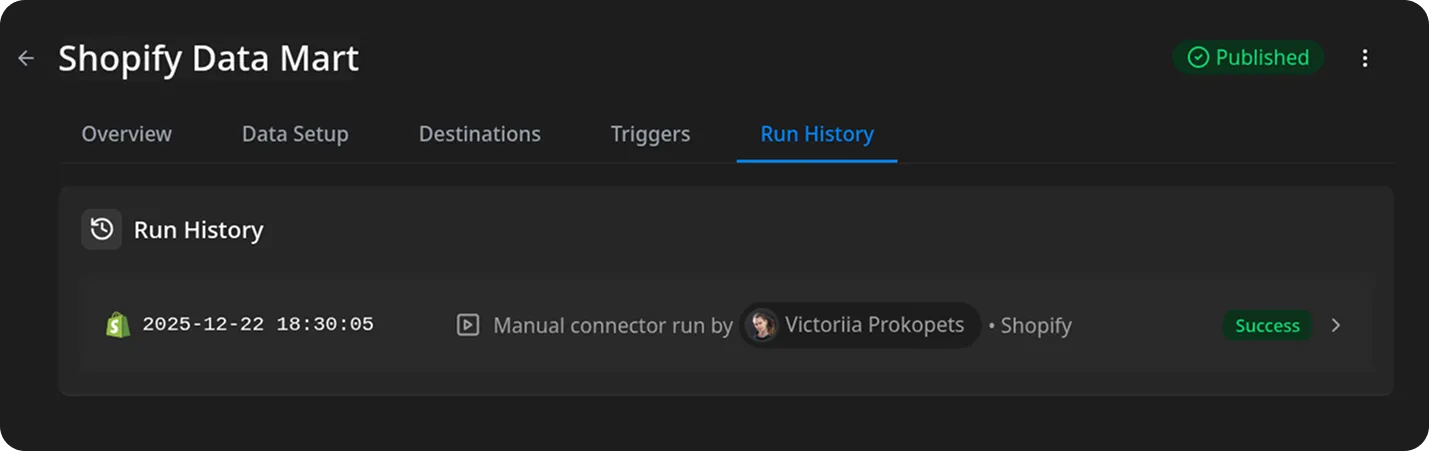
The process is complete when the Run history tab shows the message:
“Success”
Access Your Data
Section titled “Access Your Data”The data will be written to the dataset specified earlier.
If you encounter any issues:
- Check the Run history for specific error messages
- Please visit Q&A first
- If you want to report a bug, please open an issue
- Join the discussion forum to ask questions or propose improvements