SQL-based Data Mart
Use this option when you want to define a Data Mart based on a SQL query written manually — using your existing data warehouse tables, joins, and logic.
Note: You need a data storage available for the data mart setup. Here is how to add a data storage
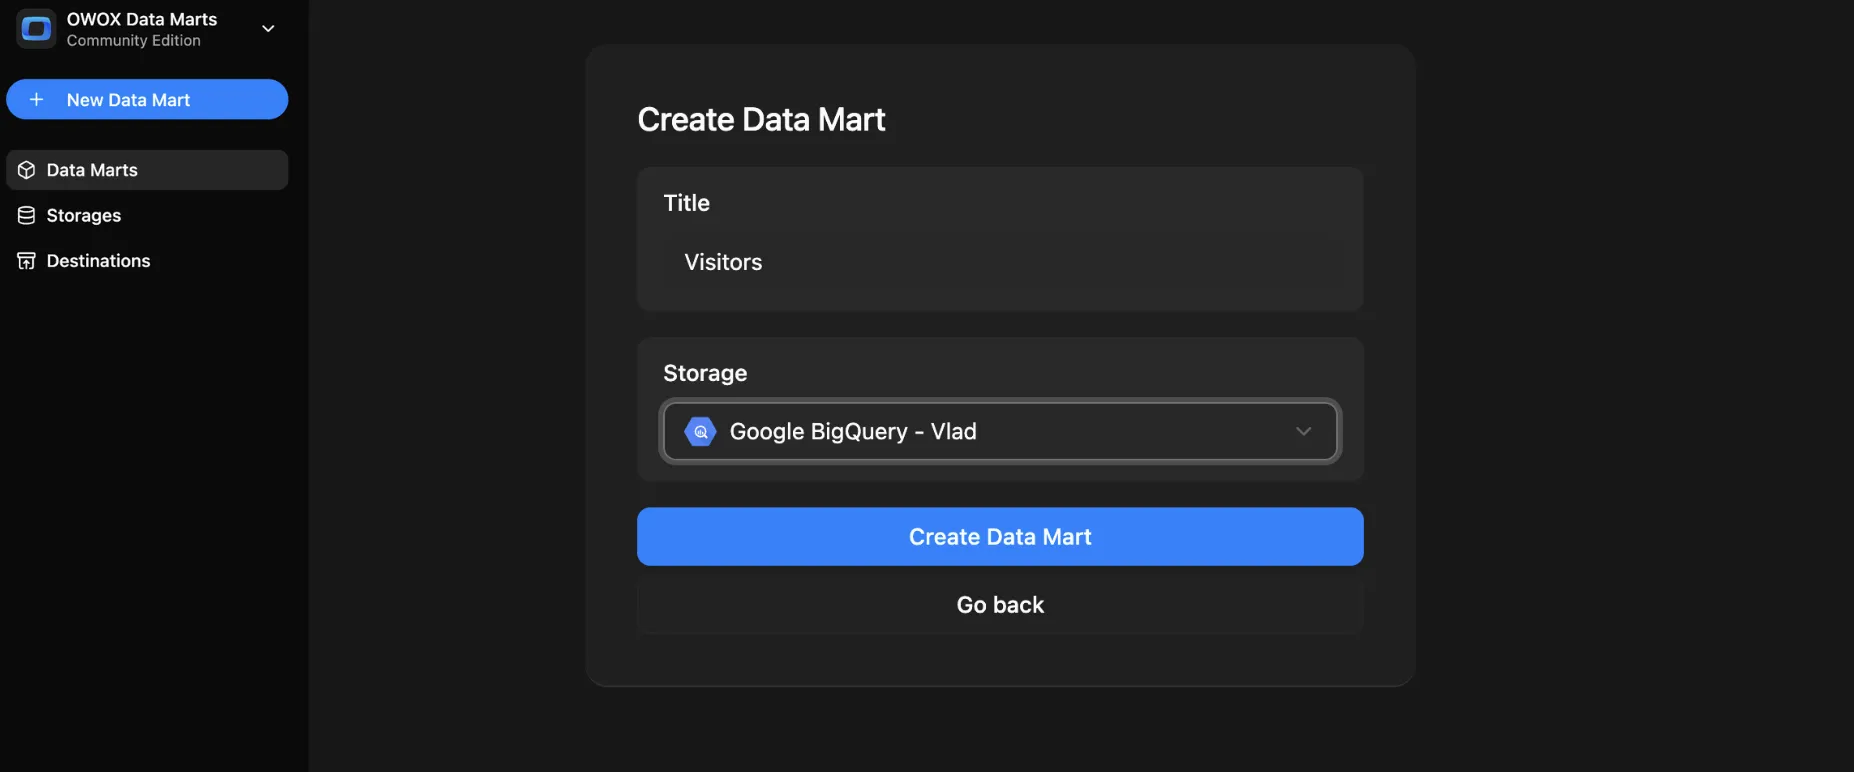
Step 1: Create a New Data Mart
Section titled “Step 1: Create a New Data Mart”- Click + New Data Mart
- Give it a descriptive title (e.g.,
Visitors) - Select your Data Storage (Google BigQuery or AWS Athena)
- Click Create Data Mart
Step 2: Choose Definition Type – SQL
Section titled “Step 2: Choose Definition Type – SQL”In the Input Source section, set the Definition Type to SQL Query.
You’ll now see a SQL editor where you can write or paste your query.
Write a new query or paste an existing one.
Wait until it’s validated, then click Save (and Publish Data Mart).
✅ Tip: Keep your query focused on one specific business question. This helps with reusability and semantic clarity.
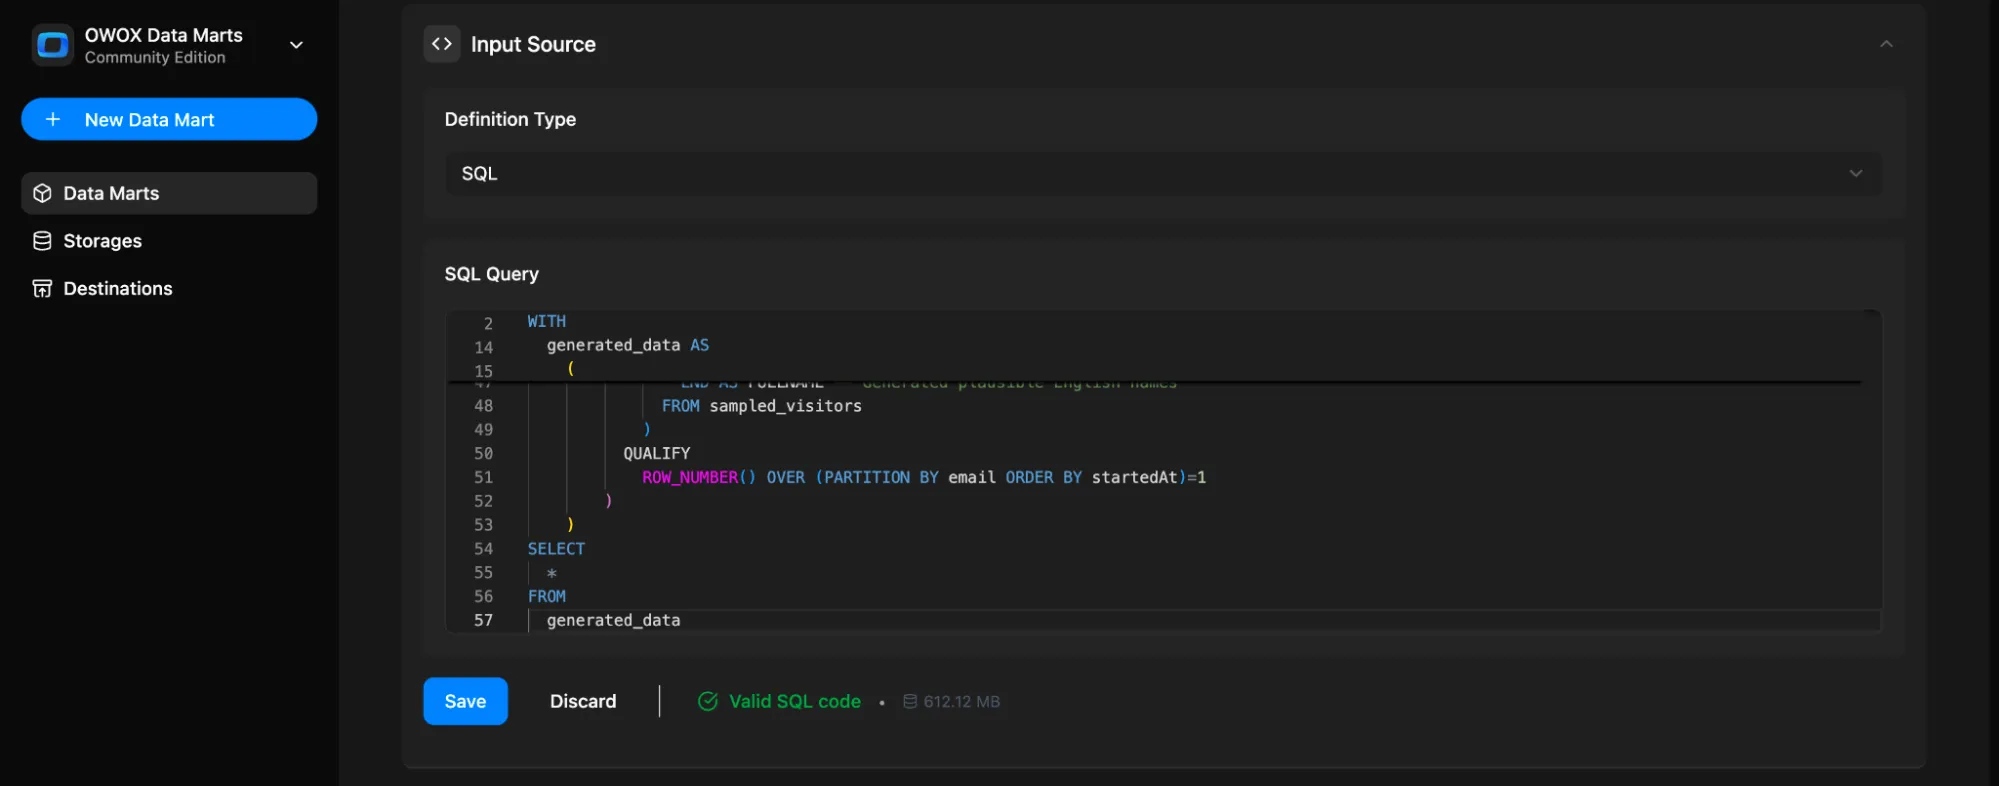
You can reference any table or view available in your storage.
Step 3: Define Output Schema
Section titled “Step 3: Define Output Schema”Once the query is saved, the Output Schema will be generated automatically. OWOX will attempt to auto-detect:
- Column names
- Data types
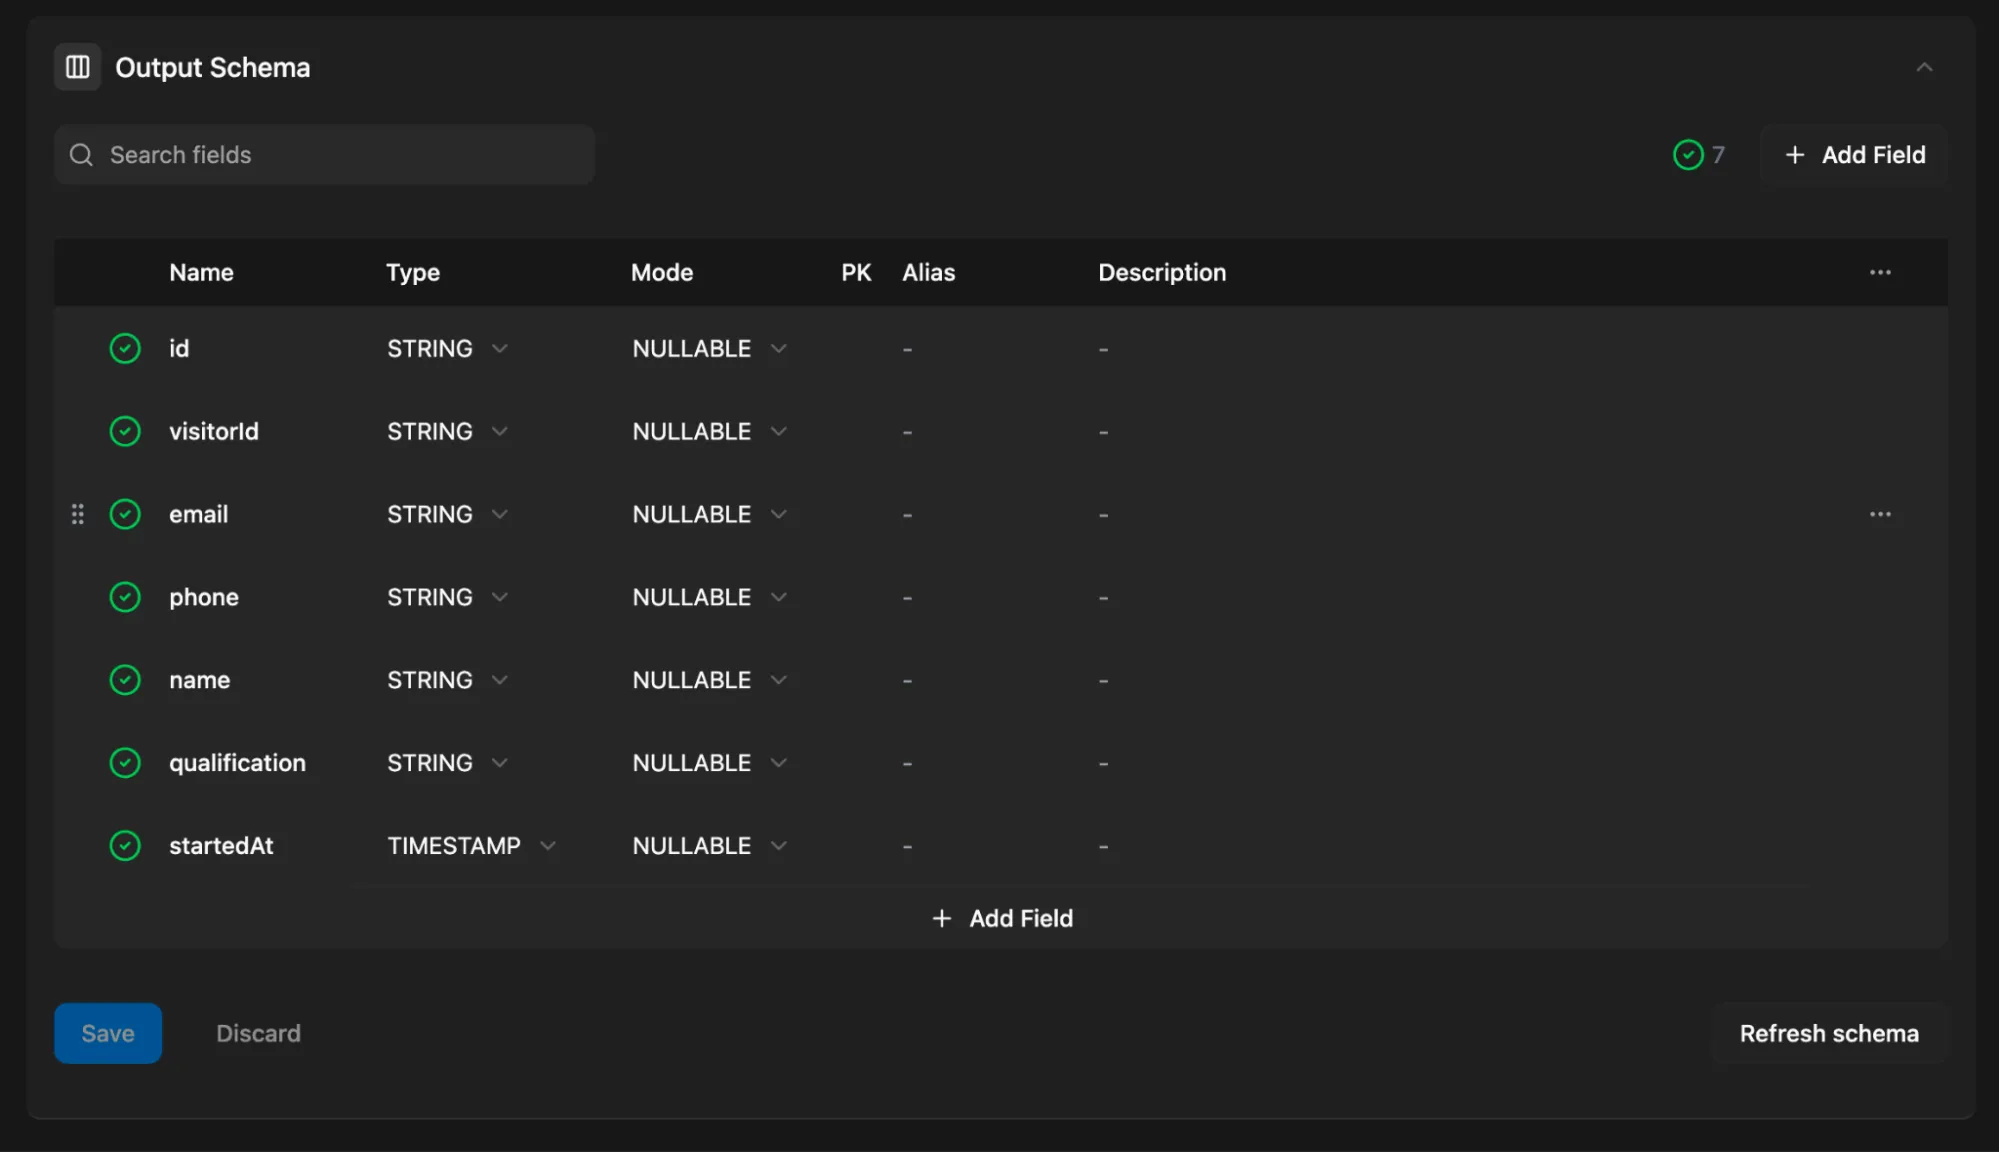
You can:
- Mark primary keys
- Add aliases (business-friendly column names)
- Add descriptions for each field
💡 These descriptions improve usability when the data is reused in BI tools or shared with business users.
Step 4: Add a Description (Optional but Recommended)
Section titled “Step 4: Add a Description (Optional but Recommended)”Use the Overview tab to describe:
- What the Data Mart is about
- What business question it answers
- Any context that might help other users

Step 5: Add Reports
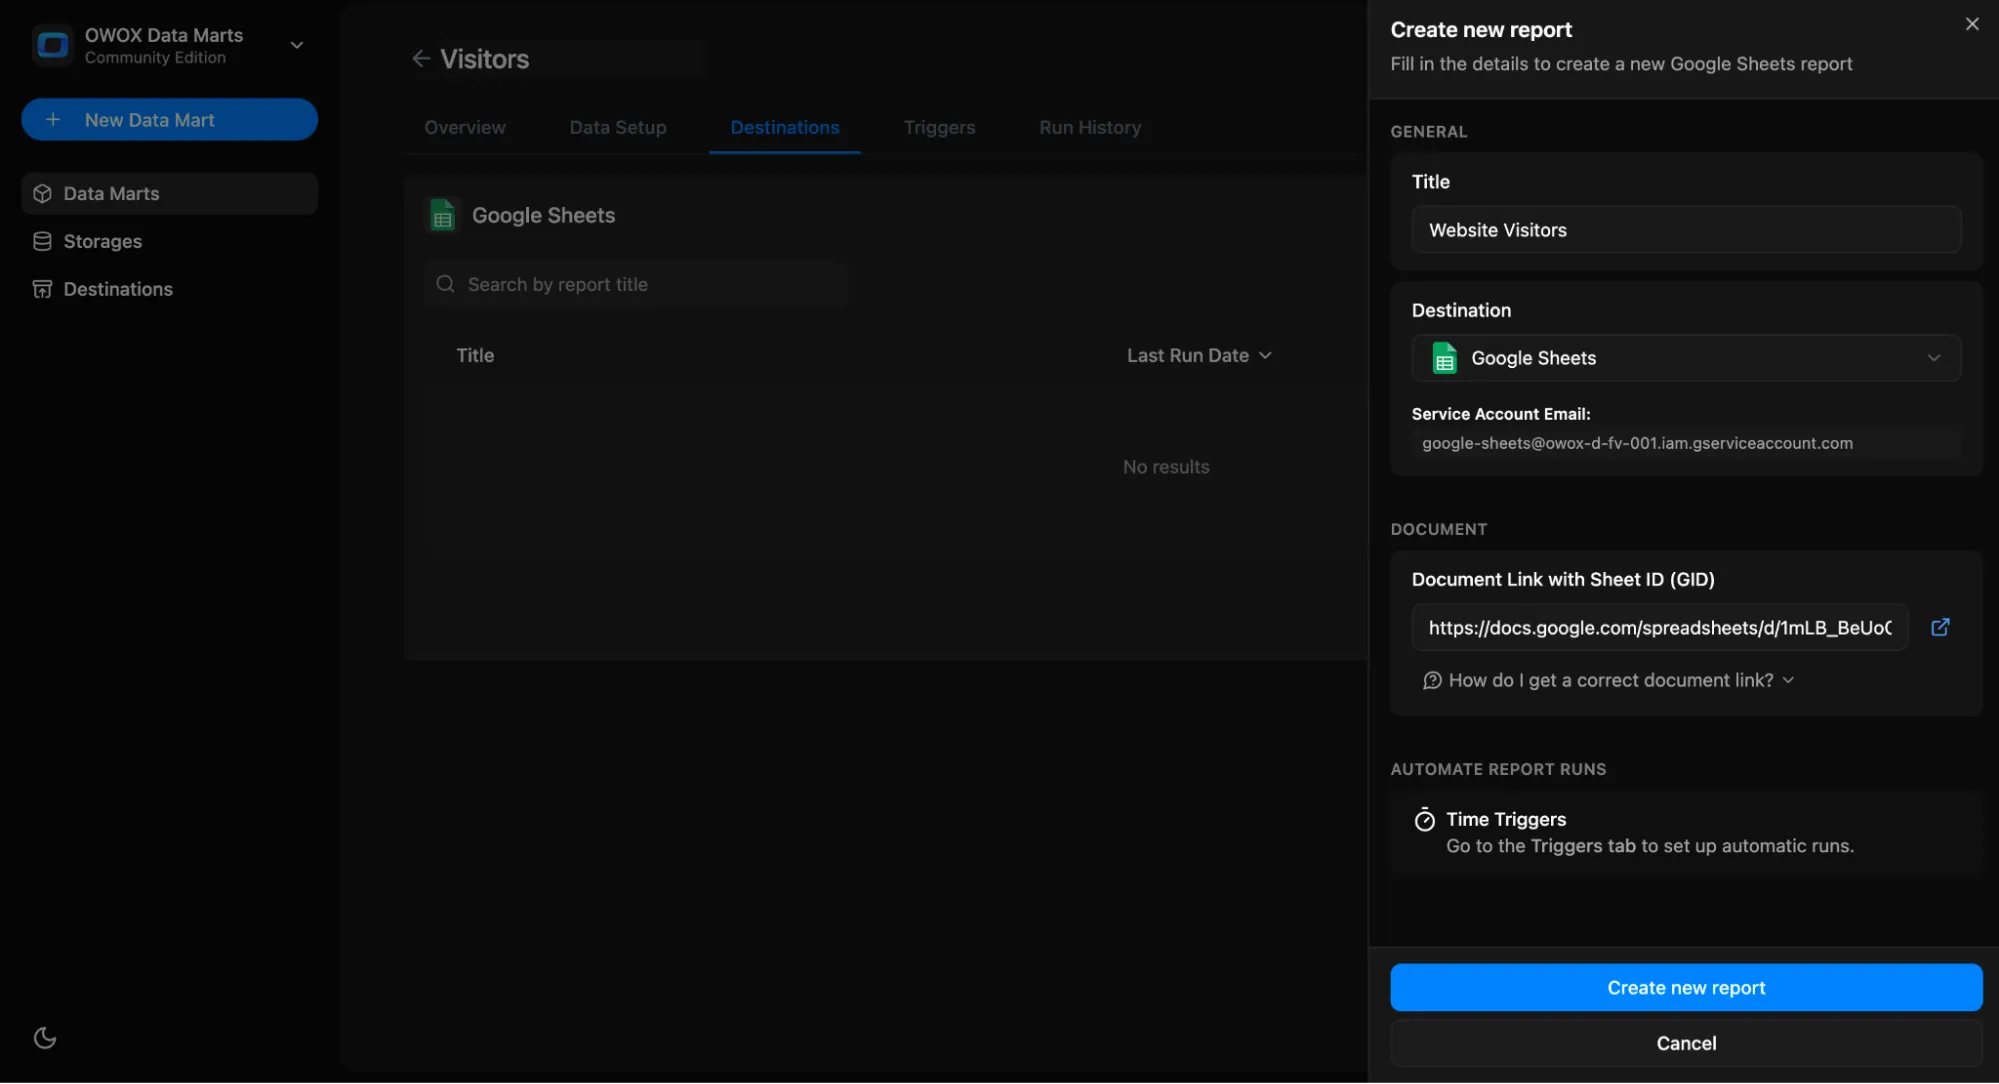
Section titled “Step 5: Add Reports”Under the Destinations section, click + Add report.
- Give your report a name, e.g.
Website Visitors - Select a destination
- Create a new Google Sheets document (or use an existing one)
- Share the document (with Edit permissions) with your Google Sheets Service Account
- Add the link to your document (to a tab in the doc)
- Click Create new report
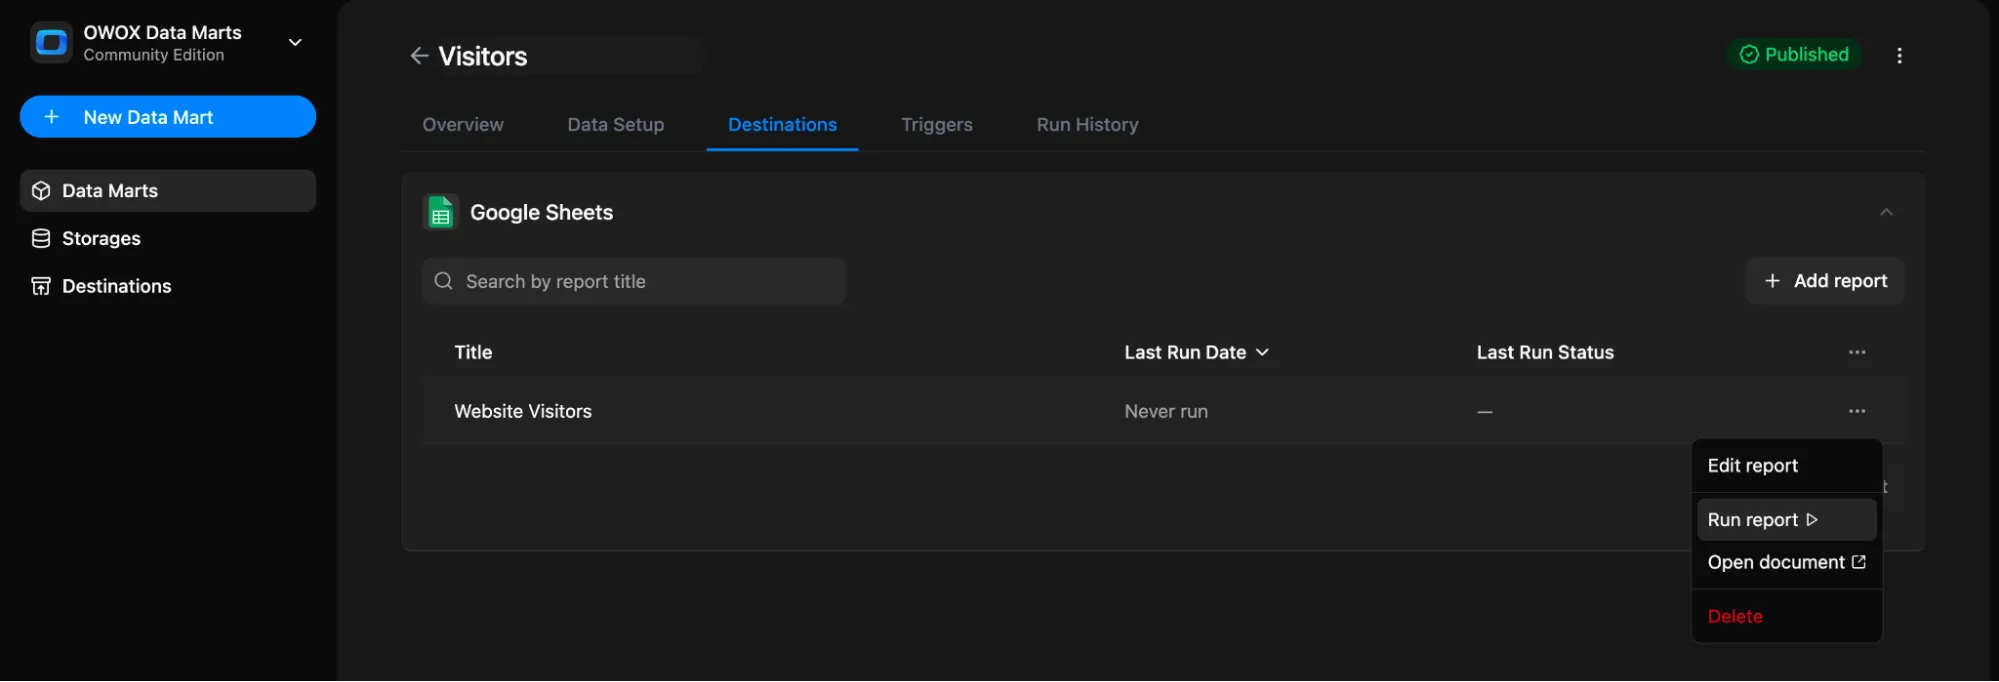
You can now:
- Run the report
- Edit the report
- Open the document
- Delete the report
Step 6: Set Triggers
Section titled “Step 6: Set Triggers”You can automate the query by setting a Trigger to refresh the data on a schedule.
- Go to the Triggers tab → Click + Add Trigger
- Choose Trigger Type:
Report Run - Set schedule:
- Daily → choose time & timezone
- Weekly → select days of the week, time & timezone
- Monthly → select dates, time & timezone
- Interval → e.g., every 15 minutes
- Click Create trigger